
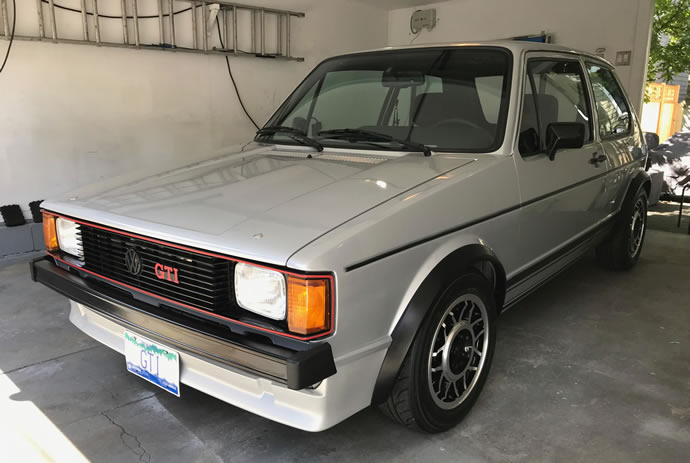
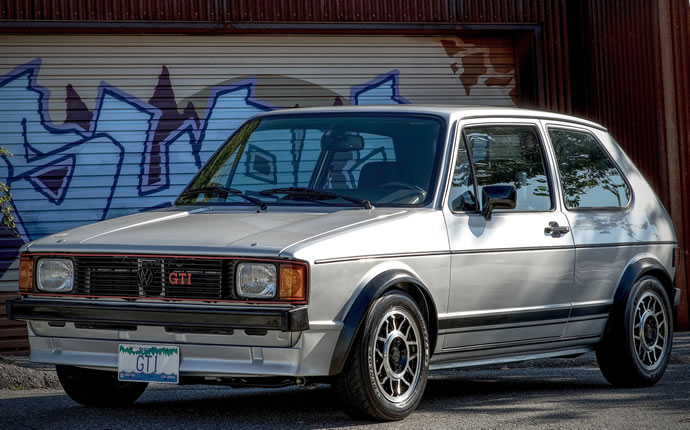
Project Ultimate 83 GTI
Final Street Trim Conversion
The timeline story of the conversion work to bring the GTI back to street/daily driver specs
The long road home
Right from the beginning of this project I had always intended to put some track time on the car to help wring out its full performance potential. Yes, extensive track time put stresses on the car and uncovered many small and large issues with the various systems, but it all served to harden up the design and make it much more reliable. And most importantly it showed that a 40 year old Mk1 GTI design, with the help from some tweaks here and there, could produce a car that not only exceeds the performance envelope of a Mk7 GTI or R spec golf, but also exceeds that of a Porsche 718 Cayman S. That is truly incredible stuff, confirming the initial project thesis that yester-year concepts of "small", "light", "simple", and "manual" (no power steering, no ABS, no stability control, etc.) could indeed produce a car of modern world class performance potential.
Kees Nierop, a former Porsche factory race driver, after experiencing the car on the track, said my GTI had strong brakes, excellent turn-in and neutral cornering manners, and a great engine that pulls strongly out of the corners and down the straights. He said the short wheelbase makes the car feel more nervous in the S curves than a modern car, but he feels the GTI offers an overall more immediate, real immersive driving experience, making it much more of a drivers car.
After Kees completed his track testing of the GTI, it was time to get this project properly completed, putting it fully back into a street car form, complete with its original interior and a more suitable street performance suspension and brake setup - performance oriented but liveable as a daily driver, complete with electrical AC and a great audio system and a long 5th gear for comfortable highway cruising speeds.
Street Trim Specs
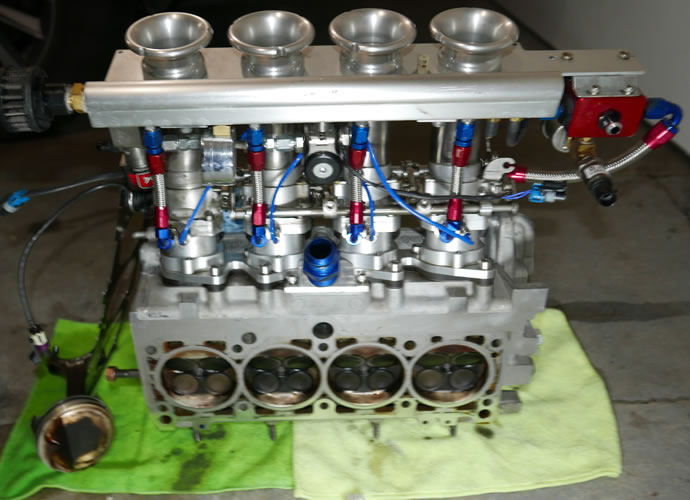
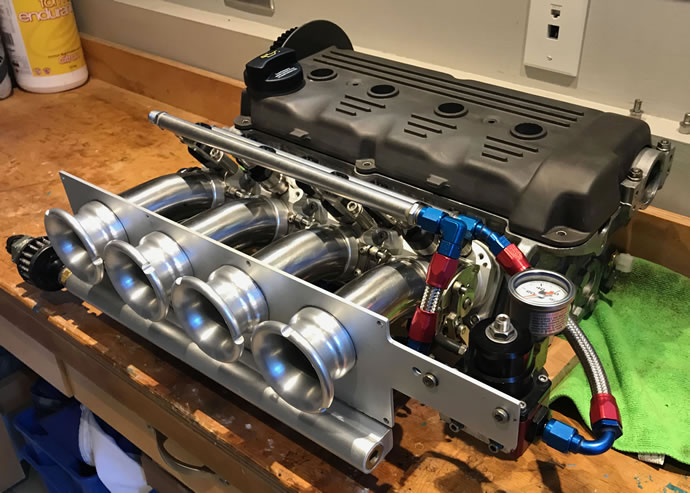
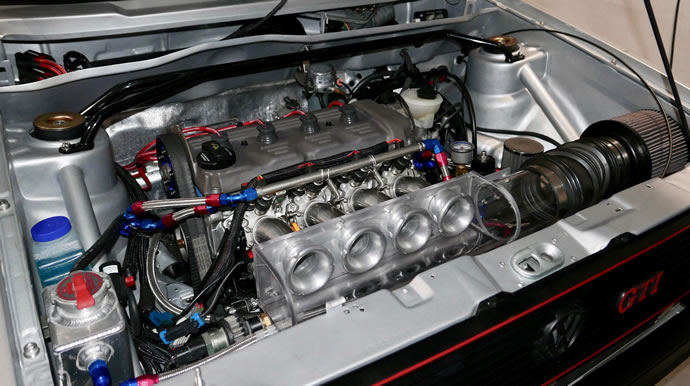
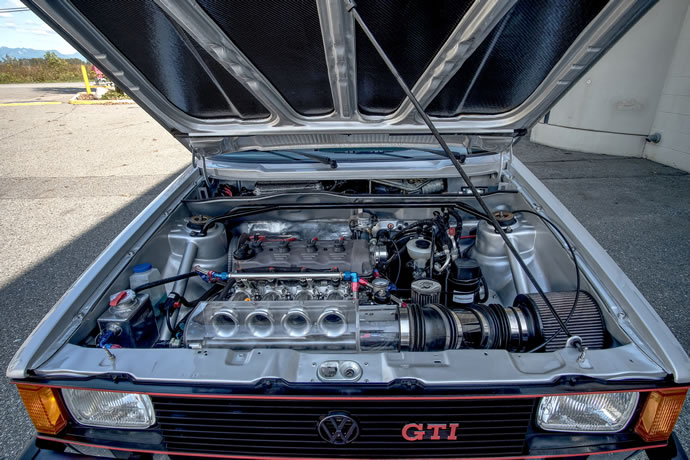
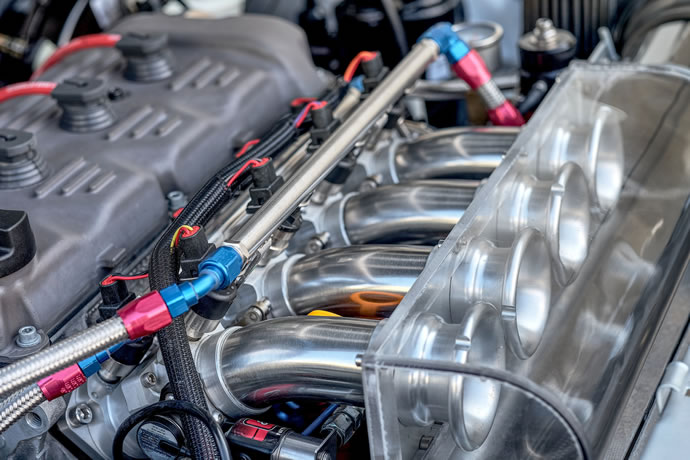
The engine with its 11.5:1 compression ratio, 288 solid lifter race cams, racing independent intake system, and racing headers proved itself already as a perfect street/race engine setup with a smooth 1000rpm idle, easy cold or warm starts, gentle initial throttle response below 3500rpm, and lots of low end pulling torque from its long 95.5mm stroker crank and 2092cc displacement. Above 4000rpm the engine takes on a full-race engine personality with an extremely aggressive pull past 7500rpm, holding its 240hp peak horsepower to 8300+rpm. The engine is so strong in this 1900lbs FWD car that keeping your foot in it all the way thru 2nd gear and 3rd gear requires nerves of steel and a steady hand on the wheel as the car tries to follow road irregularities into other lanes or the nearest ditch. Engaging the nitrous system is only possible in 3rd or 4th gear as wheel spin is already close at hand without nitrous in 2nd gear. 1st gear is not a full throttle gear on street or race tires - there is simply too much torque. Applying the nitrous in 3rd gear is truly immersive as the car accelerates at 0.75g at over 125km/h up past 160km/h. Fun but frightening as well.
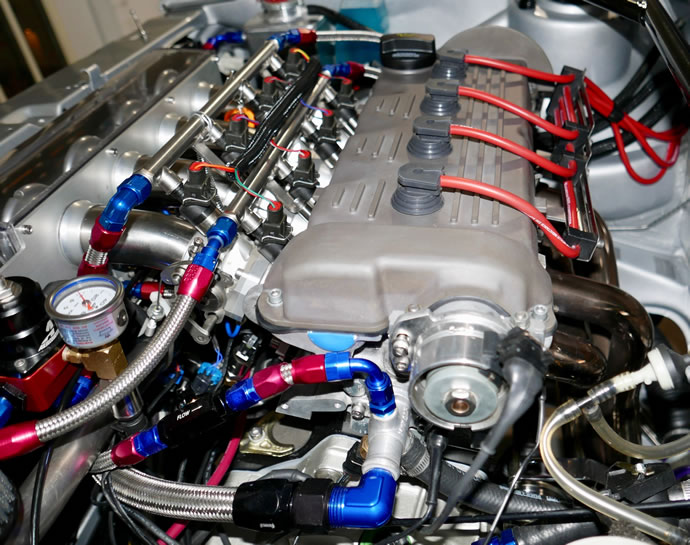
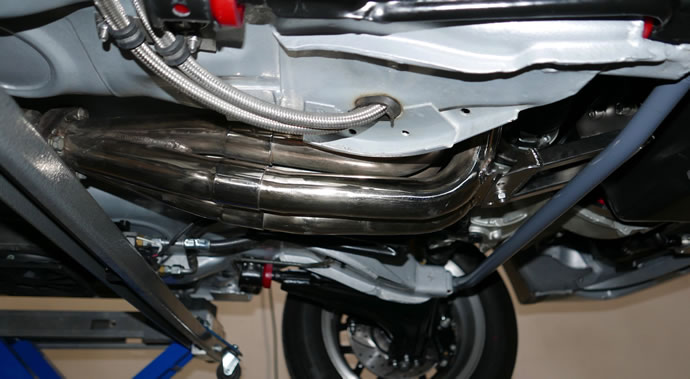
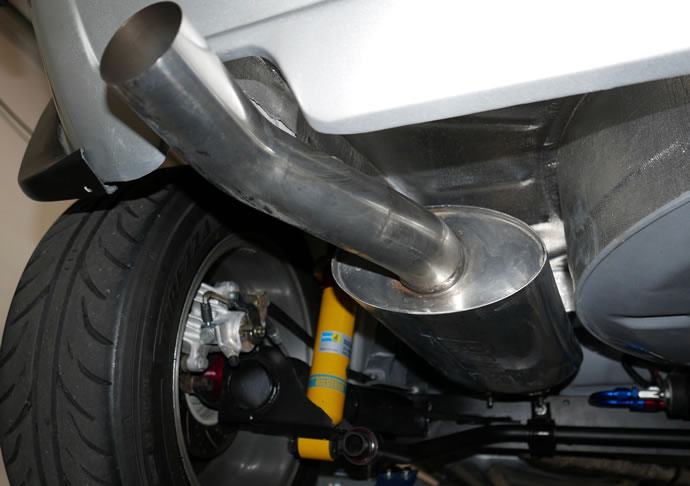
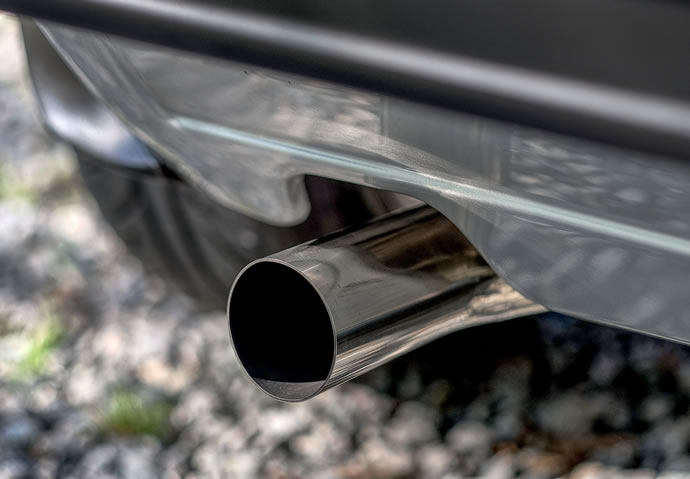
The only issue with the engine is the noise level: without the air box and filter assembly the ITB intake system is actually louder than the exhaust system - it is really loud. But thankfully the air box/filter system works very well at keeping the intake trumpets in check, and also keeping the revs below 5000rpm helps as well. The exhaust system has no mufflers in it - only 3 straight-thru racing resonators, making a deep and mellow sound at idle and part throttle, but it is fairly loud at full throttle in the higher rpms. Other than a typical 2800-3500rpm drone peak I would say the exhaust system is perfect for street use - with the longer 5th gear installed (see below) this may not end up being an issue for daily driving but if it is I will try putting the sport catalytic converter in place of the 1st resonator to see if it quietens up the system a bit more.
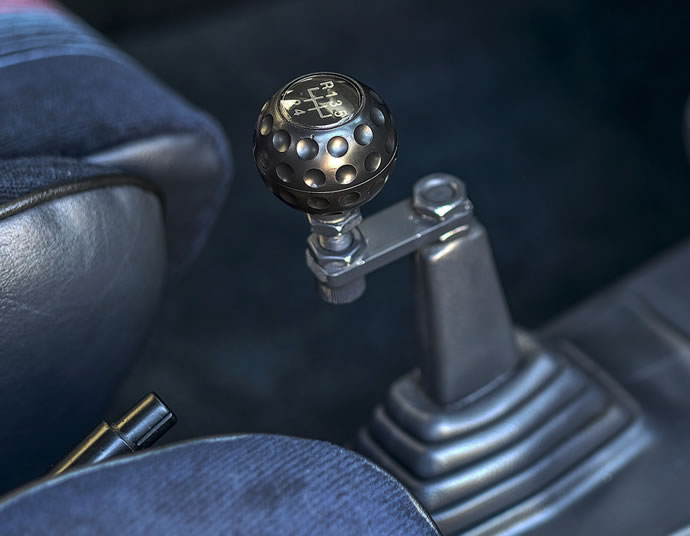
The 020 2Y transmission will have a 0.76 5th gear swapped in place of the OEM 0.91 5th gear, which when combined with its long 3.67 final drive ratio will bring 100km/h cruising in at just over 2500rpm which will be nice. The clutch is a bit of an issue as I had to go with the stiffest possible pressure plate and fairly grabby clutch material to keep it from slipping - the engine simply makes too much torque/power to hold otherwise (as I found out). I am used to the clutch and don't find it an issue on the street but a new-comer to the GTI would have to get used to a clutch with a stout pedal and firm gripping manners - it means business. I will be swapping out the Techtonics/4Crawler shift linkage system in favour of a SCCH Spherical Shifter Kit with USRT linkages - it should be make for very precise shifting but hopefully be very streetable and fun to use.
The close ratio R&P steering makes for an equally serious low speed turning effort, but again, once you are used to it you don't try and turn the wheel much before the car is moving and you mostly forget about it. And when in motion the steering is pure bliss - super direct and responsive. I will leave the HD/race R&P bushings in place as they don't seem to transmit harshness into the steering wheel.
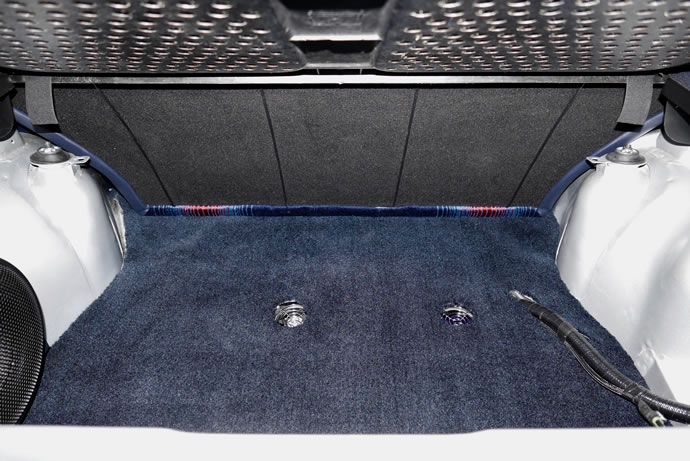
I also plan on installing more sound insulation when the full OEM interior gets re-installed - at least under the rear seats and carpet/trunk area. The carpet at the front is glued down already and there is quite a bit of sound insulation up there so I don't plan on adding any more there.
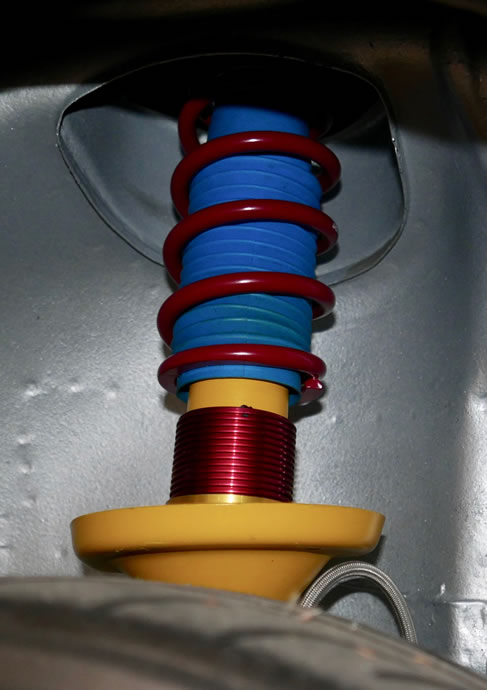
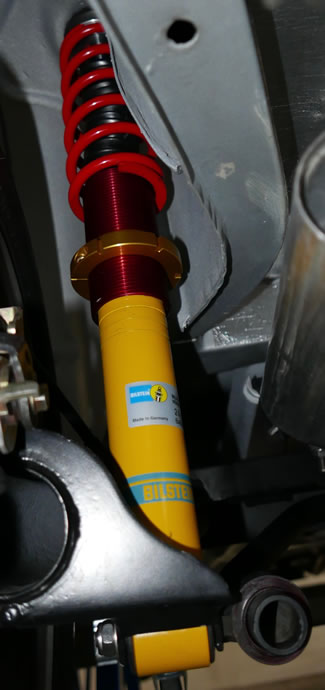
The suspension had been upgraded for track use on racing slicks, pulling 1.3-1.5gs in the corners and during braking with racing disk pads. In the end I needed 440lbs/in front springs and 350lbs/in rear springs with the large rear sway-bar to achieve neutral/flat cornering on the track, with 3 degrees of negative camber using camber plates, but that is simply way too serious for the street tires and daily use. I will keep the Ground Control adjustable collars on the Bilstein racing struts and will start off with 275lbs/in front springs and 225lbs/in rears with 150lbs/in helper springs to give 3/4" of rear suspension travel at the softer spec before stiffening up. I hope to keep the car feeling neutral and sporty/responsive without being too harsh. The OEM Snowflake 14x6 wheels and tires have a lot of sidewall flex so there is limited benefit to be gained from running too stiff. I might have some fun and put on 15x7 wheels and tires if the car feels too lazy on the 14x6s but I am very fond of keeping the full OEM/stock look if possible. Ride height will be set moderately at 3/4-1" gaps on all 4 corners. I will be keeping urethane bushings in the front control arms, Delrin bushings in the rear trailing arms, and modified OEM HD front upper strut mounts (with windshield urethane added to firm them up and make them last longer) - the race camber plates are coming off the car - too harsh for street use.
The Tech-53 big 4 piston callipers and 10.1" front rotors will be perfectly mannered on the street with Hawk performance street pads using my large 25mm master cylinder. The super aggressive Hawk DTC-60 race pads that are dusty and eat rotors will be tossed into the trash and nice new rotors will be installed.
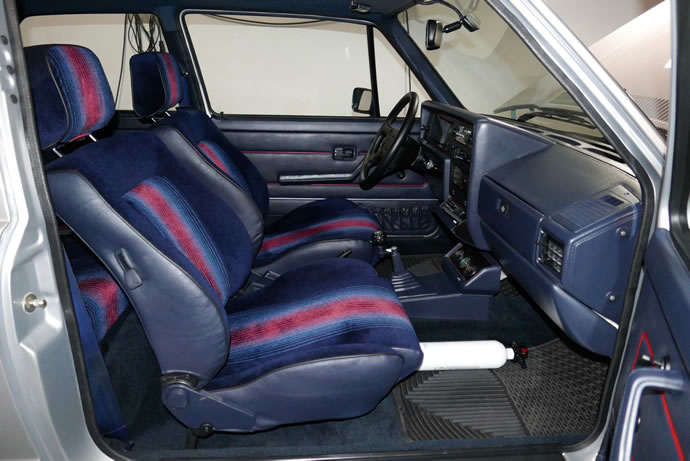
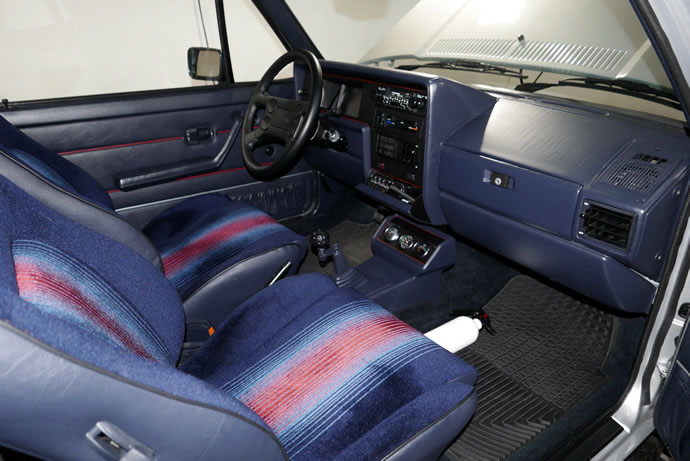
The interior will be totally stock looking but will hide electric windows, electric AC, variable heated seats, and a 1300w audio system complete with bluetooth and handsfree cellular, backup and forward cameras embedded in the rear view mirror (with outside air temperature), and my full Holley digital dash with its multiple screens of driver info and simulated analog gauges for that OEM look ...
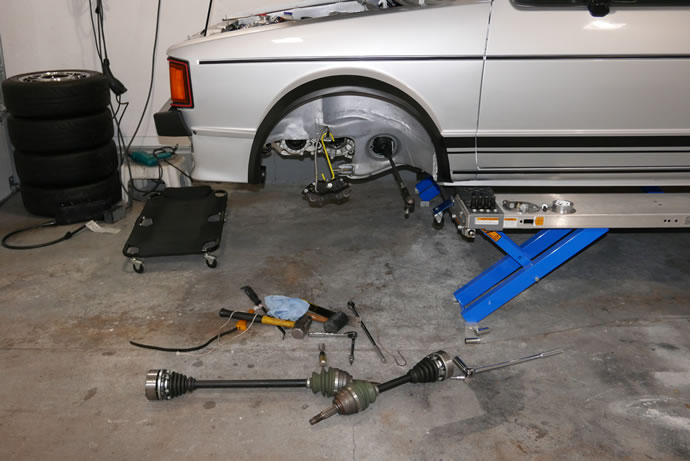
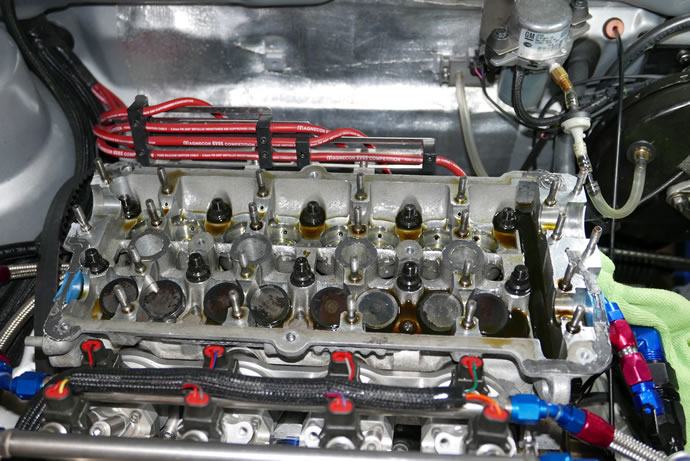
So far I have pulled out the front suspension, control arms, axles, brakes, cylinder head and pistons, and have cleaned up the heads. I have new piston rings on order along with new valve stem seals for the head which should all arrive by end of January. In the mean time I will pull out the radiator and transmission and start on the 5th gear swap from the 0.91 to 0.76 ratio for improved highway cruising rpms - January 3, 2019
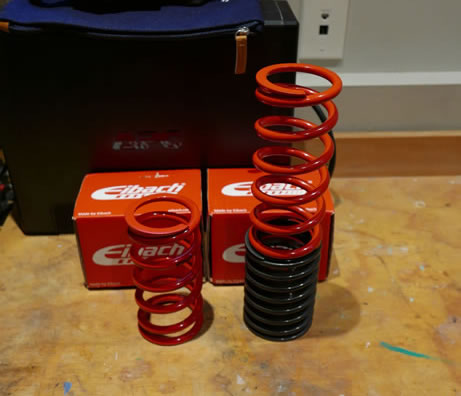
The new 275lbs/in front springs and 225/150lbs/in rear springs ...
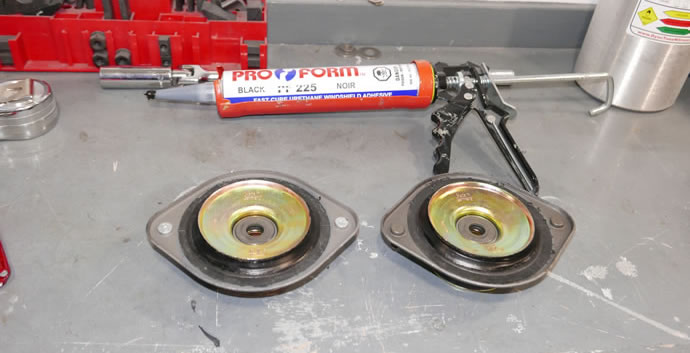
Using windshield urethane compound to strengthen/stiffen the Febi HD upper strut mounts ...
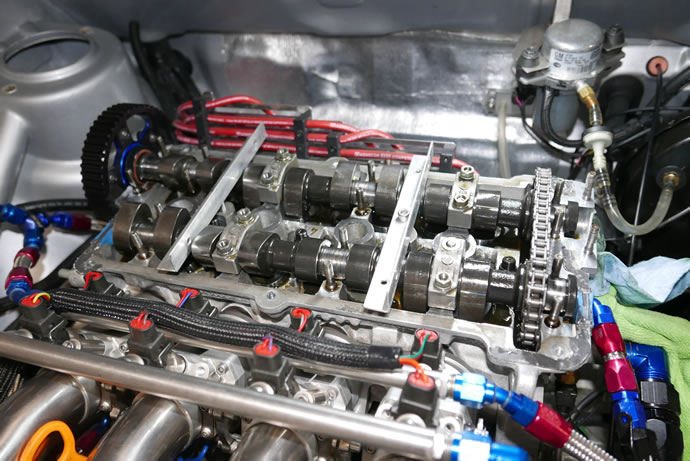
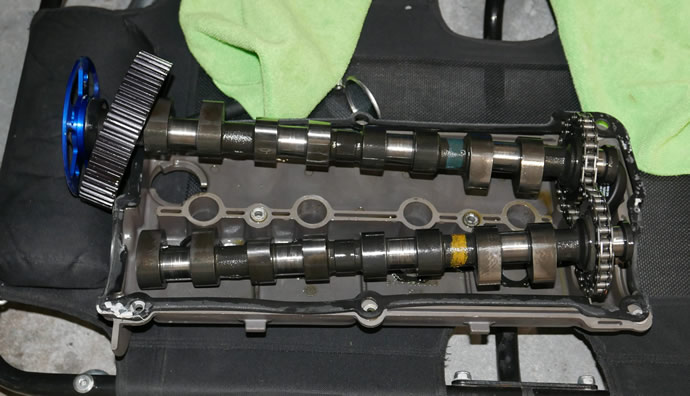
Restraining the 288 race cams from popping out of the cam brackets when disassembling ...
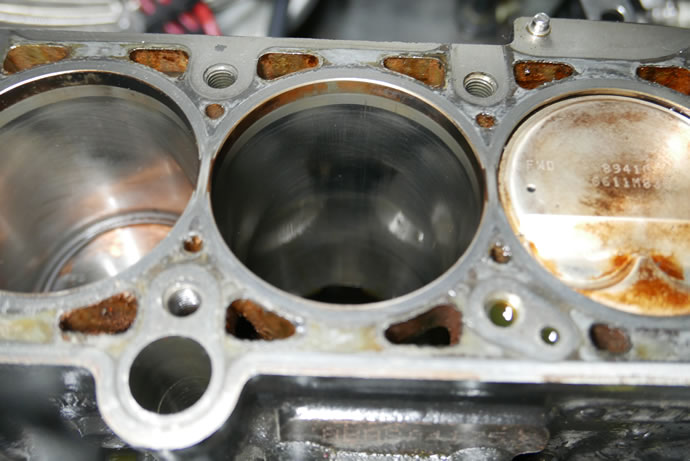
The cylinder walls and piston skirts look fine after lots of 8300rpm use (I was worried that revving the 95.5mm stroker crank/rods too high might cause excessive side loading and rod bearing wear - the rod bearings also looked good) ...
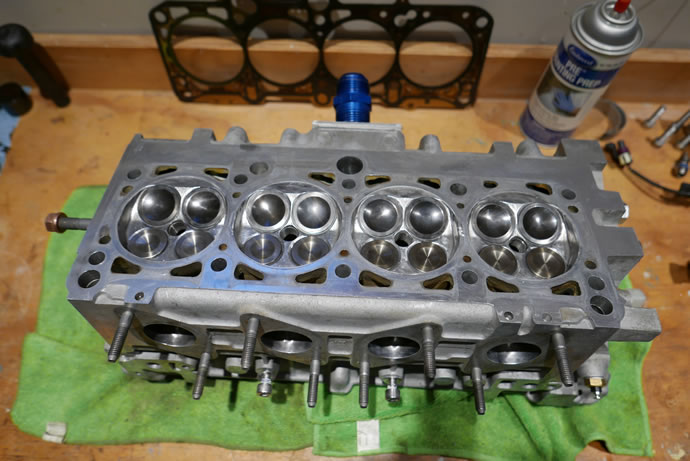
I soaked the head in degreaser at 140 degrees F for 4 hours then scrubbed and wire wheeled the intake and exhaust ports, combustion chambers, and valves, then re-polished the ports ...
My apologies for the delay in posting this update. I have actually been very committed to the project over the past 6 weeks and have an unusually long update to share. The cylinder heads and block have been totally rebuilt, the transmission now has a new 5th gear ratio, and new suspension springs have been selected and ordered after testing the Eibach race springs.
This was my first time tearing down and re-building a 16V motor and so I made a fair number of 'newbee' mistakes. Let's start with the cylinder heads: I have 288 solid lifter race cams, VR6 tall HD valve springs and narrow 5.5mm intake valve stems so there are a lot of custom parts and unique things to juggle. The 288 cams are high lift so it is harder than normal to take them in and out as the cam journal cap bolts won't start without careful positioning of the cams - each one needs to be at a different location to minimize the lift so the right technique is to do one at a time and not try to position them both at once to torque the caps down. I didn't realize that 288 race cams are hard on springs and even if they test out OK, pressure wise, they can crack/fail at any time so should be replaced every 2-3 years. I also didn't realize that valve stem protectors need to be used to avoid ripping the delicate edges of new valve stem seals - so the valves need to be installed before the seals go on and then they cannot be removed again. Then I also fought with the valve lash settings, replacing lash caps multiple times to get to the ideal 0.015" exhaust and 0.010" intake specs. And Techtonics saved the day by custom grinding 5.5mm caps for me when I couldn't find them anywhere in stock plus they were able to help me get the VR6 HD springs setup correctly (installed height and pressure). It was more effort and a steeper learning curve by far than I expected but I figured it out. Amazingly I forgot that I once the cams are installed the intake valves start to stick out below the deck height and I almost bent some valves before I got a wood spacer under the head to protect the valves - a seniors moment for me I guess. I filled the intake and exhaust ports with alcohol and checked for leaks - and I am lucky there are none so we are good to go now with the head fully re-assembled and the intake ITB system re-installed as well.
The block was another learning curve as I ran into fastener hell a few times: OEM VW crank main bearing caps are single-use stretch bolts that needed to be ordered, but I have ARP rod bolts which are fine for re-use; the crank sprocket was a custom item that was based on a 16V sprocket (BBM makes them - p/n 027 105 263 B) but needed to be machined to accept the larger 16mm crank bolt required for the late model 95.5mm stroker crank) and a special ARP fastener sourced (Integrated Engineering worked with ARP to design this bolt for the stroker crank, M16x65mm, available from ECS Tuning p/n 2794733 - but I needed to machine off 1-2mm to keep it from bottoming out), plus the highly recommended hardened steel dowel pins needed new holes drilled in precisely the right locations to match up with the crank holes (Integrated Engineering sells a dowel pin installation kit - note, I ended up sourcing 1" long 3/16" dia hardened dowel pins and didn't use the 3/4" long pins as they can back out of the crank holes as they are too short in my view). I had damaged my timing sprocket from high rpm vibration so it was a very tricky operation to drill through the old sprocket dowel pin holes and create identical holes in the new sprocket - in the end I had to open them up about 0.010" to get alignment with the crank holes but the sprocket is perfectly located and secured now with its massive 78 ft/lbs + 1/4 turn torque spec. I used a flex-hone to prepare the cylinder walls - it worked out very nicely. I ordered new Weisco piston rings and installed them with new ring pliers. I had the crank serviced at a local crank shop that made sure the damage from the high rpm vibration on both ends of the crank was addressed with clean-up machining, and the bearing surfaces were also re-polished. The crank, rods and pistons were all re-assembled and torqued, and then a new VW ABA windage tray was installed with the oil pan using Reinzoil gasket sealant (I am tired of leaky oil pans).
I worked with Broke-VW to get a 0.76 5th gear and all of the tools and gaskets and replacement single-use bolts and clips to swap out the shorter 5th gear - it worked out well but the process was challenging for me - lots of learning going on when transmissions are involved - harder than working on a cylinder head in some ways. I was swapping an 8V 5th gear into a 16V transmission so I had to do some machining on the 8V gear to get the securing clip to fit correctly - with help from Broke-VW.
I wanted to test the Eibach race springs that I had originally used on the car before swapping in the coil-over Ground Control springs/adjustable perches for racing purposes - on the track I needed to run 440lbs/in front and 350 lbs/in rear springs to get flat and neutral cornering but those are way too stiff for a daily driver on the street. I found the original Eibach race springs pretty decent on the street but felt that going about 25% softer would be a nice compromise for me - still pretty performance oriented but just a bit less edgy. So I needed to measure those springs as there is no published data on them. I used a weigh-scale platform and a car jack to build a test rig. The results (drum roll please ...): to collapse the front dead coils takes 300lbs, and then the spring is 300lbs/in after that; on the rears it is 250lbs to collapse the dead coils and then 250lbs/in after that. So they are pretty stout. I have now ordered 250lbs/in and 200lbs/in front/rear Eibach coil-over springs to install with my Ground Control adjustable spring perches.
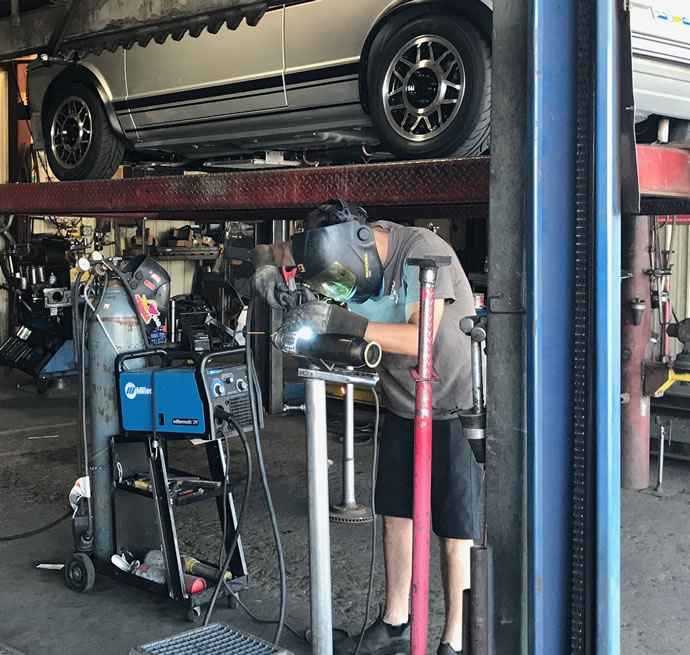
I also machined and welded up a new oil pump priming tool and got my exhaust header re-welded with a much stronger support bracket. In-between waiting for out-sourced machining operations and parts to arrive I also re-epoxy painted many engine and suspension components and continued the task of cleaning up the body, pulling off the fender flares and prepping them for re-plastic painting as they are already a bit worn looking. The project is starting to heat up just as this long winter in the Pacific North-West is finally starting to ease its grip on us - I estimate later in April or early May for 1st drive - March 13, 2019
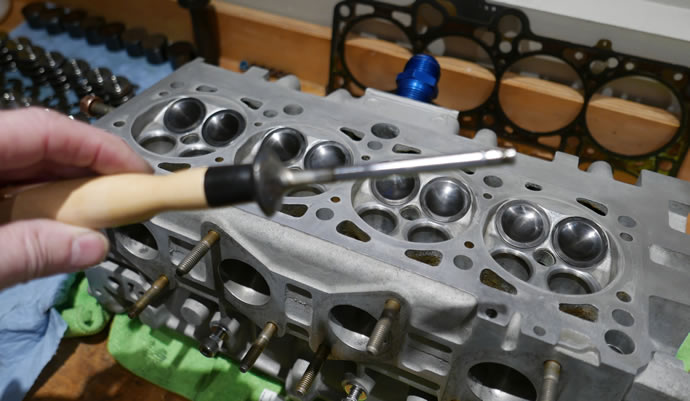
Lapping the valves
Checking the conditon of the springs before deciding to replacement them anyways ...
After assembling the heads 3 times ...
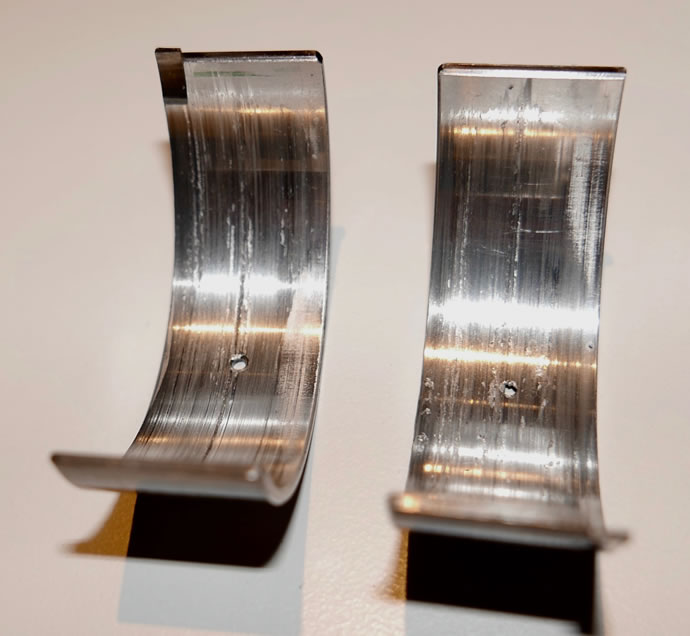
#1 rod bearing - the only one that took a beating on the track
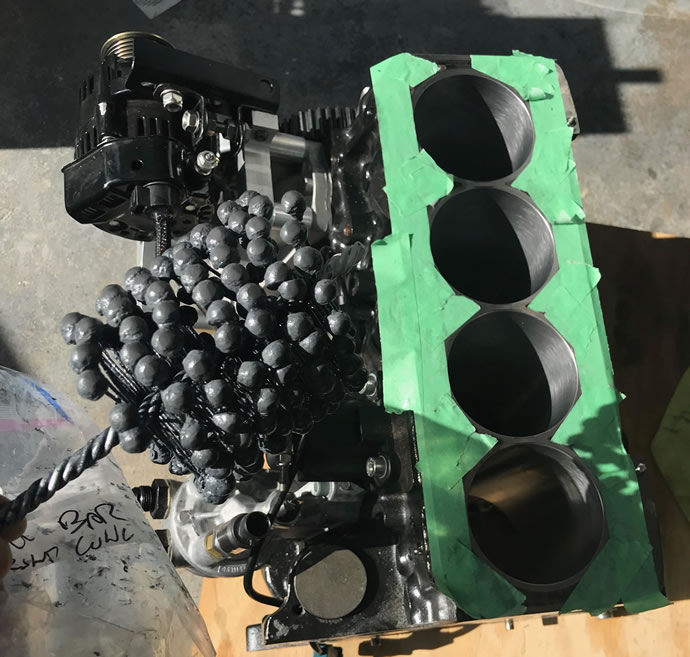
Using the Flex-Hone with a drill to prep the cylinder walls
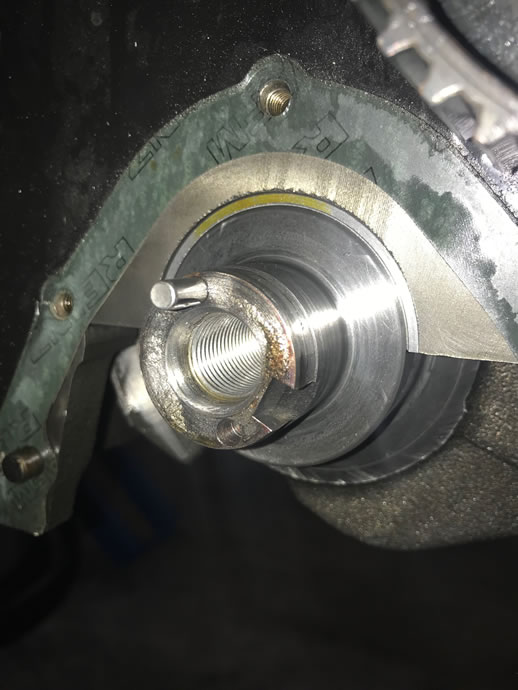
Heat/vibration damage from high rpm track use - required a new sprocket and crank machining
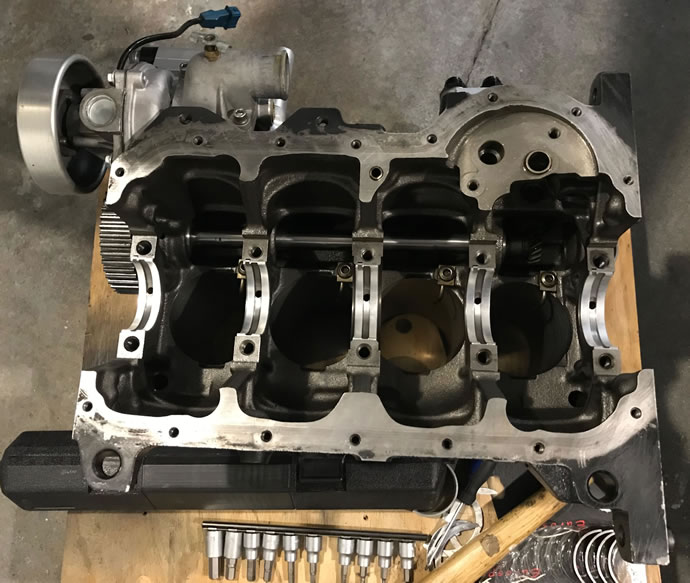
New main bearings going in

Crank going back in

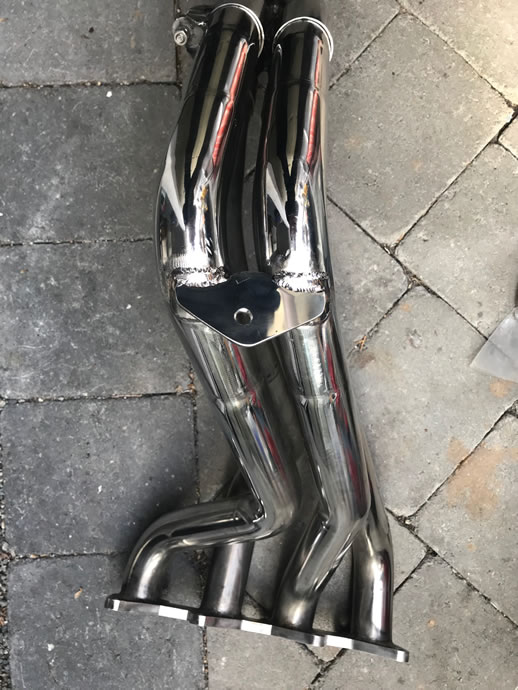
Header support bracket repair
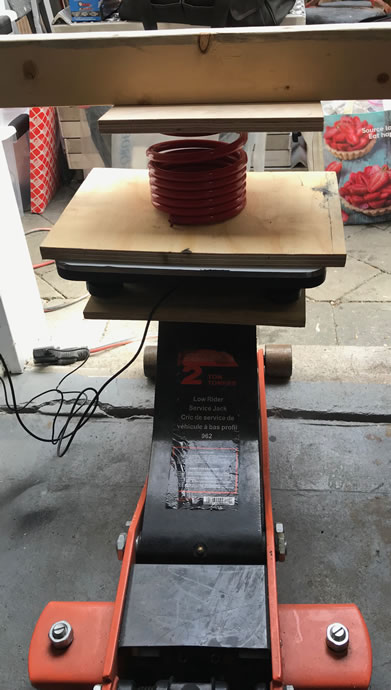
Testing the original Eibach racing VW mk1 springs: 300/250lbs/in front/rear
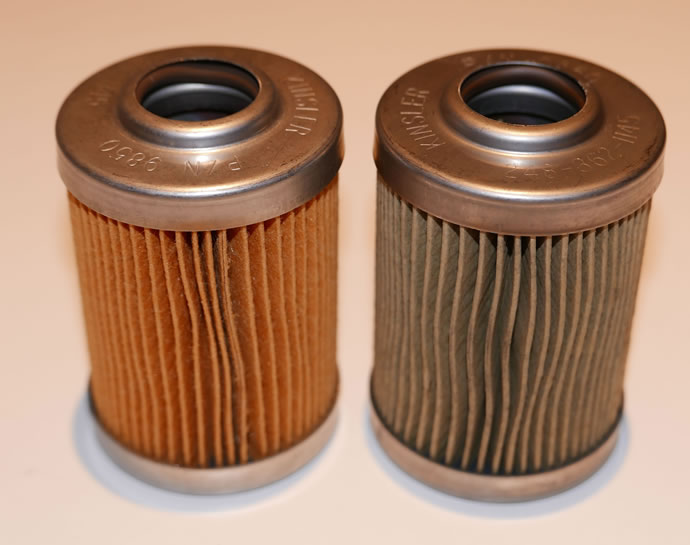
The secondary (post pump) 10 micron fuel filter after 5,000kms (right)

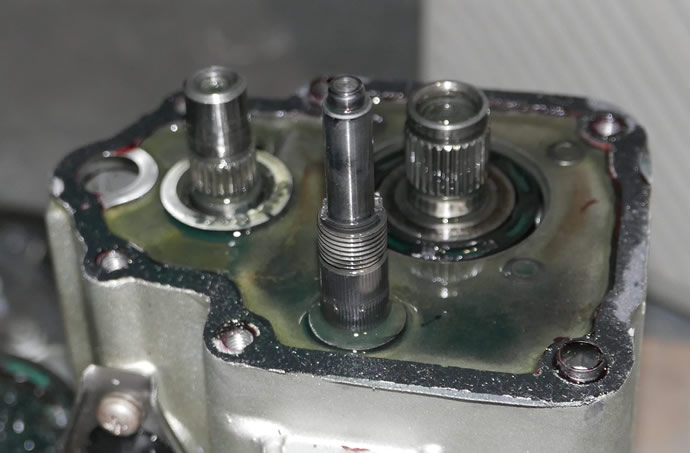
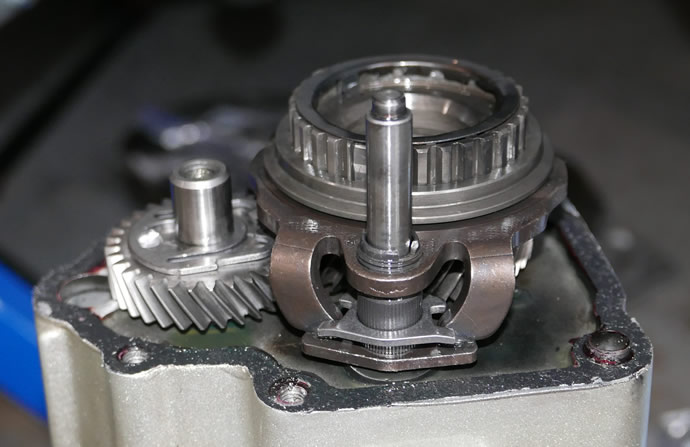
Swapping out the 5th gear on the 020 transmission
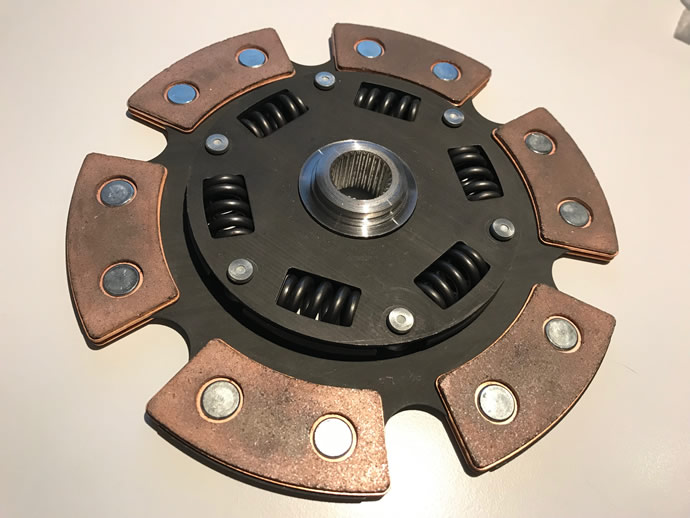
The new California Clutch stage 5 plate (hopefully this will not be too agressive for street use - the old clutch was a stage 3 unit w/o springs)
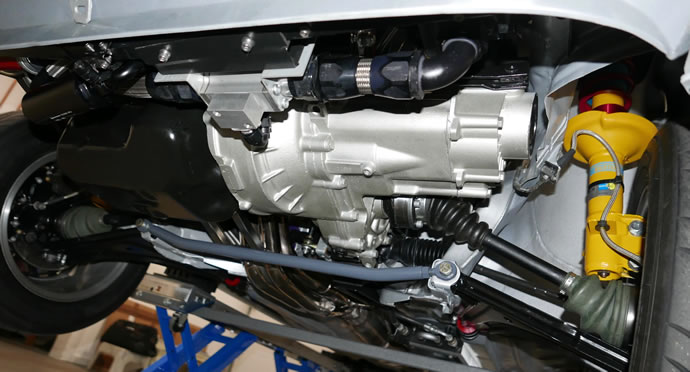
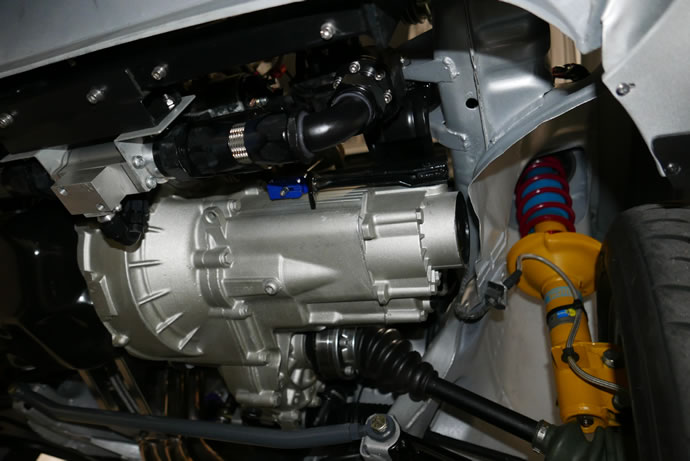
Success! The California Clutch stage 5 clutch and pressure plate assembly was balanced and then installed on the engine, the transmission with it’s new 0.76:1 5th gear set was bolted on, and the combined assembly was lifted into place and bolted back into the chassis using slightly modified BlackForest Industries engine/trans mounts. Then the custom radiator was installed, the rebuilt cylinder heads, and finally all of the sensors and lines and exhaust system ... after priming the oiling system with my custom drill mounted oil pump drive I fired it up 3 times, each time increasing the max temp from 120 degrees F, to 140 then to 175 degrees, with a full cool-down between runs. The plugs were pulled and inspected and they were 'as new'/shiny.
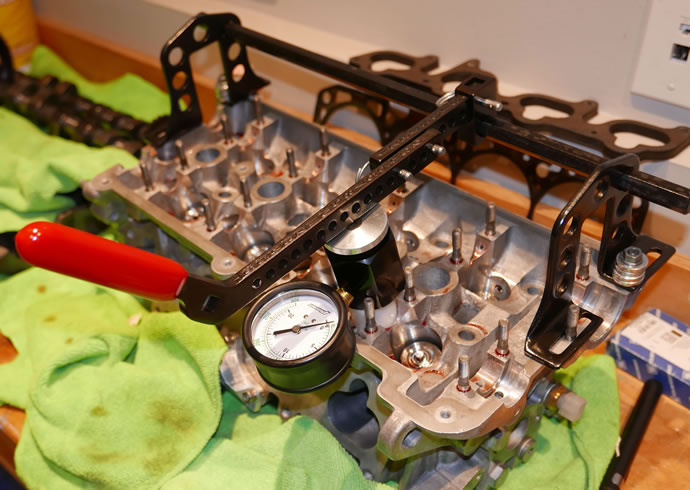
Leakdown tests were performed after assembly (5-9%), after the oil priming and starter driven cycling (5-7%), and after all 3 test fires – a total of 10 minutes of run time (3.5-4.5%). So the engine is working really well: no blue smoke, no smell, no fouling, no oil leaks, all good!
I installed a USRT shifter linkage system and test fitted a SCCH shifter (since removed and sent back to Jacob to hopefully get it to feel less stiff). I also got the fender flares repaired and re-painted with plastic paint and then a top coat of plasti-dip satin black which looks really nice. Finally, I machined down the front strut bearing inner sleeves to reduce the slack in the bearing but leaving what I hope is enough tolerance for the control arm movement - April 8, 2019
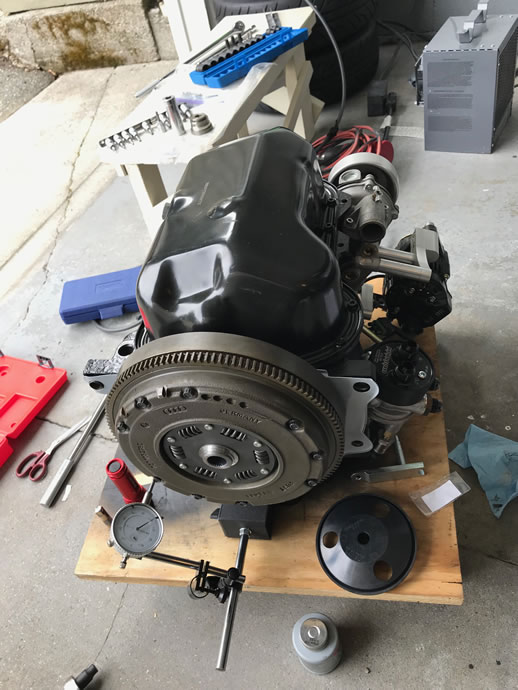
Checking the pressure plate/flywheel assembly for runout (+/- 0.003") ...

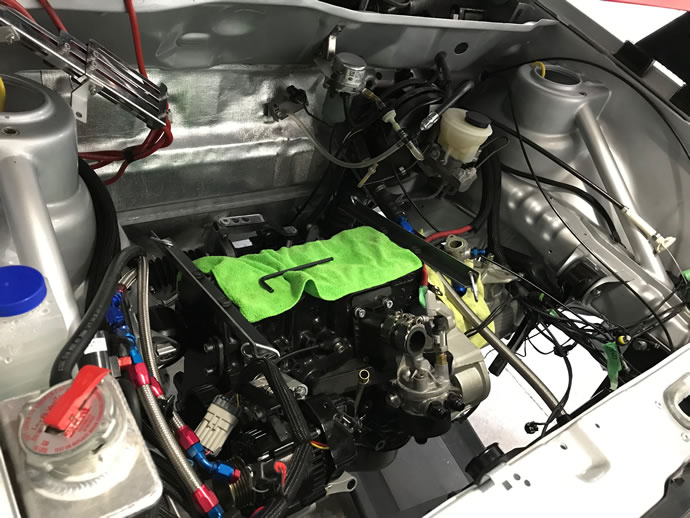
Installation went smoothly, using simple tie-down straps to pull the engine/trans up into place with the mounts removed and fitted afterwards ...
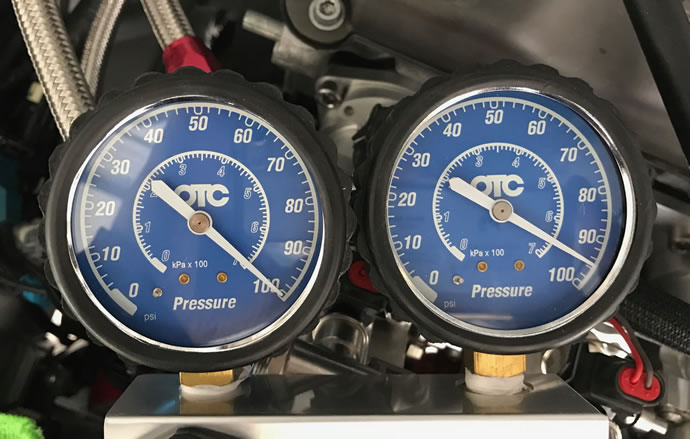
Several leakdown tests were performed along the way: after initial assembly, after spinning the engine with the starter, and after 3 sets of warm-up, cool-down tests - each time the #s improved ...
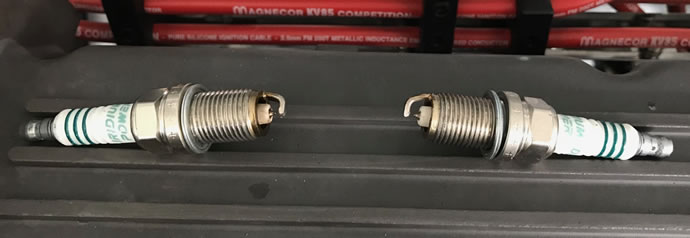
Man, those spark plugs are clean after 10 minutes of run time ...
The break-in crap stuck in the new K&M metal oil filter (nothing serious, and the oil still looked nice and clean too) ...
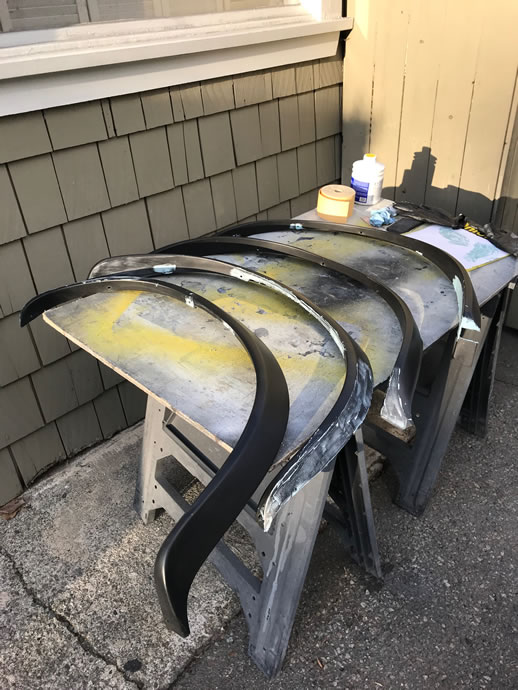
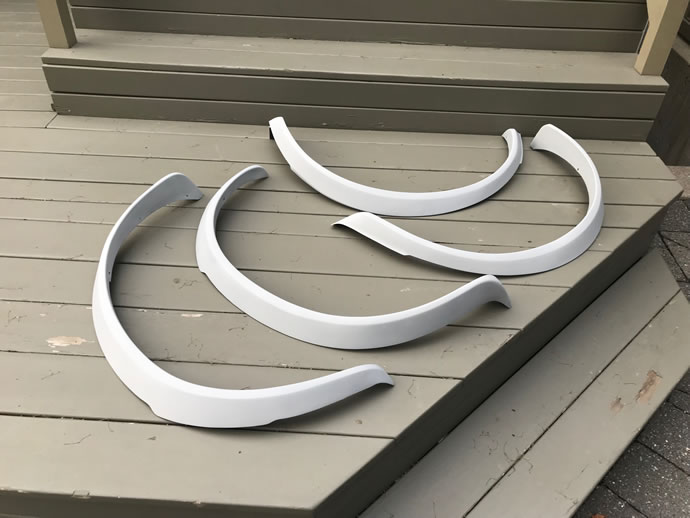
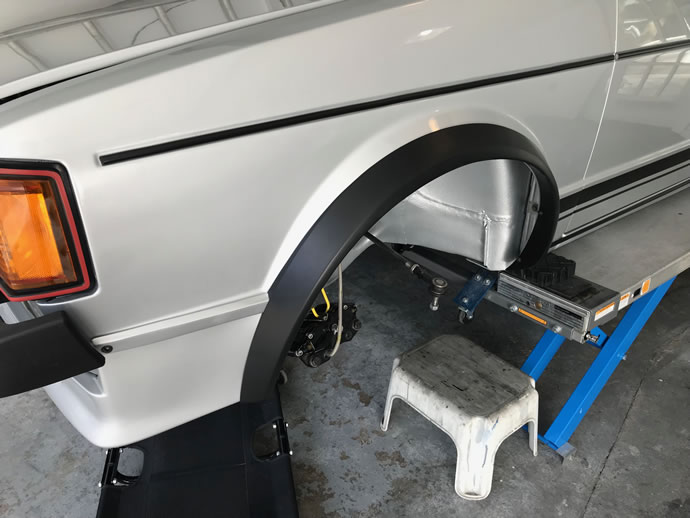
Cleaning up and re-painting the fender flares (SEM build-build primer/filler, then Plastic paint, then Plasti-dip satin black top coats - letting it dry fully for a week reduces the stickiness of the surface and it really looks nice) ...
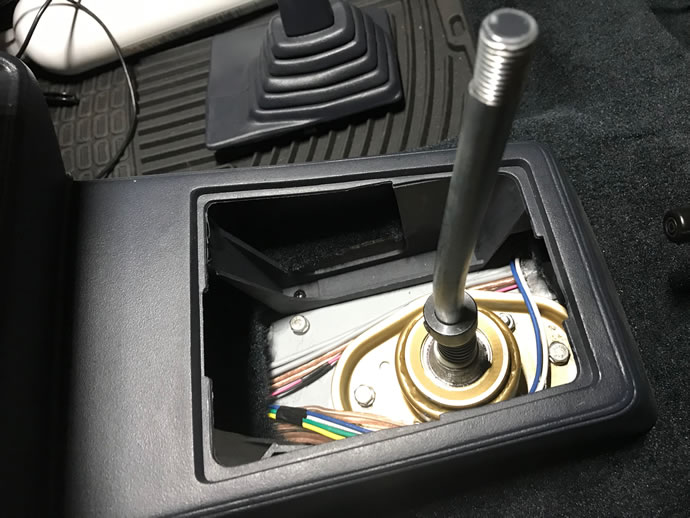
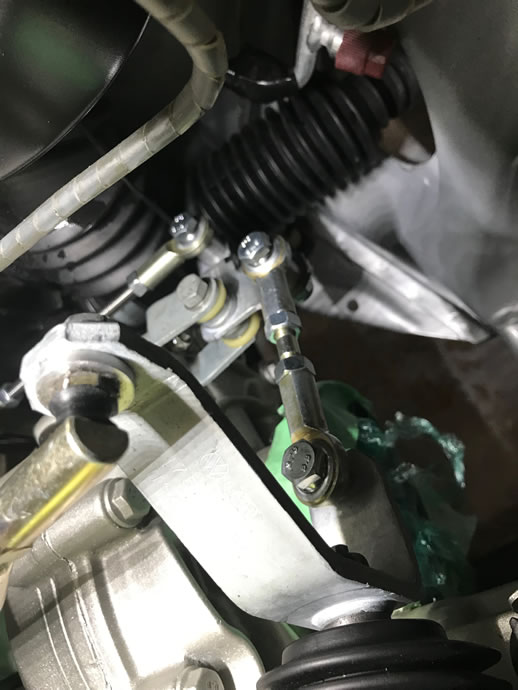
Installing the new USRT and SCCH shifter components ...
After getting the OEM interior back in the car and doing a careful alignment (using strings, tape measures and a digital level - old school, baby) it was time to take the car on the road. 100+kms into breaking this new engine in I can say that it is amazing. Here are my main points:
Not too stiff so the car manages to get over most road bumps with grace and a smooth, comfortable ride (using 250/200 lbs/in front/rear springs and Bilstein race struts and a large hollow rear bar - even though these springs are close to the 300/250 springs I originally had in before racing, going one step softer was a smart decision). It still corners dead flat and has very responsive slalom/lane change manners - go-kart level feel in comparison to most heavier sports cars.
Sticking with the OEM front upper strut mounts and adding rubber sealant to them is another nice addition - no crashing, no harshness. 3/4" wheel to fender gaps all round now that the car has settled in a bit.
The alignment is also sweet: -1.25 degrees camber, 1/16" toe out, 5mm front wheel spacers, 20mm rear axles spacers + 3mm wheel spacers - gives a more aggressive stance, evens out the front/rear wheel width - car steers dead-nuts straight.
Adding some mass loaded vinyl to the trunk area and putting in the carpet, plus adding some material to the door seals at the front edges made the car much quieter.
Add the 0.76 5th gear and this car is now a dream on the highway, turning 2000rpm at 50mph and 2400rpm at 60mph - no more droning.
The seats feel wonderful, the USRT/SCCH shifter is amazing too. I couldn't be happier. After this tank of fuel is gone I will change the oil again and then start to use the full rpm range and do some full power hill climbs to complete the engine break-in - May 1, 2019


Finally the Ultimate 83 GTI project is complete as a street car/daily driver. No fluid leaks anywhere, a/c system running well with a 12 degree C air temperature drop across the new evaporator (and with the help of a new larger condenser), all final 'fit and finish' tasks completed, and a 500kms 'shakedown drive' in 33 degree C heat to confirm all systems 'go'. I will now repeat my 1984 drive from Vancouver to San Francisco along hwy 1 in the next few weeks in my new GTI. I am arranging for a pro video and online spec sheet/review to be made of the car as the final step in documenting this project - June 15, 2019
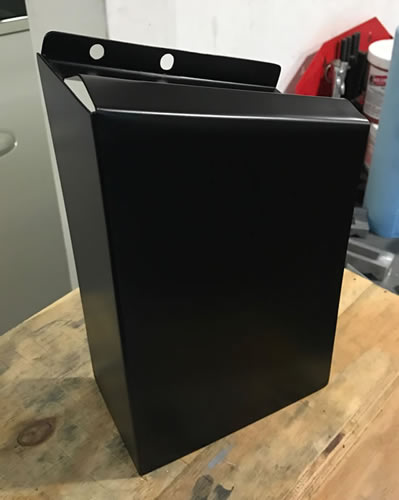
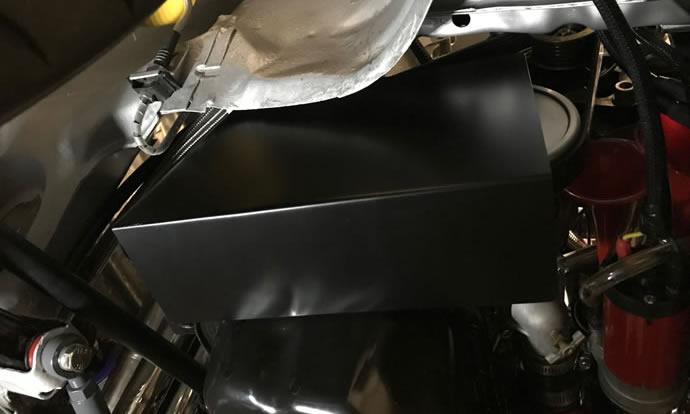
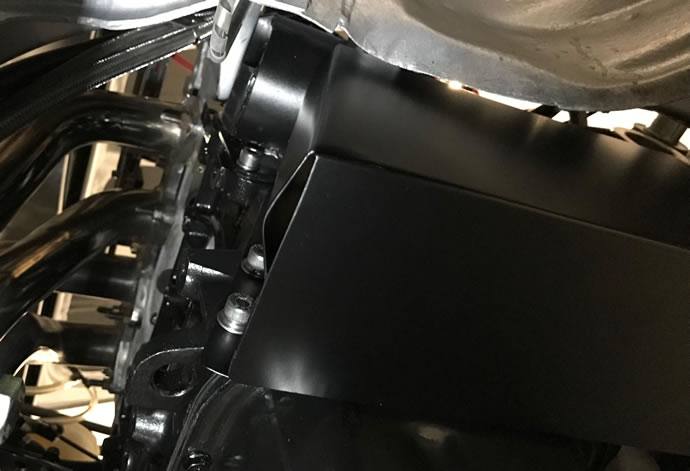
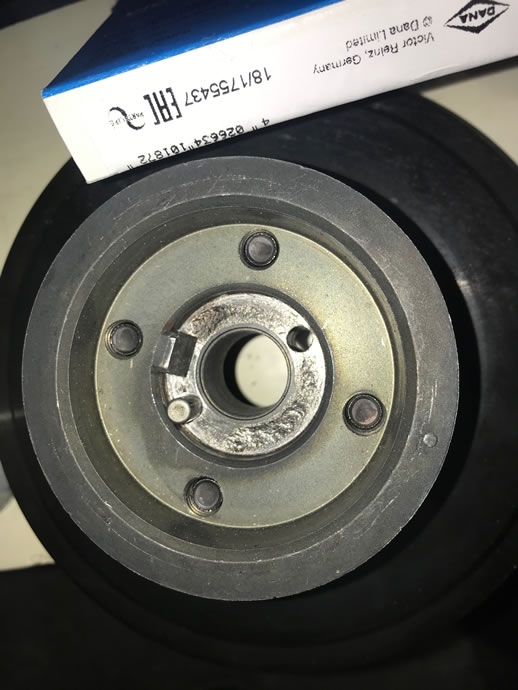
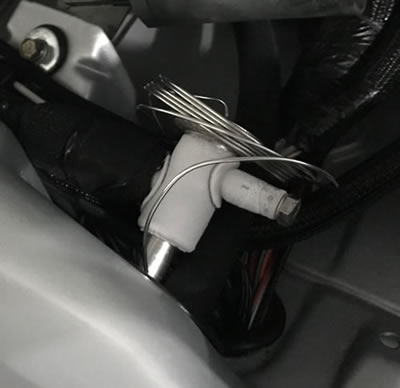
My new cam belt/sprocket insurance - a simple metal shield to protect against road debris
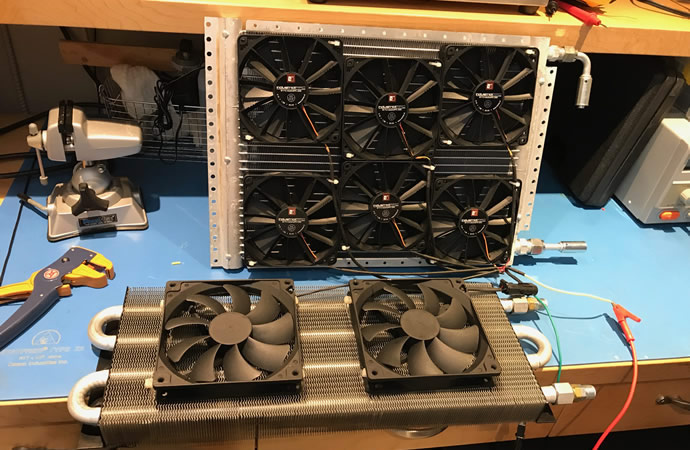
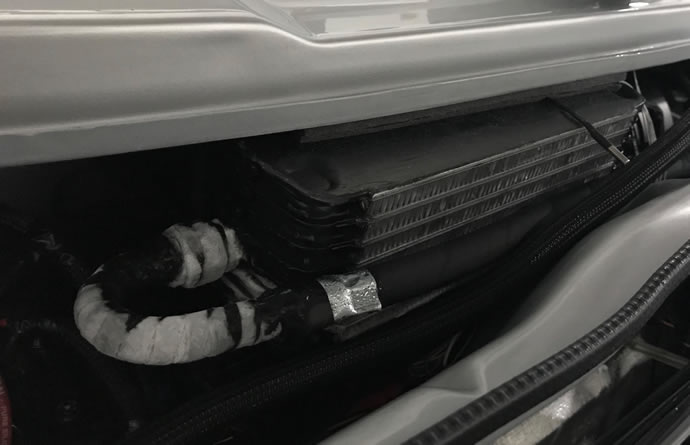
Comparing the old and new condensers - all 6 fans only draw 0.6amps total
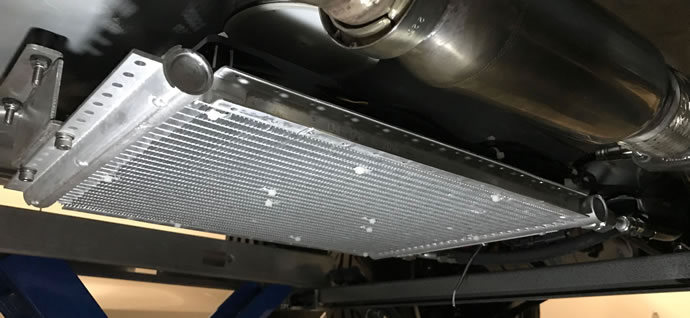
The new a/c condenser mounted under the car - better ground clearance and much higher efficiency than the prior unit
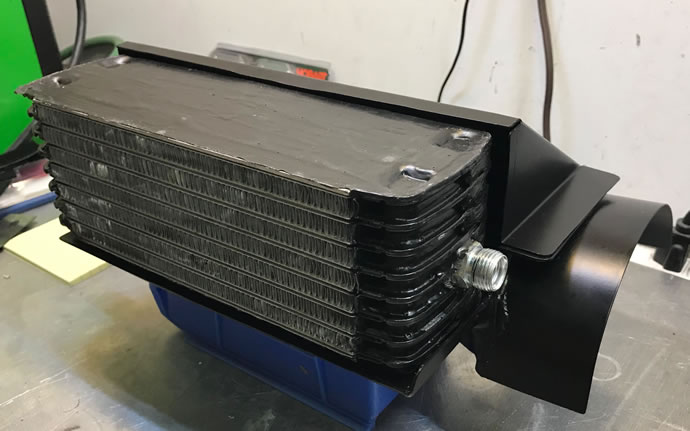
The new evaporator and air ductwork
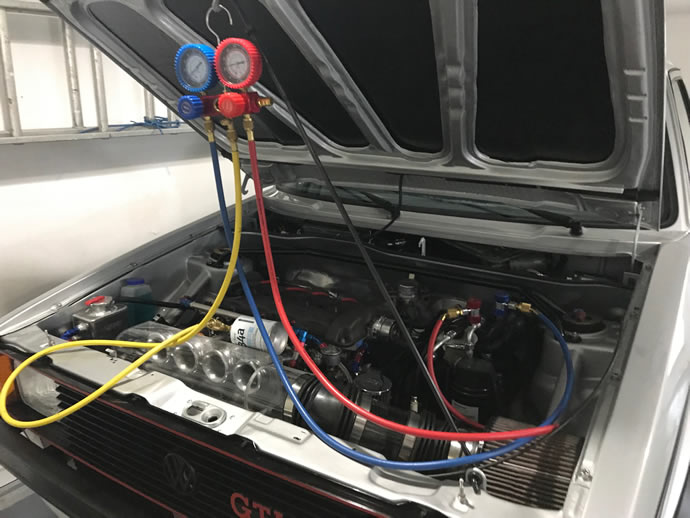
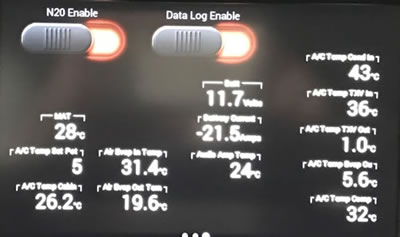
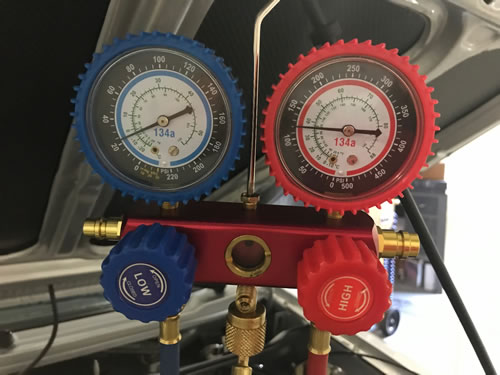
Using R134a refridgerant filled to a 22.5psi low-side pressure with a 31 degree C ambient temperature, there is a 12 degree C air temperature drop across the evaporator which allows for adequate cabin cooling on a hot summer day - think of it as a 'mild' a/c system - my tiny race alternator barely keeps up to the current draw while cruising on the hwy and can't fully keep up in stop and go traffic in the city when the radiator fans have to run to keep the engine cool - but my battery can cover those periods with its LiFePO4 25amp-hour capacity.
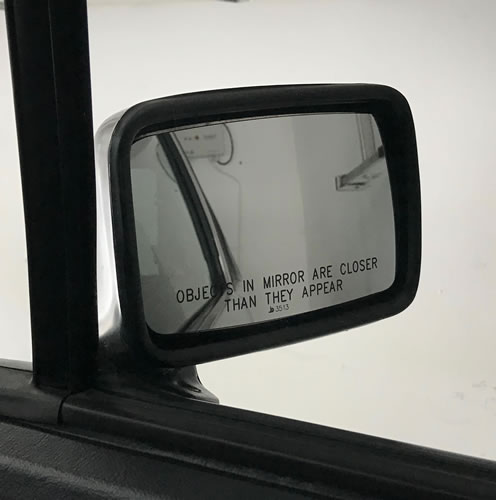
The new convex mirrors which provide much better field of view
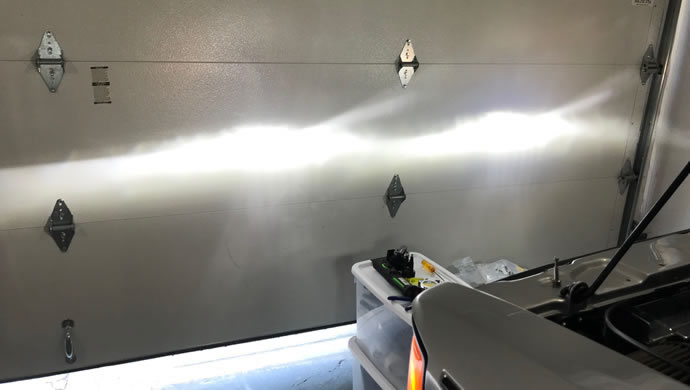
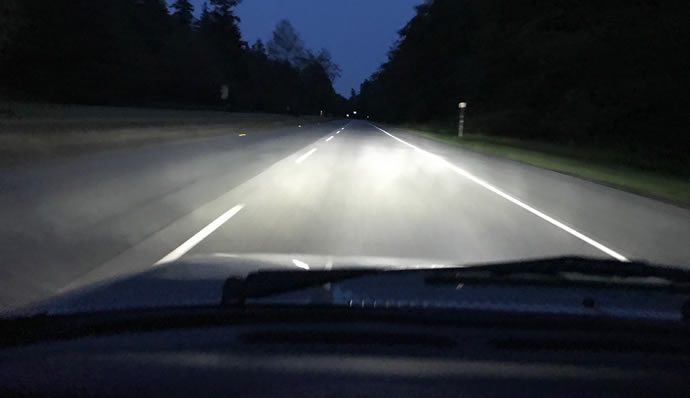
My new Philips H4 LED headlights - a nice colour temperature, tons of light output, and a decent cutoff to avoid blinding oncoming traffic
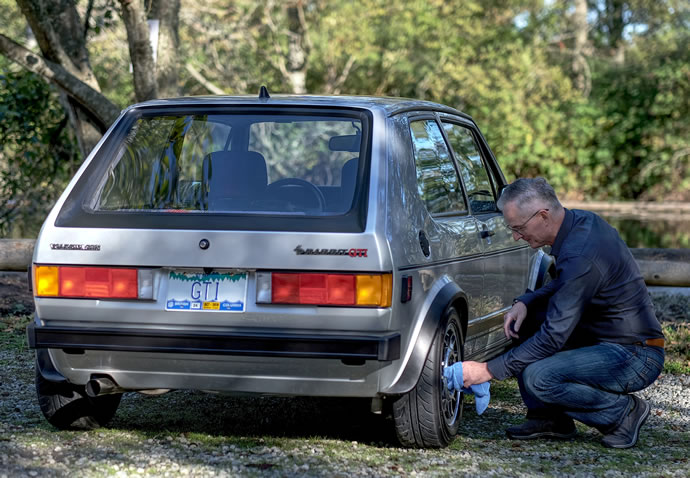
The results of a 3 step paint finishing process: starting with machine application of 3M rubbing compound, then 3M machine polishing compound and then a final hand carnuba wax job - looks very glossy - finishing the GTI project at last!
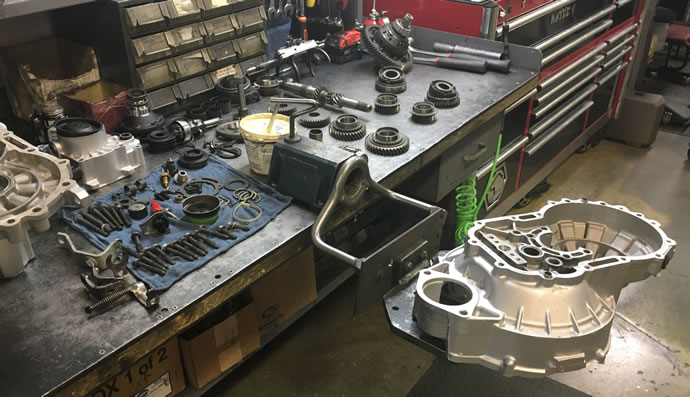
I have been taking people out for rides and part of the fun is doing some full throttle acceleration runs to show off the brutal acceleration potential of this car - when the cams hit their sweet spot between 5000 and 8000rpm things get more than just a little crazy with this 1900lbs FWD short wheel base car. But as I progressively did more acceleration runs I noticed that the transmission was getting harder to shift and there were strange noises coming from it when feathering the throttle - like marbles rolling around inside it or growling. So I drained the trans fluid and saw lots of silver flecks in the oil - a bad sign. I then spoke with Brian of Broke VW fame who has been so helpful to so many people in the VW 020 transmission world, who got me my 5th gear conversion setup and he suggested that it was indeed time to rebuild the transmission.
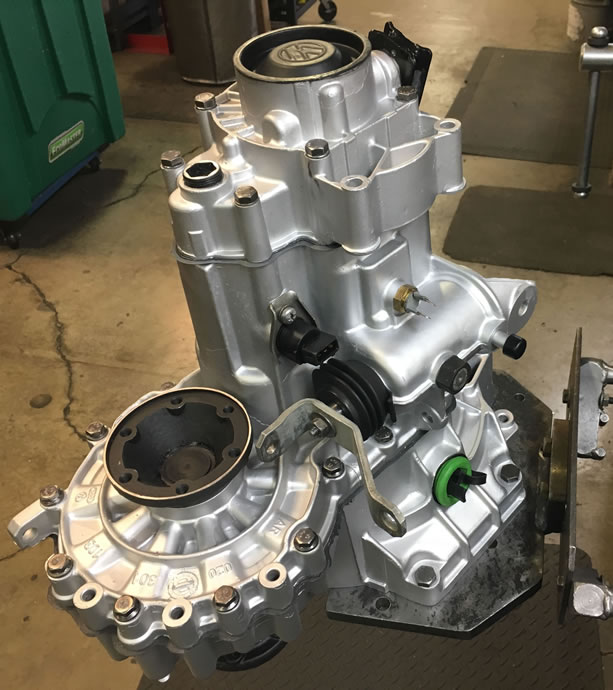
I called Ken Harvey at German Transaxle of America (in beautiful Bend, OR) where I originally sourced this 020 2Y (16V mk2) transmission from, and he said 'yes, I can rebuild it but I am leaving for vacation at the end of this week - when can you get it here?' so I ran into the garage and spent the next 3 hours pulling the transmission out of the car, throwing it into the back of my Audi A3 Etron and driving thru the night to get to Bend, OR by 8am the next morning. Ken gave me a wonderful tour of GTA which is definitely THE BEST VW transmission shop in America with its huge hard to find parts inventory and extensive rebuilding and testing capabilities. Ken got his team to work tearing it down immediately, getting the parts into the washer, repainting the case, and then completing an inspection of all of the internals. He found a badly damaged ring and pinion gear set and lots of worn synchros plus some worn bearings so all bearings and synchros were replaced, new R&P gearset installed, and some other items as well. It is now on its way back to me via UPS 2nd day air so I can get it re-installed in the car next week and then hopefully get on my way to San Francisco mid month - weather depending.
The bottom line in all of this is that I was using a transmission that was designed for 100ft-lbs of torque and running 200-250ft-lbs thru it at 50% higher rpm than spec on the race track, at the 1/4 mile strip, with slicks, power shifting, etc. - it lasted 4000kms which is actually quite good all considering. From now on it will be babied at lot more ... - June 27, 2019
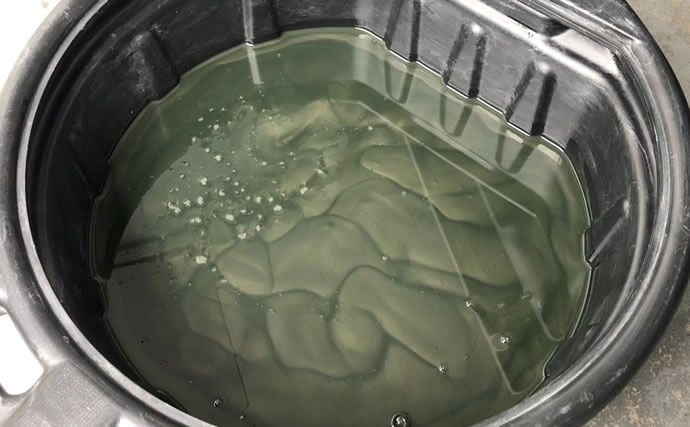
Silver flecks in the trans fluid - oh no!
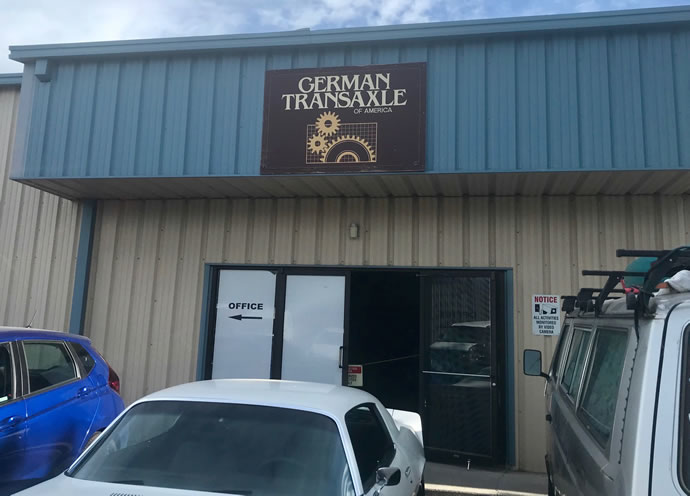

Arriving at GTA (German Transaxle of America) at 8am the next morning after driving thru the night and getting a tour from Ken Harvey who is the master of all things VW 020, plus many of the other VW gearboxes ...
The transmission after stripping it down and cleaning the parts ...
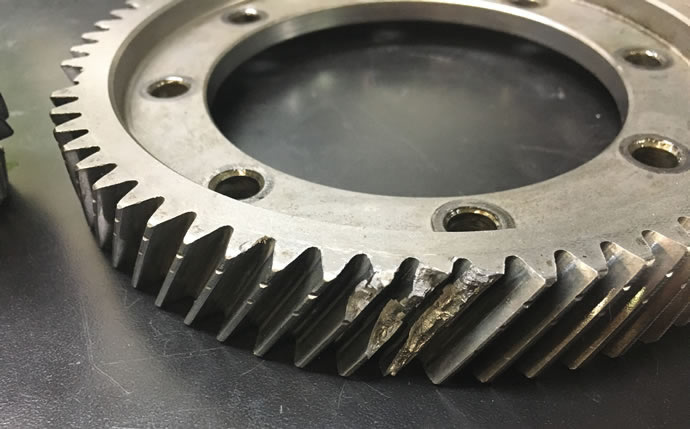
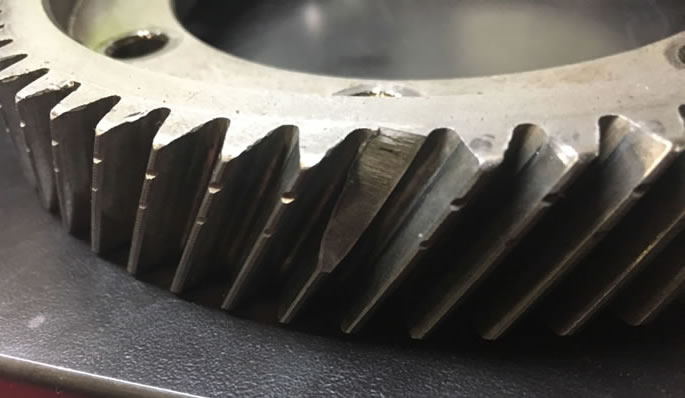
Holy crap - I am so lucky that the metal from those R&P gears didn't end up eating the whole transmission ...
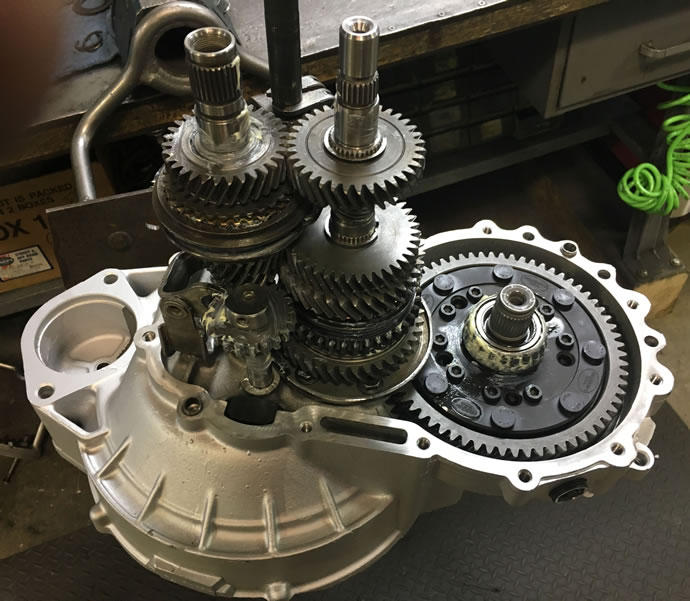
Coming back together with many new/replacement parts ...
Finished in record time!
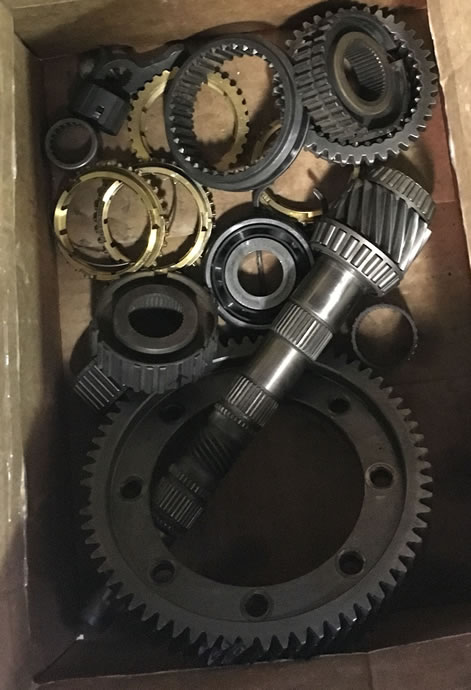
All the parts that were replaced ...
4,000km/2,500mile road trip: I wanted to relive my original summer 1984 GTI trip from Vancouver, BC to San Francisco down the coast, to bookend my Ultimate 83 GTI project after a nearly 7 year journey. Would it survive the trip without mechanical or electrical troubles, and what would it be like to drive it for 40+ hours on a range of roads across the Western US. The short answer is that the only mechanical issue was a disintegrating exhaust system flex pipe which I had replaced on my last day of the trip in Yakama, WA, and there were no electrical issues.
The GTI handled the trip very well, except in the few areas where the pavement was rough - my suspension tune is still very firm - it works wonderfully on smooth roads but later this summer I will be receiving my KW V3 coil-overs and will incorporate my 250/200lbs-in springs into them and achieve more compliance for street-only GTI driving. The GTI has the 16V 3.67 final drive ratio, and I had swapped in an 8V 0.76 5th gear so my cruising rpms were low enough to enjoy 75-80mph speeds for long periods of time. At times the exhaust system noise level was a bit tiring - since coming back from this trip I swapped in the Techtonics high flow catalytic converter - it has maybe cost some power but the exhaust note is much more mellow now and over-all part throttle volume is about 1/2 so hwy cruising is now awesome. Once I have the KWs installed the GTI will be a very street-friendly car indeed.
I visited several project supporters along the route: Josh & Mark Arnold, Collin Gyenes & team at Techtonics, Tim Linerud, Derrick Hoffman, my son Perry who lives in SF, and the team at German Transaxle. Thank you to everyone for their hospitality and support!!!
My trip route was Vancouver to Portland via I-5, then out to the coast on 99-W, and then US-101 all the way to San Francisco, and then back up to Sonoma and then out to US-1 on the coast, then back to SF on US-101 again, then south on I-280 and across I-92, then I-580/I-680/I-80 to I-5 to Mount Shasta, then I-97 to Klamath Falls/Crater Lake, then continuing on US-97 to Yakama, then I-90 back to Seattle and then I-405/I-5 home to Vancouver again in a 6 day period. Peak elevation reached was over 8,000' at Crater Lake and another 4-5 passes in the 4-5,000' elevation levels - lots of varied roads and scenery to enjoy and test out the GTI with.
Catalytic Converter update: before the Cat installation the car always had a rich smelling exhaust even though the WBO2 sensor and ECU were in closed loop mode and regulating to 14.7:1 A/F ratio. After the cat installation but before ECU tuning the exhaust smelled of rotten eggs and the cat was a bit too hot for my liking (at 350 deg F inlet flange, and 650 deg F outlet). I googled around and found out that racing cams with a lot of intake/exhaust valve overlap pull air thru the cylinder head into the exhaust creating an artificially lean signal to the WBO2 sensor and also that the signal is noisy so you can't leave the ECU in closed-loop mode at idle with racing cams, but instead should solely tune based on max intake vacuum and idle quality/stability. When I did this I ended up with an indicated 17:1 A/R signal at idle and no more rotten eggs so my car had indeed been running rich at idle all this time (8,000kms). My plugs were rusty brown looking too so that was the issue after all. The cat outlet temp fell by 75-100 deg F as well which indicates that it is not having to work as hard. I also changed the injectors 'end angle' from 0 to 30 degrees BTC so that less raw fuel is likely to sneak thru the intake to exhaust system before the valves all close and the compression stroke completes. Another ECU programming change I did was to hold the A/F to 14.7:1 until the MAP signal indicates full throttle so the engine doesn't run rich when accelerating at part throttle any longer. Finally, I fully programmed the deceleration fuel curves to lean out the engine when off the throttle during compression braking - this gives an average A/F during decel of 16-20:1 which is OK as there is no lean back-firing or instability indicated . So the GTI is now quiet, smooth, and doesn't smell of a rich exhaust or rotten eggs which is all great news.
Notes: A/F = air fuel ratio; WBO2 - wide band O2 sensor, ECU - engine computing unit, MAP - manifold absolute pressure (vacuum), at 14.7:1 A/F in theory all fuel burns to create nothing but CO2 and water vapour - but in practice also produces CO and unburnt HC (hydrocarbons) which the cat cleans up, rotten egg smell is the result of sulfur in the gasoline combining with hydrogen in the cat to create hydrogen-sulfide (and also typically indicates a rich A/F condition, max cat inlet to outlet temp difference should be under 300 deg F - it is actually burning/converting the pollution and in the process is heating up the exhaust gas significantly so the whole exhaust system post cat will be much hotter the without a cat in the system (you will need to add thermal insulation to keep the heat away from the body of your car as well as any wiring and fuel/brake lines, etc.) - July 16, 2019
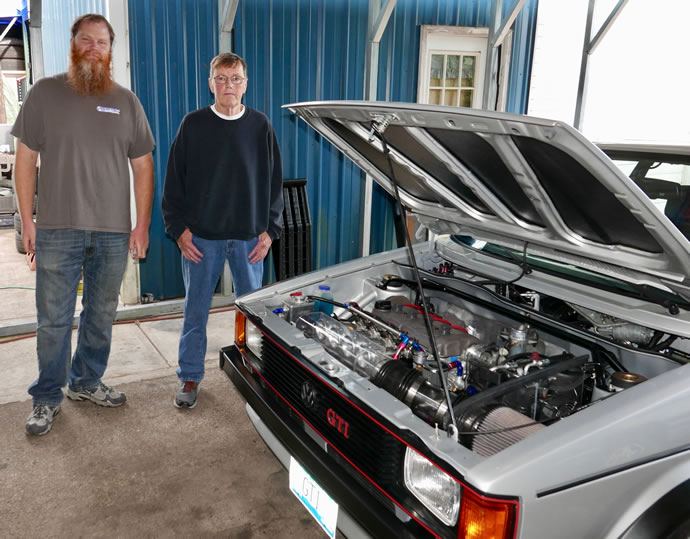
Josh & Mark Arnold, master engine builders - Amity, OR
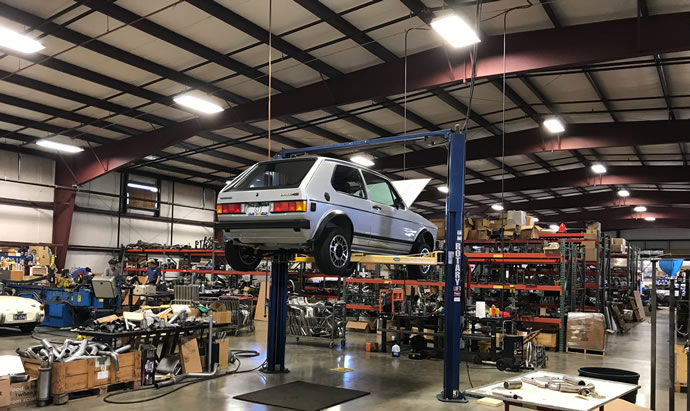
Performing a basic safety check at Techtonics Tuning after the 1st 650kms of driving - Sheridan, OR
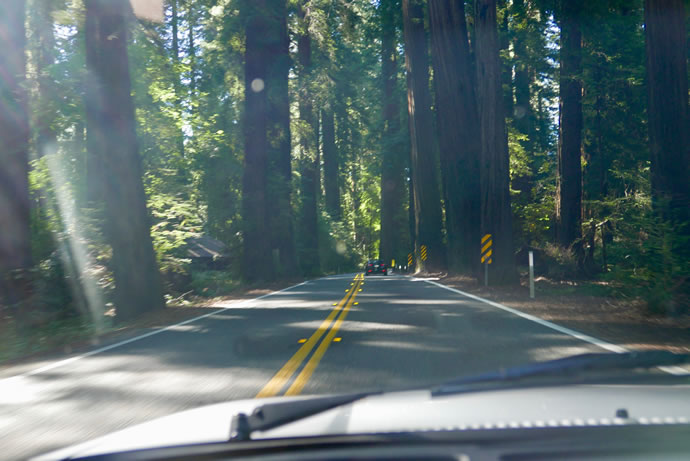
Driving thru the Redwoods in northern California
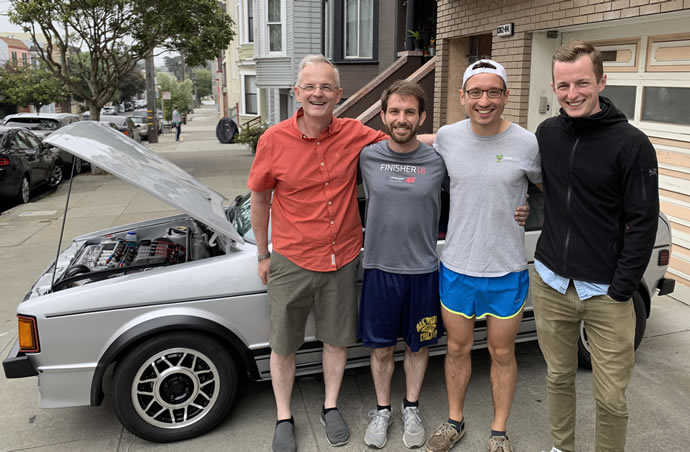
Arriving in San Francisco to pick up my son and head up to Sonoma, CA

Visiting Sonoma Raceway and checking out the race cars in the garage

Driving past the vines in Sonoma valley on the way to Hwy 1 on the coast
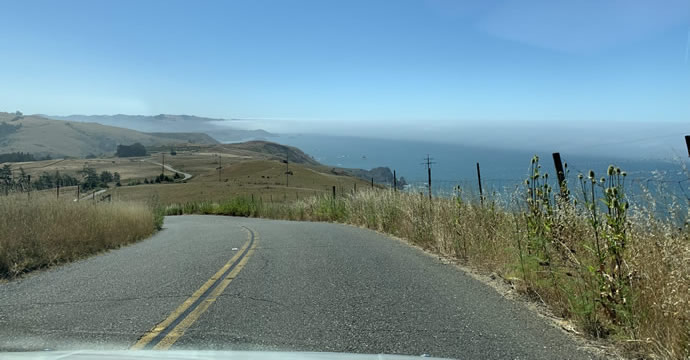
Ahh, the glorious Hwy 1 north of San Francisco - on a perfect day

Crater Lake, OR at 8,000' of elevation
Bandit Muffler in Yakama, WA performing flex pipe replacement surgery
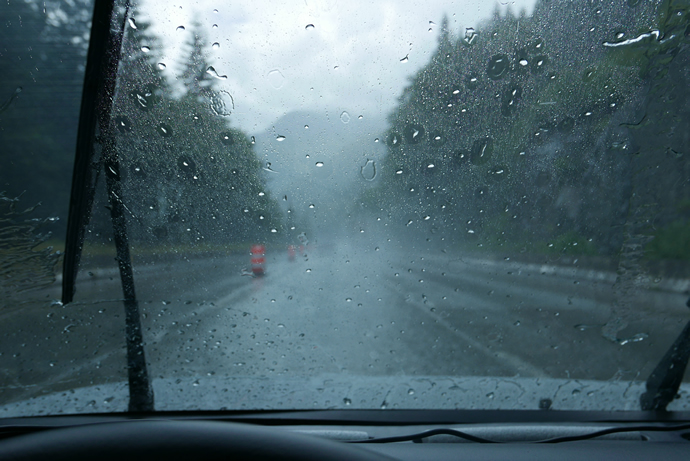
Finally some heavy rain on my trip - as I went thru Snoqualmie Pass, WA on I-90 only 3 hours from home
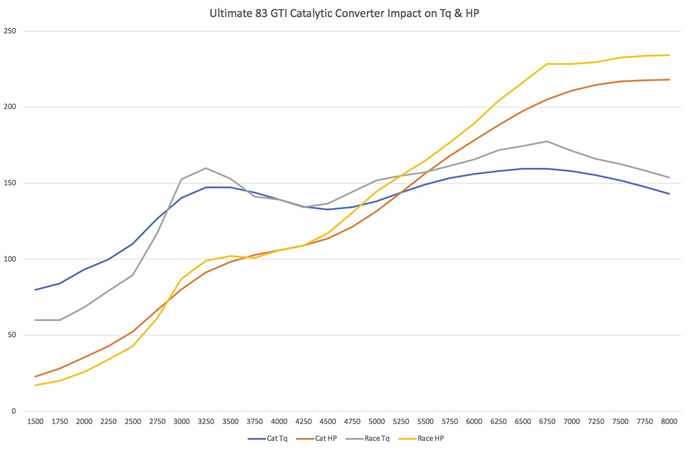
I used my ECU self-tuned fuel table to calculate the torque and HP curves for both my non-Cat and Cat equipped exhaust systems. Previously I had performed multiple dyno tests on the engine, determining that the best results were obtained without the intake ITB air box or filter, 32 degrees of total timing and a 13.2:1 air/fuel ratio, achieving 205hp at the wheels, which translates to around 240-250hp at the crankshaft. Adding the air box and filter cut about 10hp due to impairment of the ITB trumpet air flow characteristics.
I used 0.42lbs/hp-hr BSFC (brake specific fuel consumption) which agrees with my dyno test results and is inline with what race-prepped normally aspirated engines would see, vs 0.47-0.50 for a garden variety OEM engine.
The results were that the non-cat engine with the air box and filter registered 235hp and 180ft-lbs while the cat-equipped engine registered 218hp and 160ft-lbs of torque, but the real story is in the shape of the torque curves: the cat-equipped engine produces up to 40% more torque below 2000rpm and 11% more on average below 4500rpm where the majority of street driving occurs and only loses 7% on average above 4500rpm, and it has the effect of flattening out the torque curve so that it is almost level from 2500-7500rpm - making the engine feel very smooth and willing to rev over its complete rpm range.
On the track it makes sense to remove the air box and the cat and let the engine rip, but on the street it is far more enjoyable to have a car that is relatively quiet, smooth and tractable at all revs - without a fuel-rich smelly exhaust! I am very happy with the results.
As a background matter, running a cat with 288 race cams required leaning out the idle somewhat as well as backing off the timing at idle, plus reprogramming the fuel map to kill all fuel during deceleration - August 3, 2019
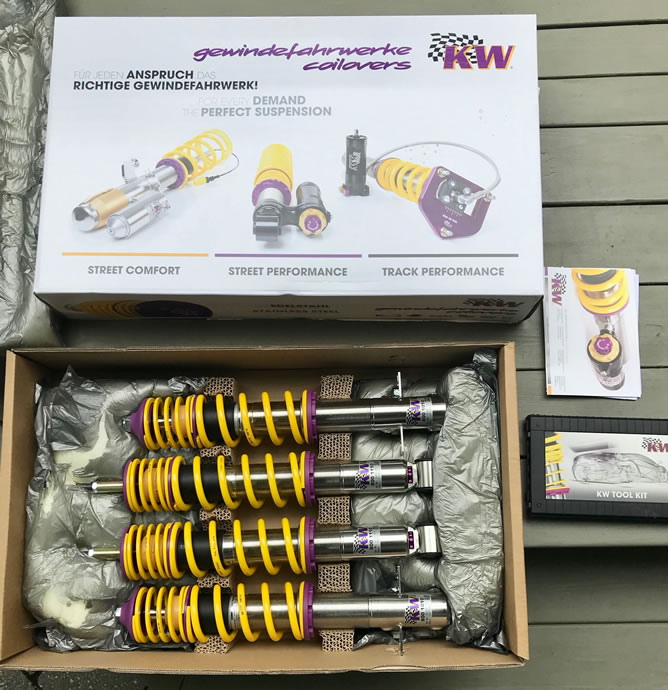
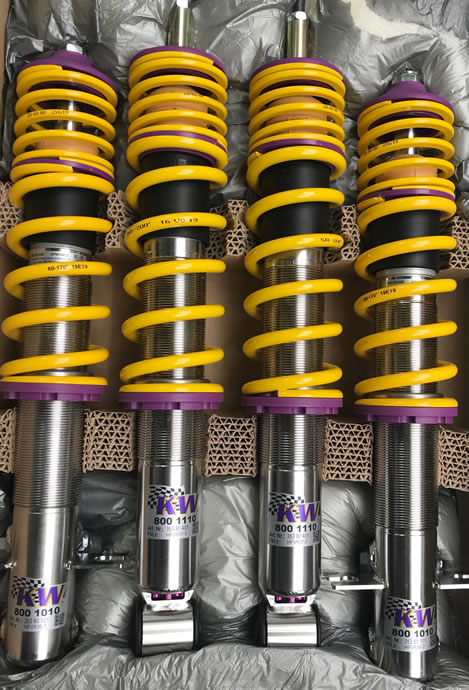
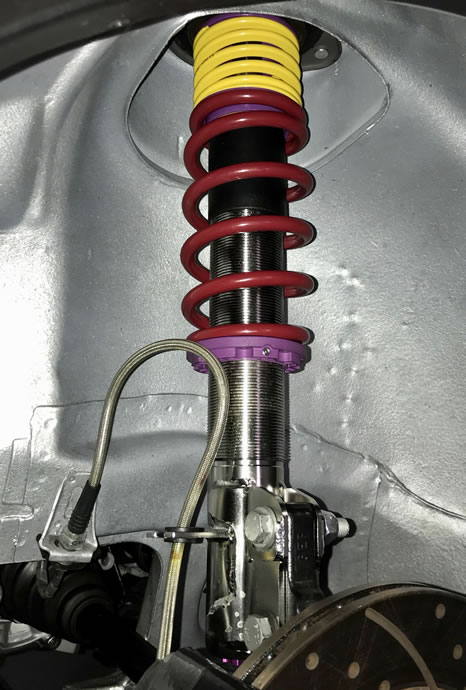
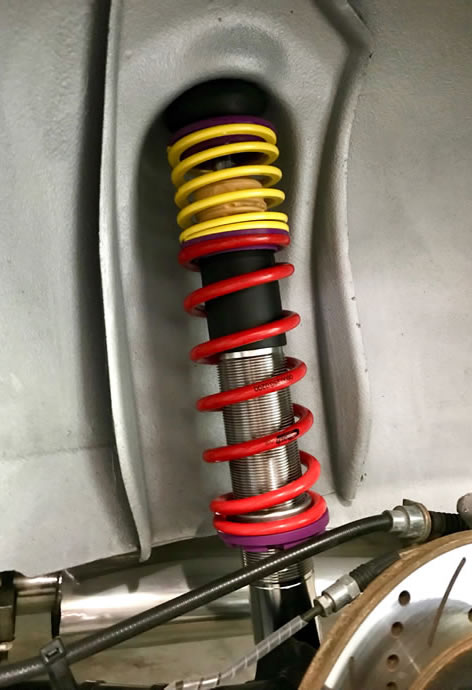
After a 9 week lead time wait my KW Variant 3 p/n 35280001 dual-adjustable struts and shocks arrived from Germany (these days no-one stocks mk1 KW V3 kits so they are 'made to order' at the factory and drop-shipped). And it was well worth the wait indeed - what beautiful components these are, made of stainless steel and polymer materials. And not only are they compression and rebound adjustable over a wide range, but the compression system is a dual valve design that bypasses the adjustable valve when the car hits a rough bump, letting the strut/shock move to absorb the bump without upsetting the car while using the more restrictive adjustable valve for control over normal road surfaces - making the system much more 'street friendly'.
The V3 kit comes with 342lbs/in front and 285lbs/in rear springs with additional 'tender' springs that are meant to keep the springs under slight compression when the wheels are fully unloaded. The problem with 342/285 springs for a mk1 VW is that they are a bit too soft on the track and a bit too stiff on the street. A great track setup is around 400-500lbs/in front and 300-400lbs/in rear (with a big rear sway bar) for a 2000lbs mk1 VW and a tolerable street setup is around 250/200 - many people run stiffer than that on the street BUT they put up with a lot of crashing over rough pavement - trust me, I have driven almost 10,000kms on 300/250 springs with seriously stiff racing Bilstein struts/shocks and they don't suit themselves to about 50% of the roads out there in the real world.
So I swapped in my newer Eibach 7"/8" 250/200 springs (2.5" ID) for the KW 342/285 springs and dialed back the compression/rebound to 1 click off 'full soft' and the KW V3s became truly transformative. All of the banging and crashing over rough surfaces was gone and in its place is a supple ride that is still quite sporty, limiting body roll to a few degrees when yanking the wheel back and forth (let's call this 'drive with spouse' setting). Steering feels lighter at center, the car feels calmer and more confident, and it still has very good turn-in and dynamic movement control. I next dialed back in more compression/rebound stiffness: +2 clicks is more sporty without harshness (will be my default setting for daily use), +3 clicks starts to get into the harsh mode but still acceptable for general performance use (my boy-racer mode), +4-5 clicks starts to enter into the prior Bilstein zone - very stiif and not very street triendly (track use ...). Now I realize how stiff my Bilstein p/n V36-0059 rally race front struts really were - they are perfect on the track with 440lbs/in springs but are too much for me on the street - August 26, 2019
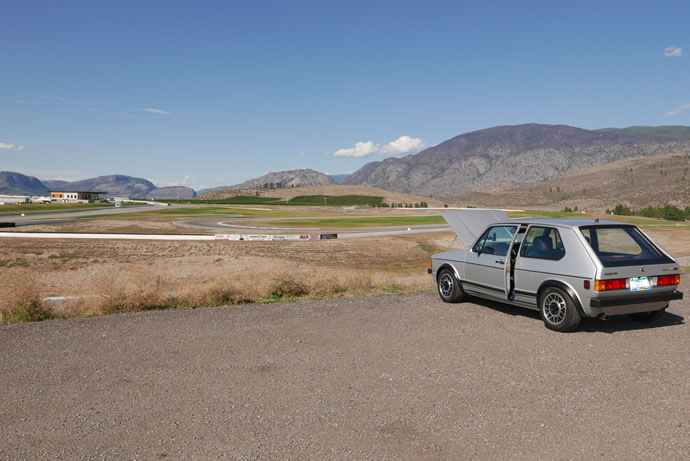
In mid September I completed my last trip in the GTI - heading south to SR20 at Mount Vernon and then driving up into the North Cascades Mountains, past the Diablo Dam, and then thru lots of high altitude lakes and canyons, eventually emerging at Winthrop, and then ultimately I turned north and headed up into Canada at the Osoyoos boarder crossing, and then after a night there, I headed back home via the Crowsnet Hwy back over the Cascades.
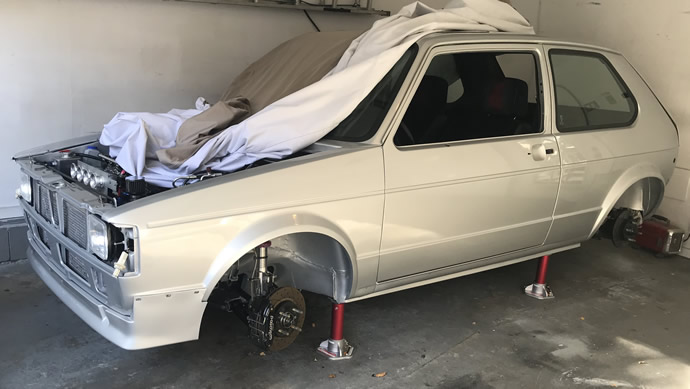
Once I was back home Geoff Yue & I completed the photo shoot for AutoStrada Magazine. I then stripped out the windshield and replaced it with new glass, pulled out all of the driver side glass, moldings, bumpers, fender flares, stripes and then had 2/3 of the car re-painted and re-wet sanded/polished, addressing almost all wear and tear abuse. After a complete re-detailing the car looks the best it ever has - December 1, 2019
At the Area27 race track after driving SR20 ...
Stripped and (almost) ready to be re-painted ...
Geoff's amazing photo shoot results ...


Index of Project web pages:
Project Overview, Goals & Specs
Project Car Initial Condition
Chassis Development
Bodywork & Paint
Suspension, Steering & Braking Systems
Engine, Oiling, Cooling, Transmission & Exhaust Systems
Electrical, A/C & Fuel Systems
Interior
Performance Validation
Final Street Trim Conversion
VW Vortex thread on this project
Videos # 001 - 049 (Feb 2013 - May 2014)
Videos # 050 - 099 (Jul 2014 - Sept 2015)
Videos # 100 - 149 (Sept 2015 - May 2017)
Videos # 150 - 181 (May 2017 - Dec 2019)
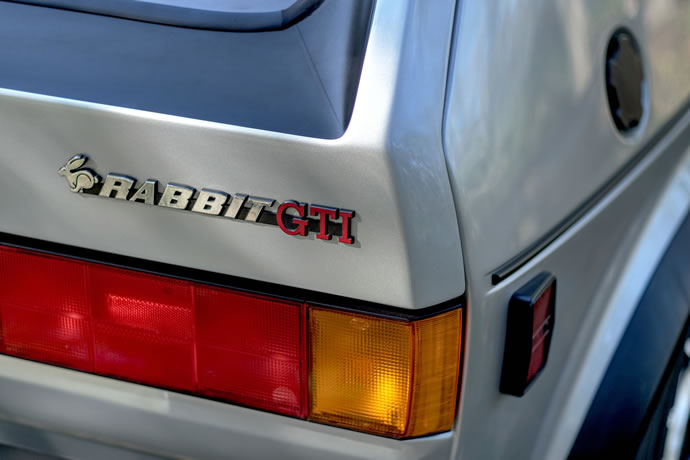
My original 1983 Rabbit GTI (owned 1983-1987)