
Project Ultimate 83 GTI
Chassis Preparation & Fabrication
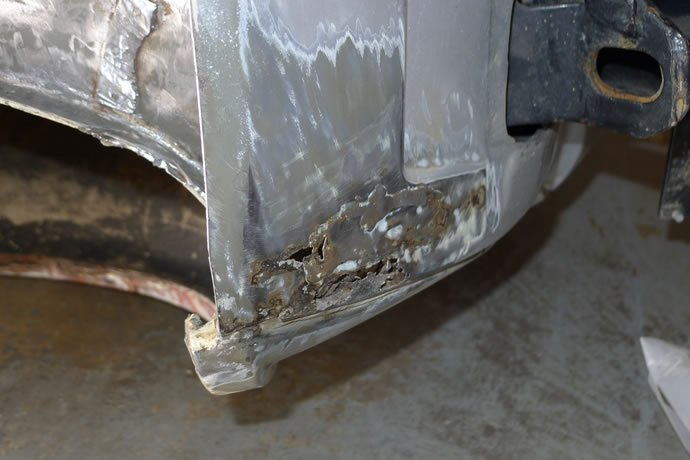
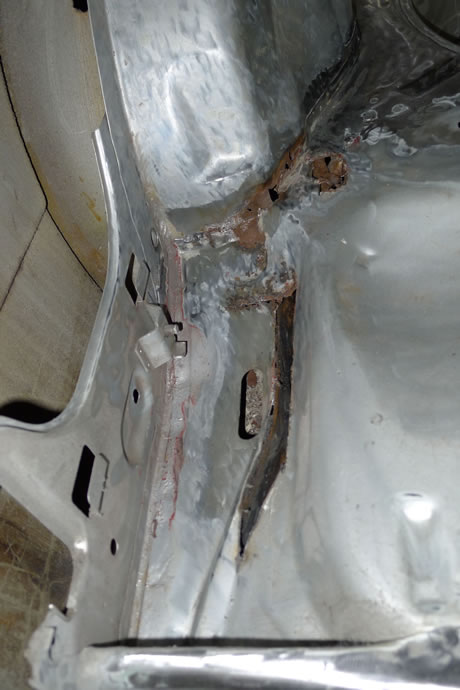
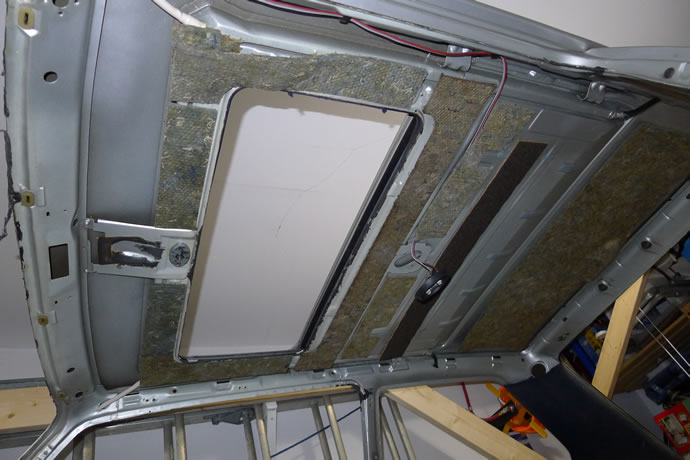
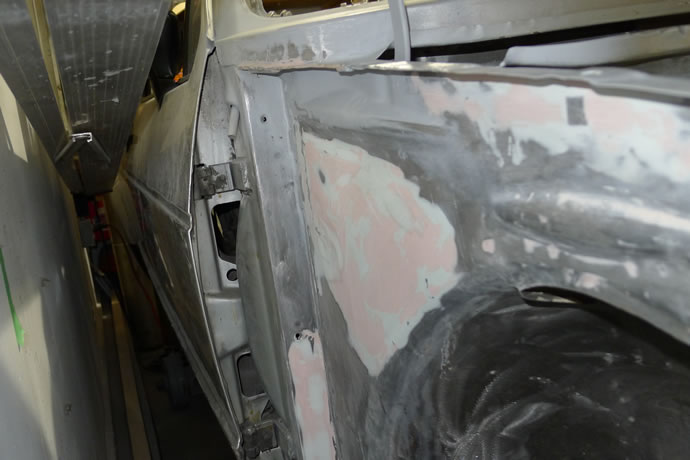
The weak link in any Mk1 Golf is the rust hidden in the pinch welds beneath the thick layers of latex sealant – after 35+ years the latex has often shrunk, cracked and moisture has found its way into the non-galvanized mild steel unibody chassis to rot away silently. I hear stories of rust-free Mk1 cars and I find it hard to believe them as you need to spend the time and effort to strip the underside of the chassis to its bare metal state to know what you are really dealing with – it is a long, slow, painful process that involves vibrating tools, wire wheels, solvents and a host of techniques to slowly remove the messy latex, and then you need to grind off all of the factory pinch-welded tabs that hold wires and hoses through-out the car – these are prime areas where rust will re-emerge.
Once the rust is discovered you have 2 choices: cut it out or acid etch it away, and then fill the spaces with new sheet metal and/or brazing techniques to fill in pitted thin sheet metal – depending on the car this is typically an additional 500-1000 hours of effort if done thoroughly and correctly.
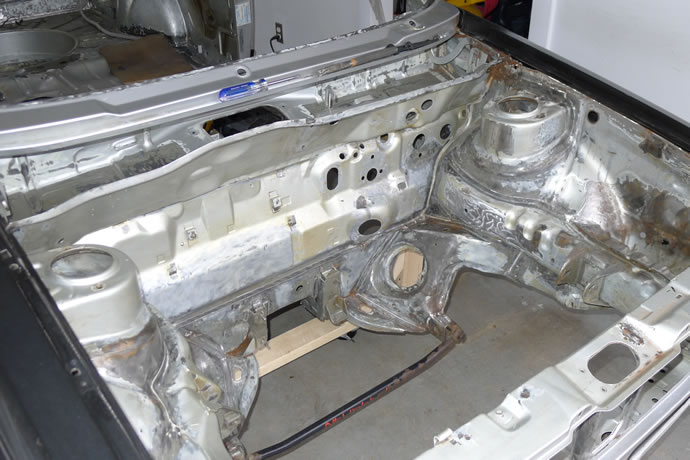
At the bare metal stage I had the opportunity to stiffen the unibody frame. This involved welding in a rectangular tube sub-frame along each side of the car and also boxing in the interior floor-boards with 1/8” steel plating, and doubling up the firewall and rear seat vertical walls – creating a very stiff sub-structure for the rest of the car to leverage. In the engine bay tubular braces were added that extend forward from the strut towers to the front of the horns, supporting a bolt-in engine brace that connects the horns/bumpers to the front engine mount – another especially weak area for the Mk1s. In the back, the area around the rear axle mounts was strengthened and tied into the frame rails.
Further stiffening is provided by a bolt-in upper strut brace and a lower A-arm brace. Together this bracing eliminated all chassis flex thereby providing for a level of handling and responsiveness that few if any Mk1 Golf owners have experienced (mainly full-caged race cars).
The timeline story of the chassis prep and fabrication process
Removing the Seam Sealer
There is absolutely nothing enjoyable about the endless hours required to get rid of the old seam sealer that was applied liberally all throughout the underbodies of these mk1 cars at the factory. The Internet is chock full of stories (a lot of complaints) and recommendations for removing old seam sealer. The bottom line is that all of the seam sealer needs to be removed as there will be hidden rust and damage to the chassis that you will otherwise miss. Here is my strategy for attacking this nasty job:
- You need to start the rough removal process with either an electric heat gun or a vibrating mulit-tool with a caulking knife attachment. The heat gun is a slower process, and it gives off some gases so you need to keep the area ventilated, but it doesn't scratch the underlying metal too much unless you get carried away. The multi-tool process is 2-3x faster, but it tends to scratch the metal unless you apply very little pressure and go slower. You will need to spend more time cleaning up the metal afterwards. Your choice - in fact you can combine both approaches.
- If you use an electric heat gun you should set it to its highest temperature. Don't use a torch unless you want to risk a fire and also want to breathe in a lot of harsh fumes (that said, you can't avoid some fumes so leave the garage door open while doing this). Warm up the seam sealer in a small area until it softens, while also directly heating a metal scraper that is 2" or less in width (use a flat-head screw driver for tight spots). Slowly push the hot metal scraper edge into the sealer and start to work in a line at a slow rate of maybe 1" every 5-10 seconds.
- When an area is basically clear of the sealer using either the heat gun or the multi-tool process, take a wire brush mounted on a drill or an angle grinder (or use those expensive but very effective 3M Roloc Bristle Brushes - try the 36 grit first) and remove the remaining sealer. If you try and start the sealer removal process by just hitting it with an abrasive brush or wheel you will make a huge mess of your garage and will plug up the tools in a hurry as well - get the majority off with the heat gun and scraper or multi-tool first.
- Then polish up the metal further with sandpaper or other metal prep abrasives
- Sweep up the mess on the garage floor and then use some compressed air to blow the remaining dust off the car, tools and garage surfaces.
- Finally, you can then start to inspect the metal and plan your cutting/welding accordingly
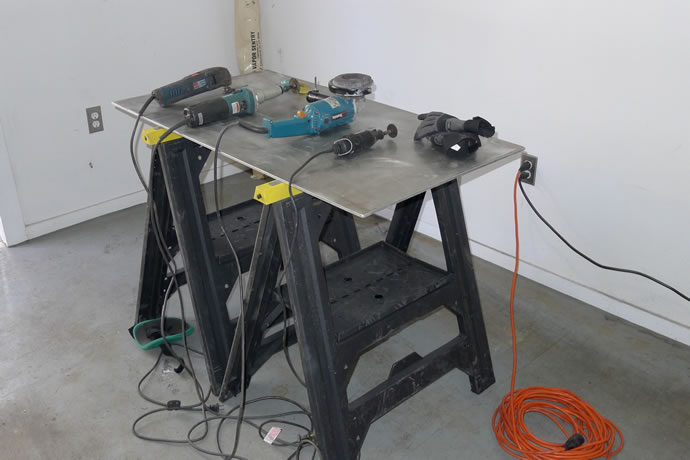
The tools I typically use in the garage to prep the chassis (from left to right): Bosch vibrating multi-tool with caulk knife attachment, variable speed die grinder (for cutting, grinding and surface prep/sealer removal), angle grinder, and a dremel tool (for precision cutting and grinding) - sitting on my make-shift welding table (1/4" aluminum sheet) ...
The first inner fender took me about 90 minutes to do up to the point shown here (I had not finished the second half in this photo) ...
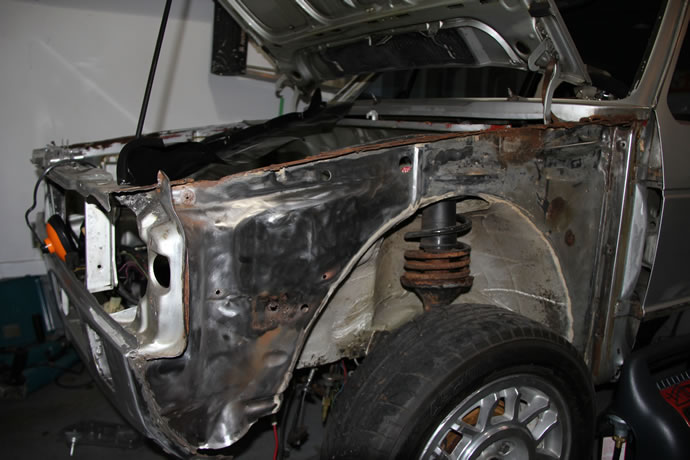
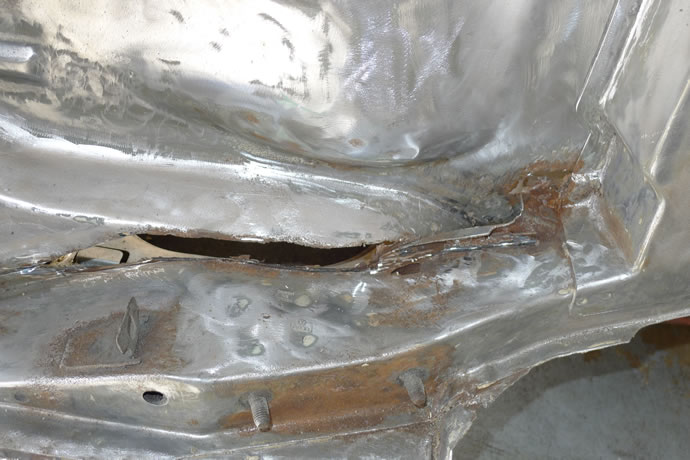
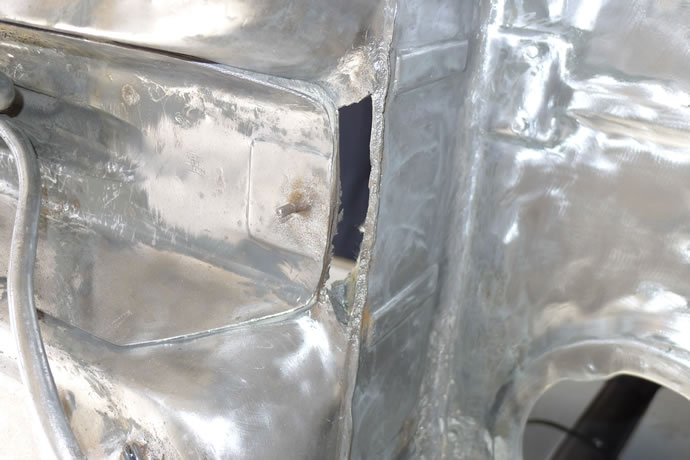
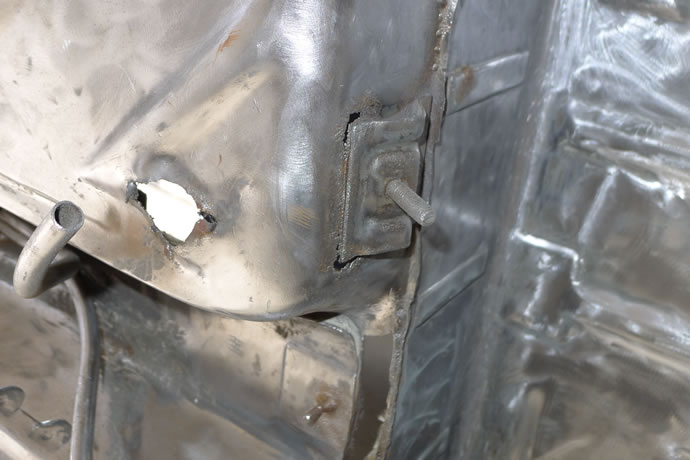
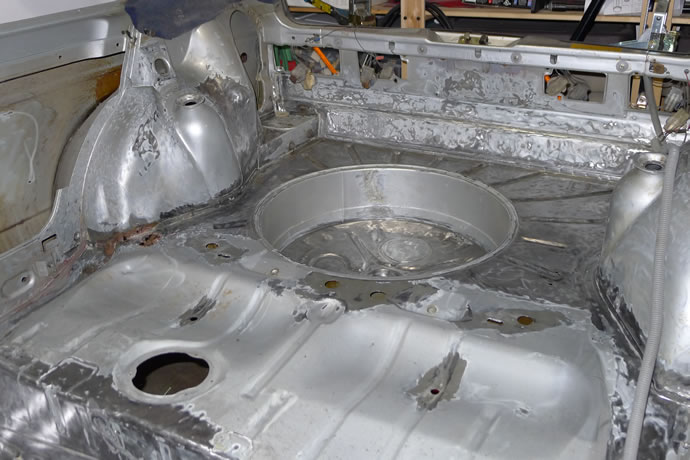
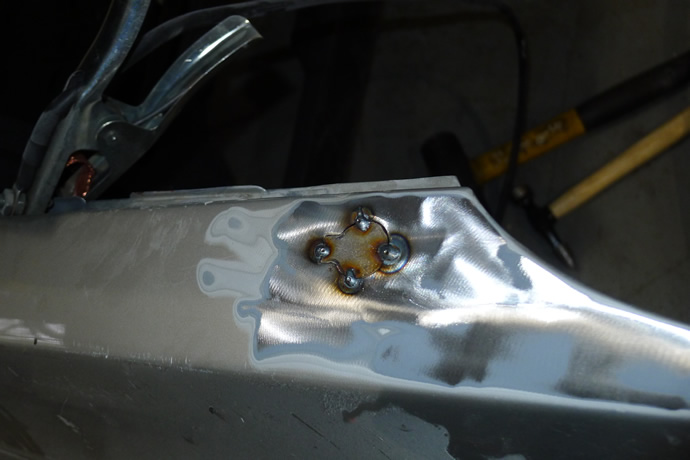
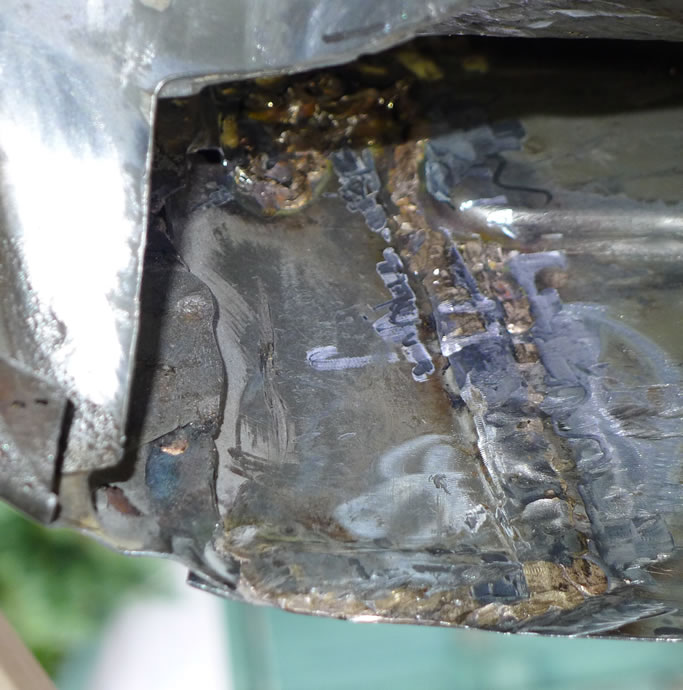
I also took my new plasma cutter and used it to quickly and easily remove the rusted out battery tray (see initial condition photos for a comparison). But I had the power turned up a bit too high and I burned a few small holes into the support horns which I will have to weld back up. After using the plasma cutter for the rough cuts I cleaned everything up with an angle grinder. You can see that I will have to cut out some rot on the lower inner fender and weld in and grind flush some new sheet metal - a common thing on many parts of this 30+ year old chassis). I will weld up all of the spot welded seams in the engine compartment and will also do a moderate amount of 'smoothing' ...
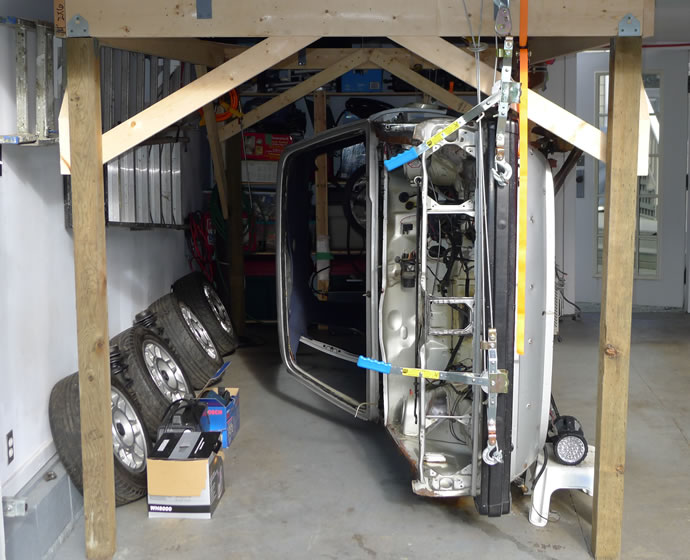
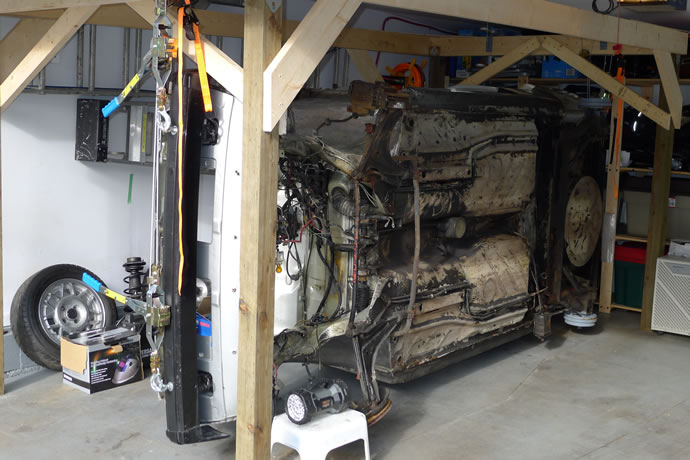
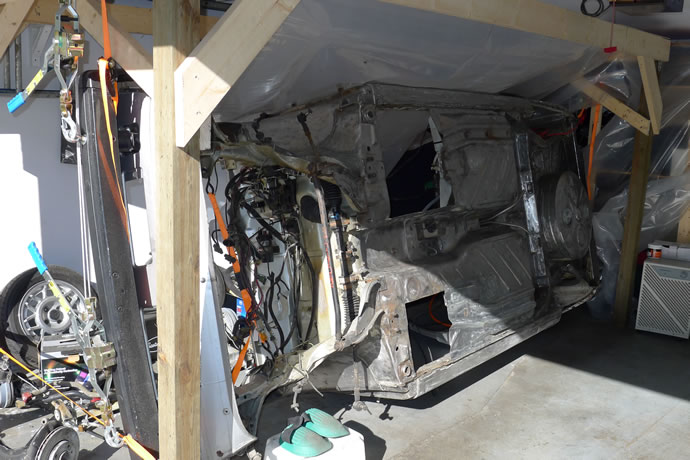
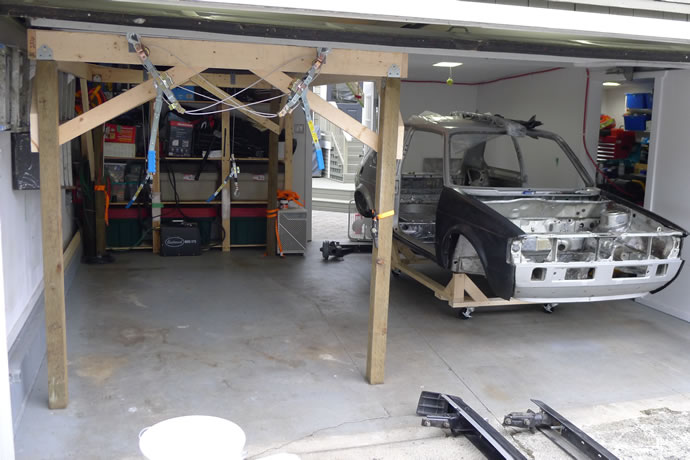
Here is the innovative way I came up with to flip over the car in my garage. Using double 2x6 headers and 4x4 posts, and some careful bracing of the corners I was able to support the car on 'come-alongs' and rotate it in any position by moving the come-alongs to different mounting points. Since my garage is small I had to fabricate and weld up some brackets due to the length of the come-alongs. I only had 0.25" to spare above and 1-2" on each side and bottom. Tricky but this shows that it can be done. It will make the job many times easier so will be well worth the effort (and the $300 in materials) ... check out the video on this
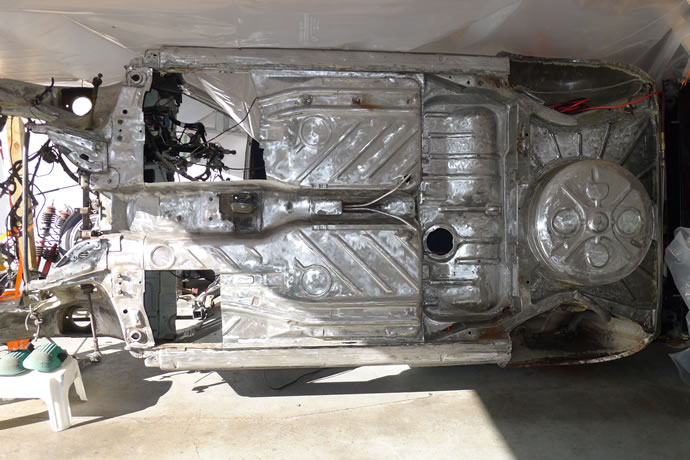
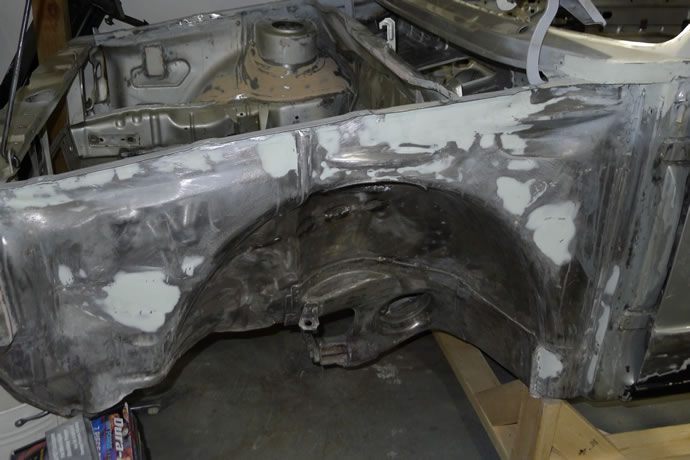
After a week of of removing the seam sealer (not quite finished - but close now) the car underside looks like this - February 22, 2013 ...

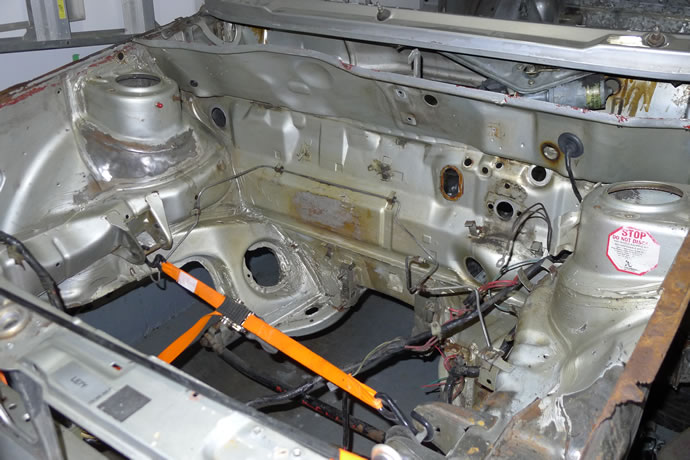
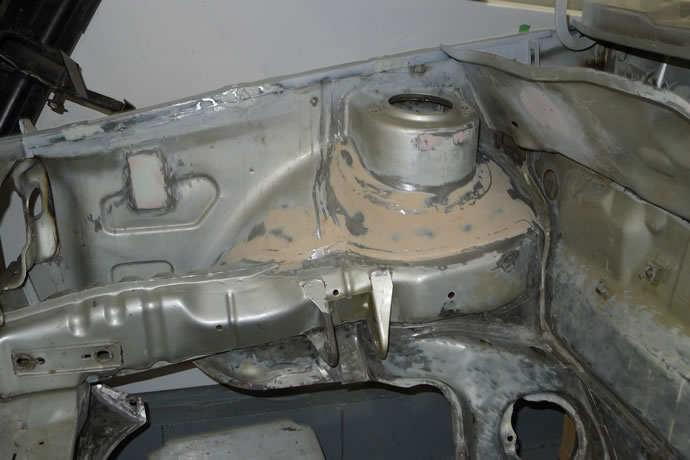
After another week of of removing the seam sealer and sound deadending materials from the interior, and stripping out the last components, the car inside looks like this - March 14, 2013 ...
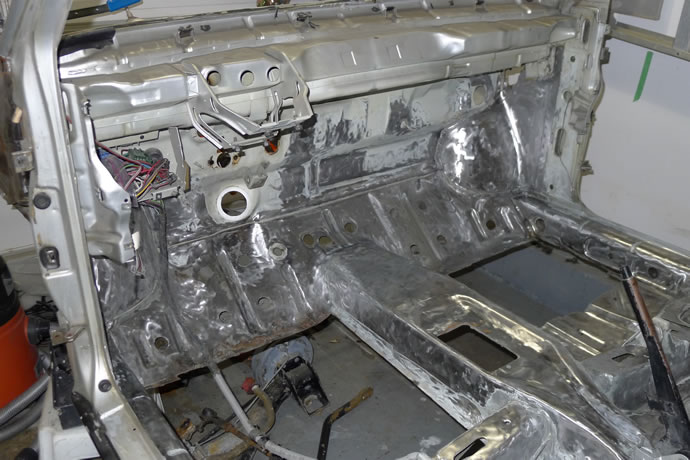
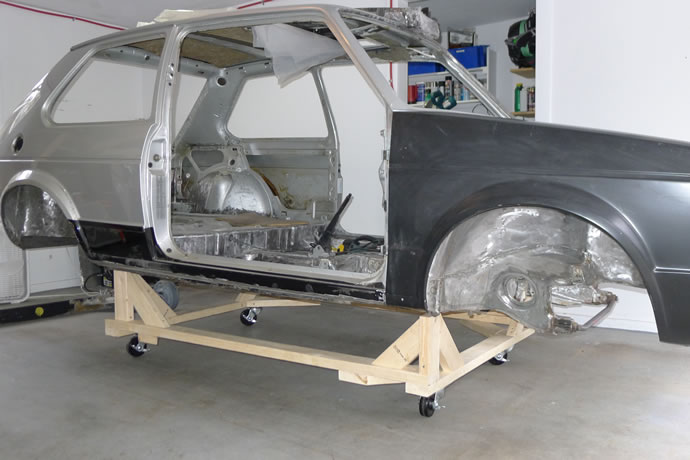
Building the rolling chassis stand, test mounting the inner & outter fenders, starting the engine bay smoothing process - April 6, 2013 ...
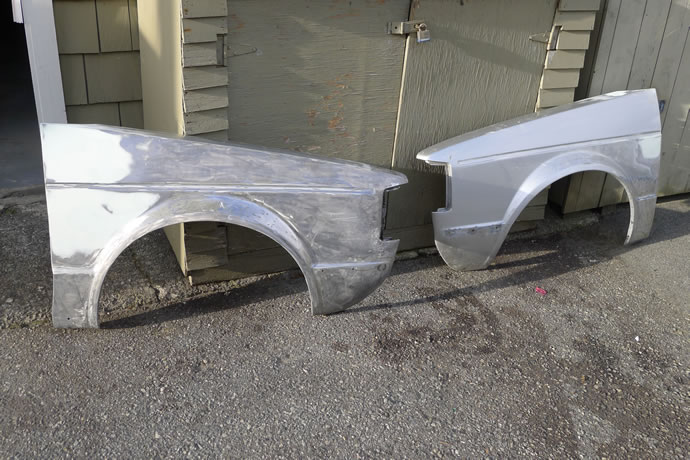
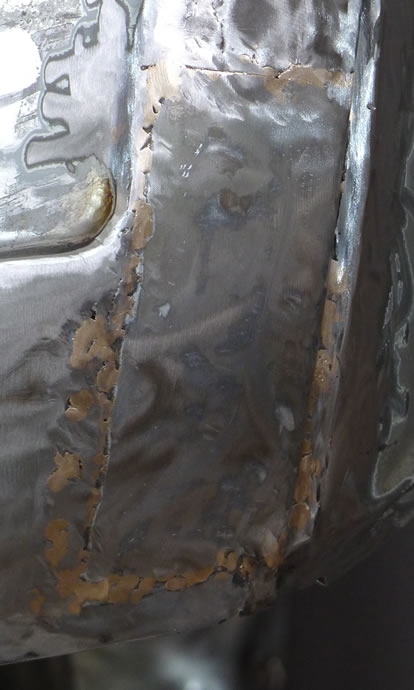
After the test mounting of the new fenders it became clear that they were poorly made and would not fit correctly so the original venders were cleaned up, the rust cut out, and holes from aftermarket side turn indicators welded up - April 10, 2013 ...
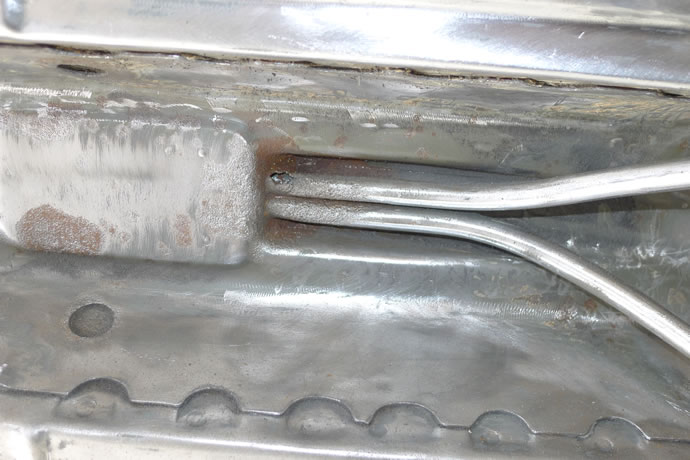
Spot-welding a metal patch in place before pulse/stitch welding it all the way around ...
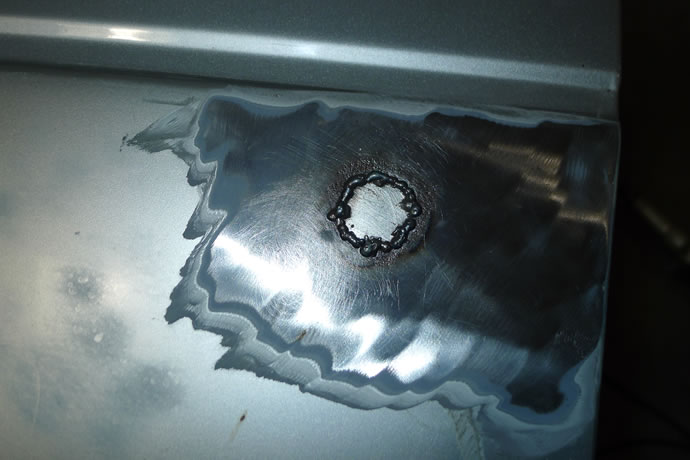
The result of pulse welding another hole before grinding (the metal was too thin and rusted to allow for continous welding without blow-thru) ...
The original fenders after some acid etching, holes welded up, and body filler applied and sanded (I still have to complete the paint stripping later on) ...
I spent the last few weeks carefully cutting the new upper/inner fenders to size and then test fitting everything so that the outter fender gaps against the hood and doors were correct and then when everything was perfect I spot welded the inner fenders in place. I also had a lot of challenges (successfully tackled) welding up related metalwork that was replacing rotted sections of the engine bay area - May 4, 2013 ...
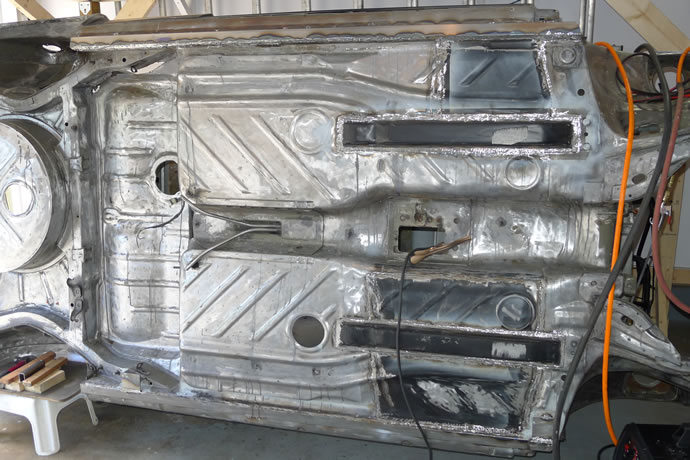
The new upper/inner panels and associated new metalwork welded in place, plus body filler added and sanded once the welds were ground flush ...

The initiation of the engine bay smoothing process after I seam welded in the strut towers and the related metwork ...


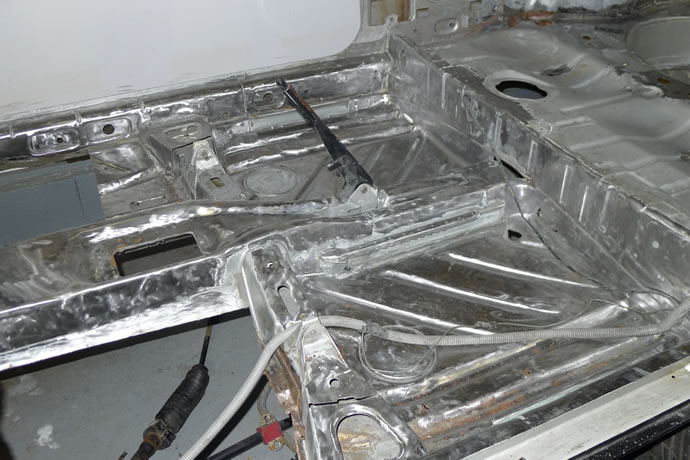
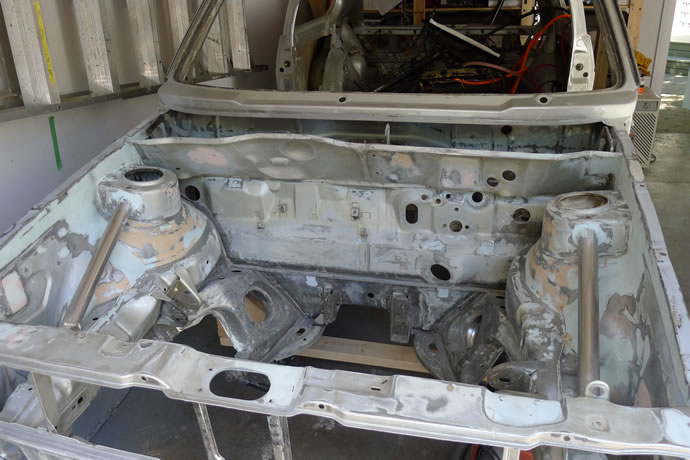
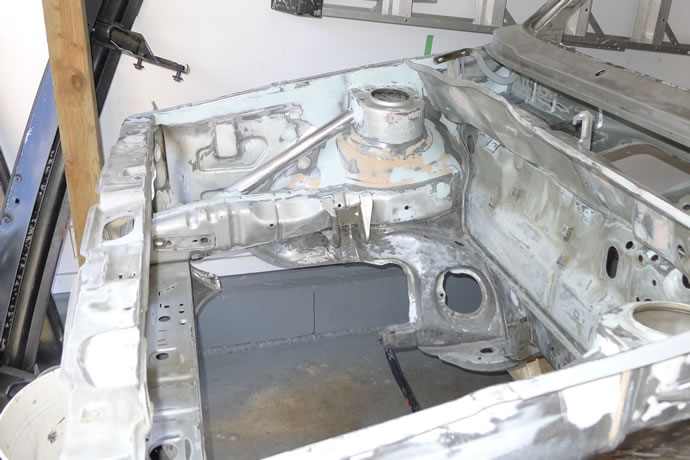
I finally completed the engine bay area welding and smoothing process today and started on the underside frame connector/floor pan structural repair/strengthening process - May 19, 2013 ...
You can see the tubular front 'horn' supports which brace the core support area. There will also be a bolt-in front engine mount support to keep everything in alignment when the 300hp engine will be trying its best to twist the A1 chassis into a prezel.
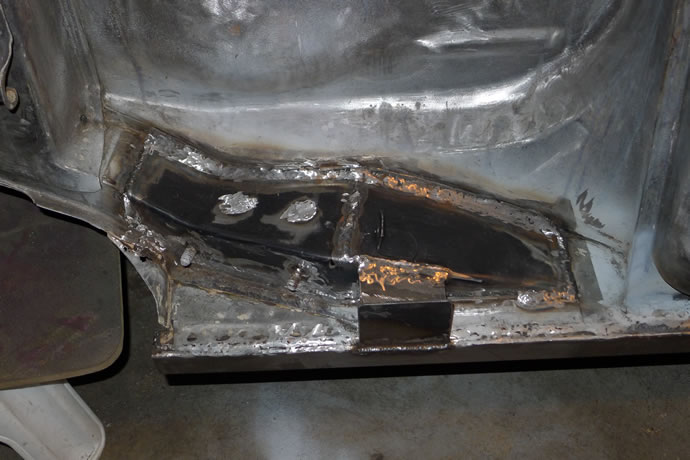
I also started on the task of repairing the damage caused by prior owners who were lazy bastards that jacked up the car in the wrong places, crushing the central unibody structure just behind the correct jack points. I had to cut open the frame tubes and hammer the floor area back into alignment. Given that there was some rust in this area it will give me an opportunity to completely revive this area. I will also be installing 1x1.5" front-to-rear frame connectors under this area and will also add 1/8x3" plate steel on the inside of the frame to further stiffen things up.
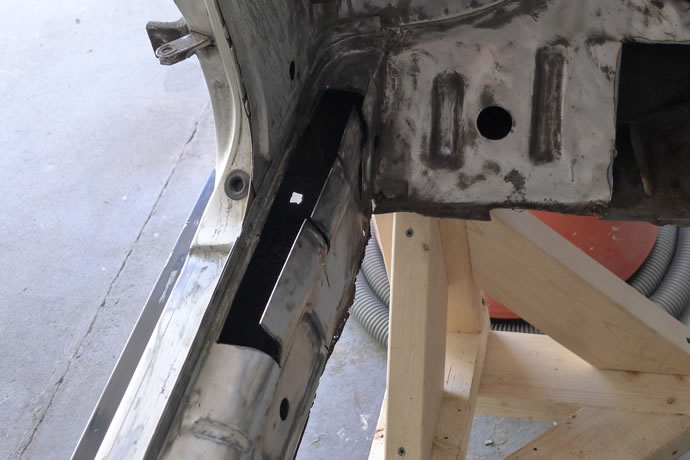
After a big push I managed to get the 1.5"x1" rectangular tube front-to-rear frame connectors, floor pans and additional OEM bracing installed (and also fabricated new 'lift points') - June 9, 2013 ...
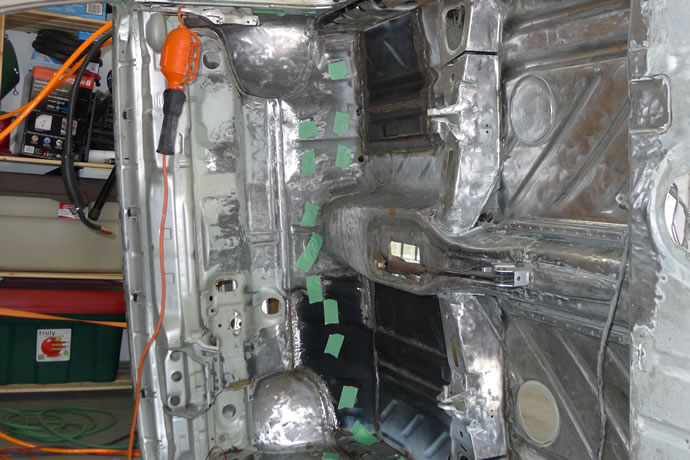
I will smooth out the welded seams with body filler to make everything look OEM
Any time you try and MIG weld thin sheet metal you risk 'blow-thru' and this is especially true with older vehicle sheet metal where there has been some rust. I wanted to try my hand at MIG 'brazing' using the same modern European techniques that are required when working with thin boron doped high strength steel panels and/or zinc plated panels - in either case MIG welding puts too much heat into the base metal and both weakens it and vaporizes the protective Zinc coating. So I managed to source some 0.030" diameter MIG brazing wire and adjusted the settings on my welder to lower the wire feed speed a bit and dial the voltage/temperature setting to the lowest that my welder will go. It worked! The bronze flowed into the gaps and in between the overlapped metal on the lower rear quarter panel patch and I did not once blow-thru the base metal. Highly recommended for sheet metal restoration work ... - June 24, 2013
One awesome feature of MIG brazing is the ability to sand off the excess bronze without impacting the base steel panels ... (you need to punch some small holes or slots in the top sheet that overlays the lower sheet to allow for deeper flow of the brazing material. Yes, you can butt weld sheet metal but you need to provide enough of a gap to allow the filler material to flow thru and create a bead on the reverse side - think of the bronze filler material as a type of steel 'glue')
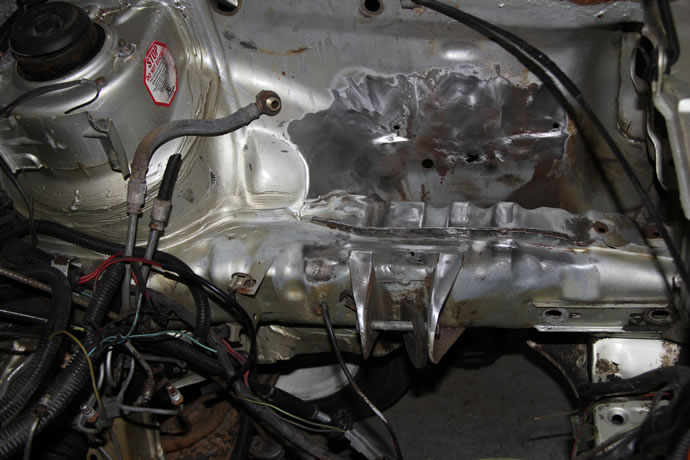
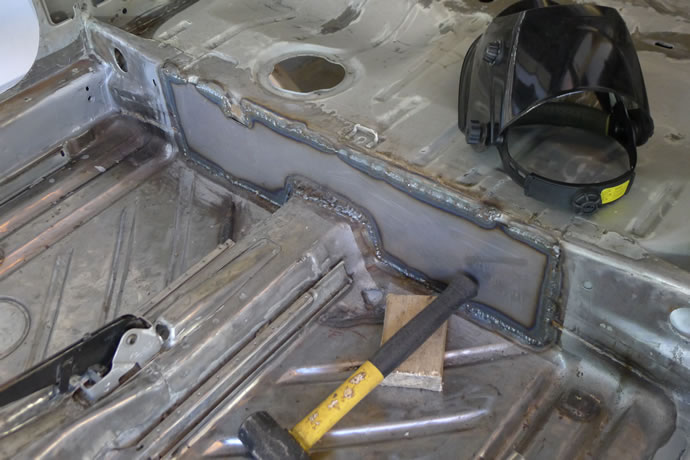
I also found enough time this weekend to weld in additional heavy gauge sheet metal around the rear axle beam mounting points to stiffen/strengthen this area of the chassis ...
Here you can see the 14 gauge sheet metal bracing panel that I added to help create lateral/side-to-side chassis stiffness ...
I have cleaned up the OEM 'frame rails' and primed them with zinc acid-etch weld-thru primer ...
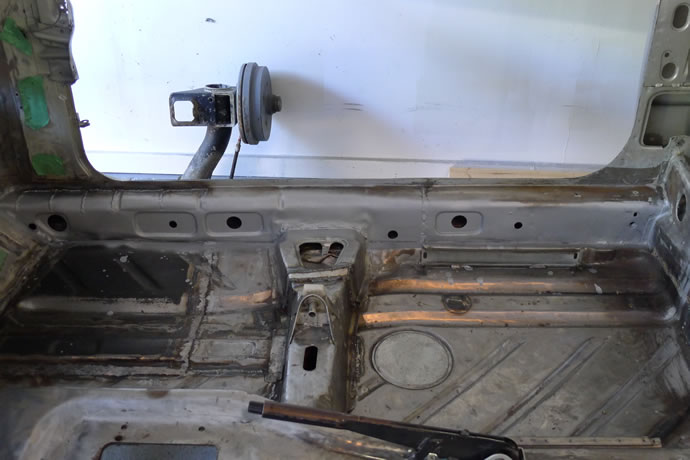
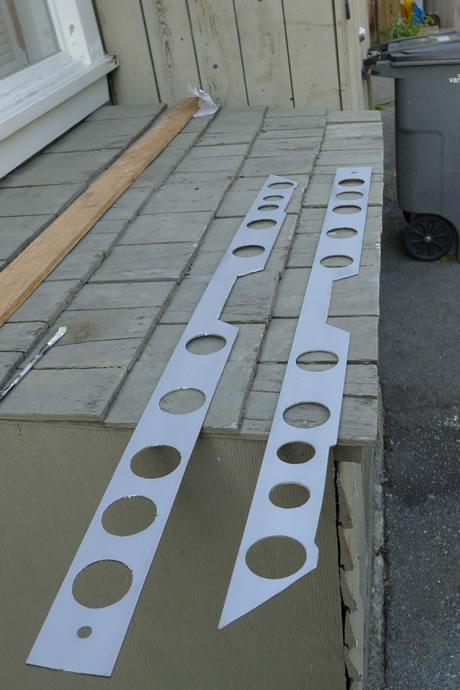
These frame rail stiffening pieces were made from 1/8x3" steel and then plasma cut to both lighten as well as allow for access to the OEM frame rail access holes ...
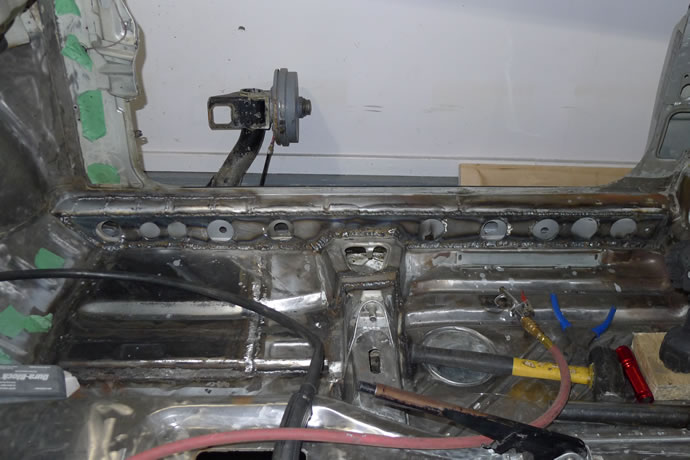
And then they were welded in place - this completes the major welding tasks for the chassis and now I can complete the minor welding/brazing tasks and get on with preparing the metal surfaces for epoxy primer ...
Index of Project web pages:
Project Overview, Goals & Specs
Project Car Initial Condition
Chassis Development
Bodywork & Paint
Suspension, Steering & Braking Systems
Engine, Oiling, Cooling, Transmission & Exhaust Systems
Electrical, A/C & Fuel Systems
Interior
Performance Validation
Final Street Trim Conversion
VW Vortex thread on this project
Videos # 001 - 049 (Feb 2013 - May 2014)
Videos # 050 - 099 (Jul 2014 - Sept 2015)
Videos # 100 - 149 (Sept 2015 - May 2017)
Videos # 150 - 181 (May 2017 - Dec 2019)
My original 1983 Rabbit GTI (owned 1983-1987)