
Project Ultimate 83 GTI
Bodywork & Paint
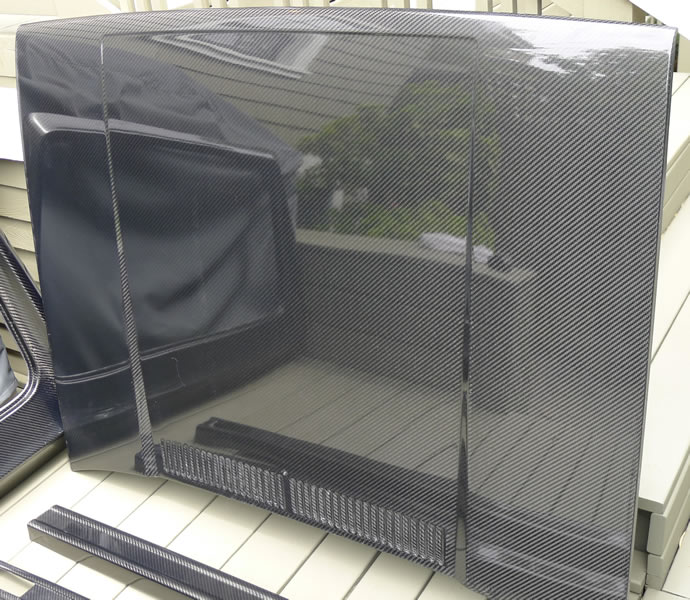
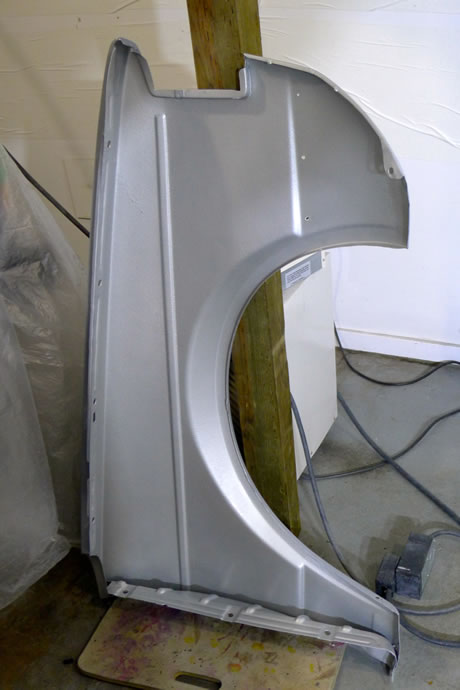
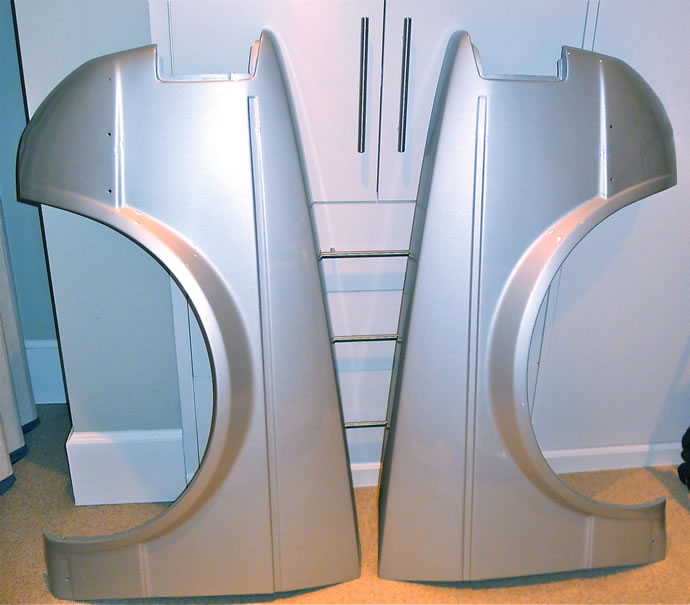
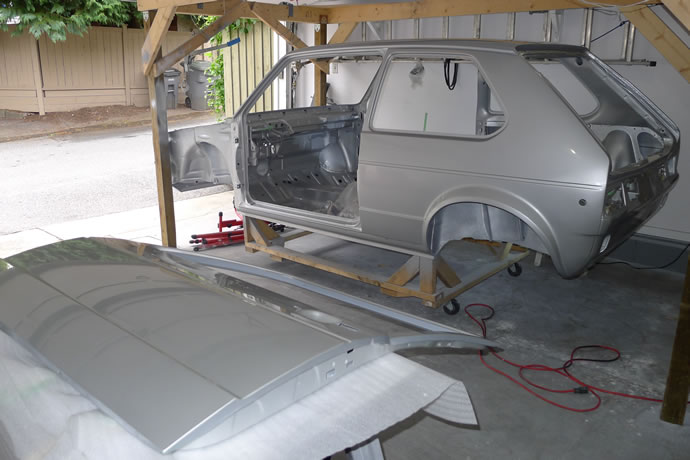
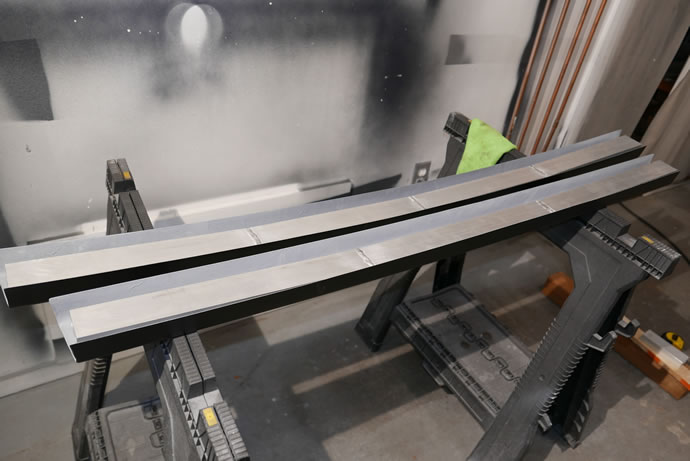
The factory hood, hatch and bumpers were replaced by carbon fiber units that required careful fitting to ensure consistent gaps and a smooth finish. New aluminum sub-structures were fabricated for the euro sized carbon bumper skins to glue onto and then they were painted in black epoxy – the completed bumpers only weigh 5lbs each now but they are surprisingly strong.
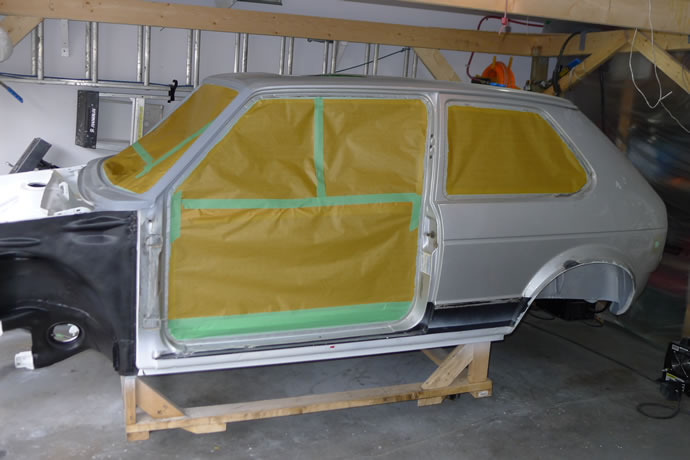
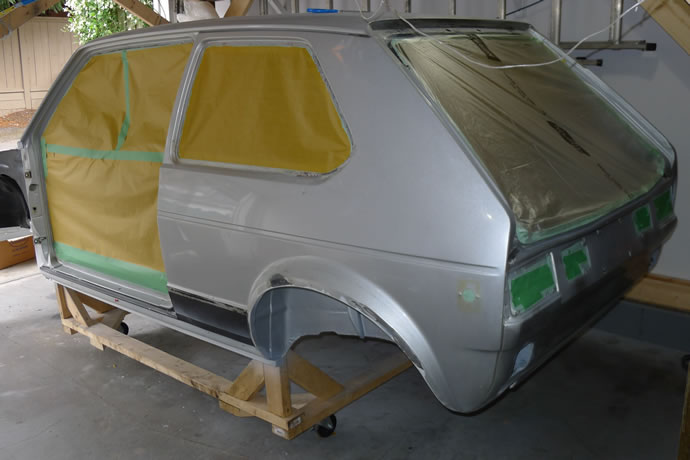
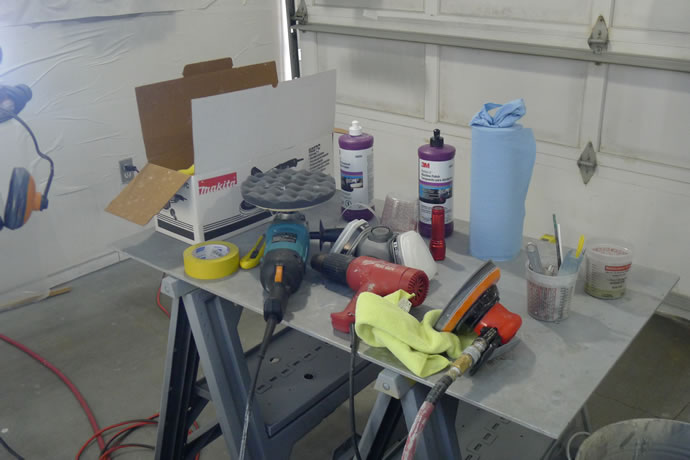
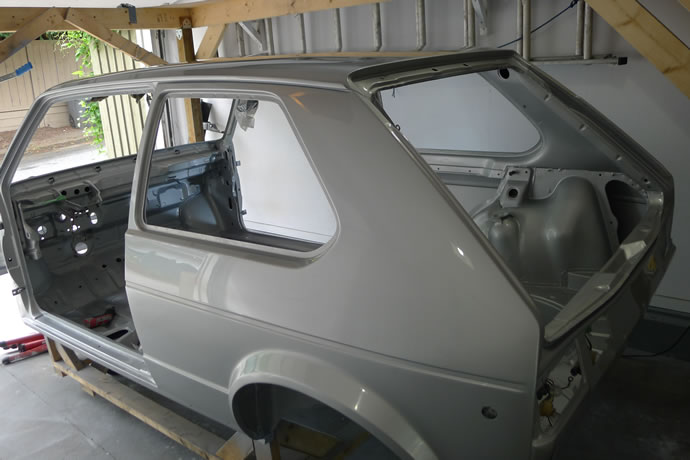
After the metalwork and fiberglassing was completed the bodywork and paint began. For my car there were 3 coats of epoxy paint applied to the bare metal, then rubberized undercoating in the wheel wells, then high-build primer on the exterior panels, then block sanding and more high-build primer, over and over until the panels were dialed in, then another sealer coat of epoxy, sanding from 400-1000 grit, then 3 coats of silver base, then 3 thick coats of clear, then endless hours of hand wet sanding of the clearcoat, starting at 1000 grit, and eventually moving all the way up to 3000 grit before the machine polishing work began, then a final hand application of finishing wax. This was a long process that took over 2 years end-to-end.
The timeline story of the bodywork and painting process
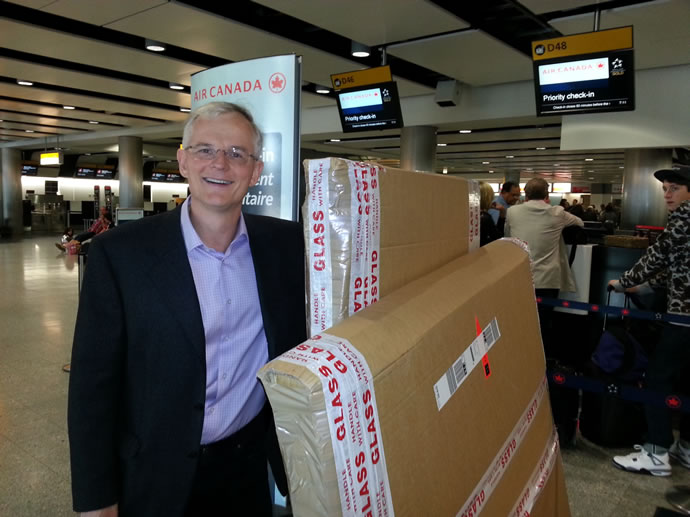
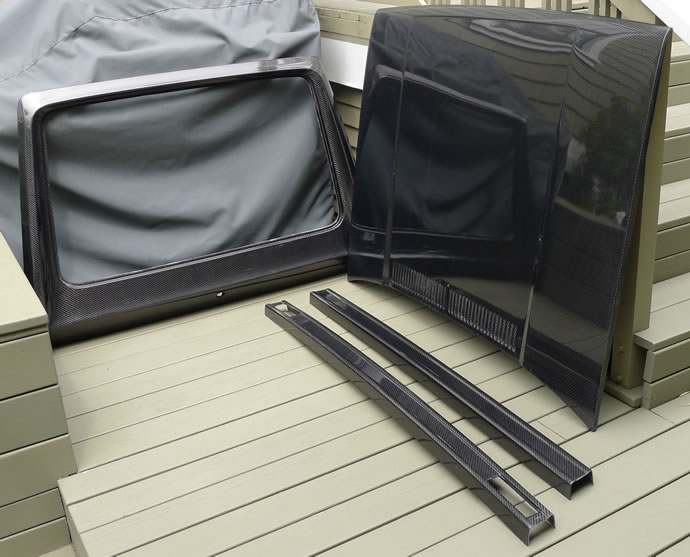
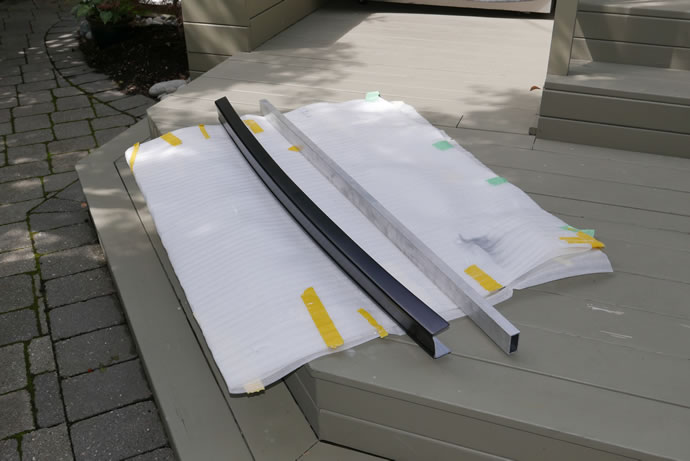
I just got back from the UK and brought back the beautiful and extremely light weight carbon fibre body panels and bumpers made by LWS Design for this project. I am super impressed with their customer service as they hand delivered everything to me at the airport before 7am at no charge! The full set of scratch resistance polycarbonate windows will ship separately later this summer - June 19, 2013 ...
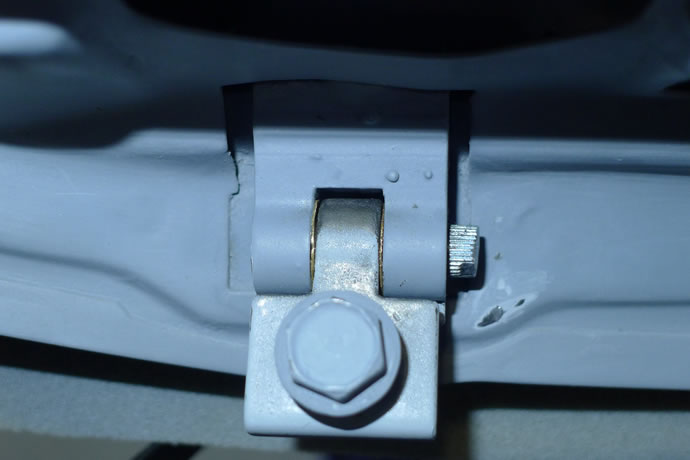
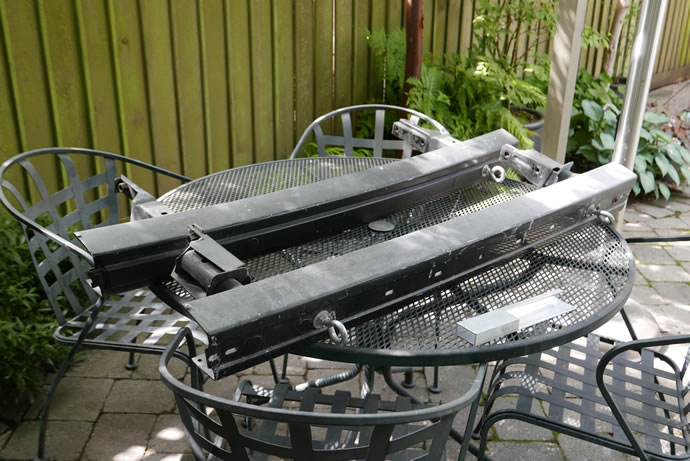
Finally! The chassis welding is done and the under carriage has been scuffed with 80 grit sandpaper, degreased, and then shot with 2 part epoxy primer (look carefully and you will see my trick new e-brake cable metal tube design/routing - designed to leave more room for the exhaust system) - August 10, 2013 ...
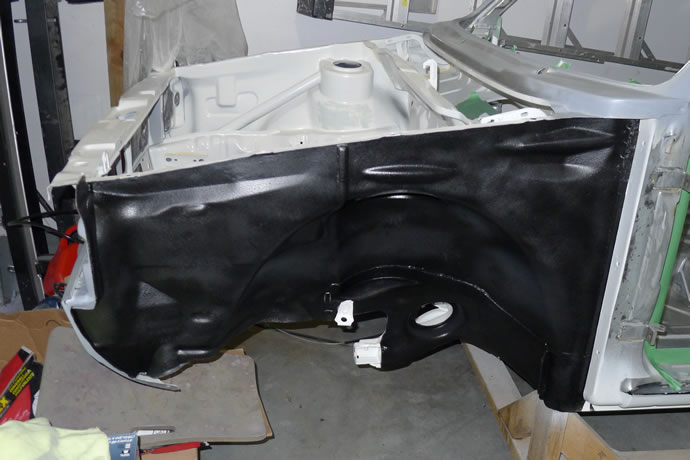
Since August 10th (above) I applied body filler to all of the under carriage welding seams, sanded it down, and then applied more 2 part epoxy primer, then applied seam sealer only to the areas where there were actual gaps in the seams/metalwork (seam sealer can promote rusting if water can get behind it so it is better to avoid over doing it), then I applied rubberized undercoating in the rear wheel wells and the very back corners of the under carriage where the wheels will throw up rocks and dirt, which will eventually be painted silver aka OEM look, but again, I won't apply under coating anywhere else (I will use some interior sound deadening material under the carpets to control road noise rather than mess up a lot of nice clean sheet metal). I will now work on the rest of the chassis and then when everywhere else is up to this level I will re-apply epoxy, then 2K high build primer, then block sand where appropriate, then epoxy as a sealer, then silver base coat and then clear coats, in that order - August 18, 2013 ...
I have managed to get 2 coats of epoxy primer on the front end with final body filler/smoothing applied/sanded between coats. This is a huge milestone for me as I can now clearly see the car coming together. It is rewarding to see how well the engine bay smoothing turned out too - August 29, 2013 ...
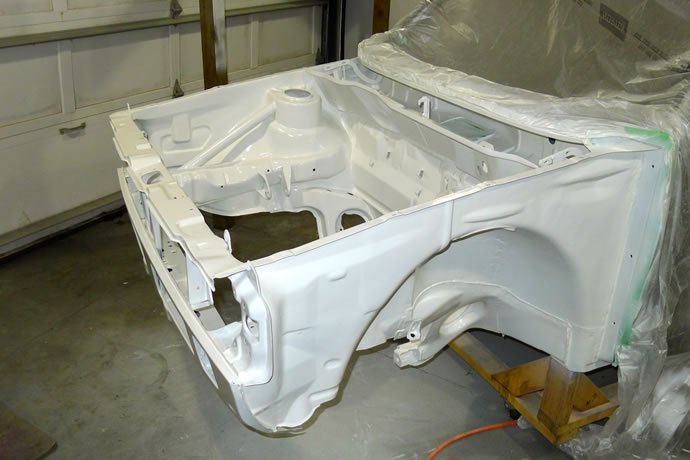

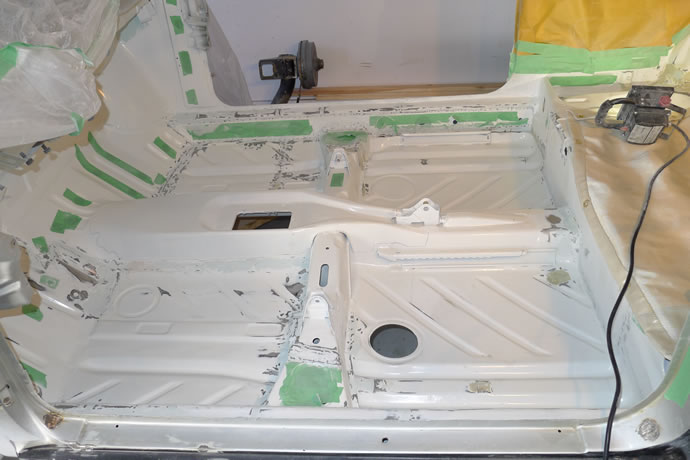
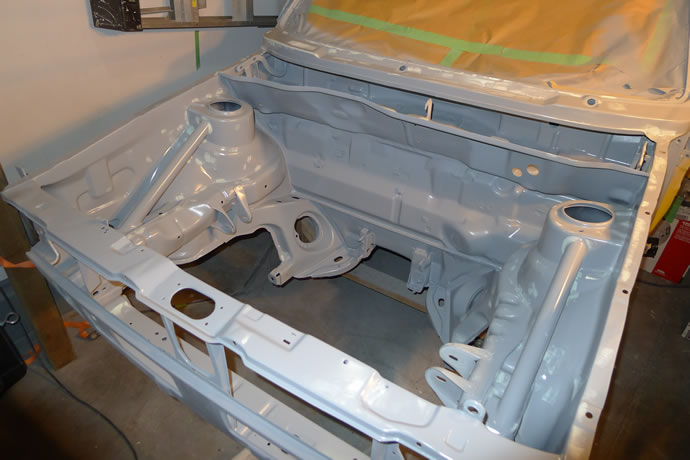
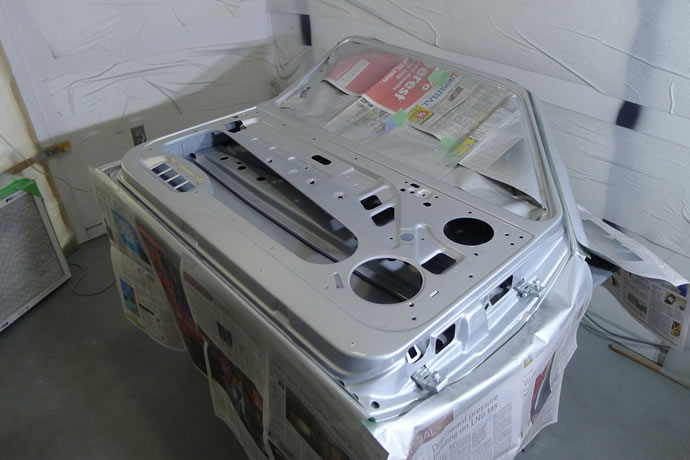
And now the first coat of epoxy primer is applied to the interior sheet metal with body filler on the welded seems coming next - September 1, 2013 ...
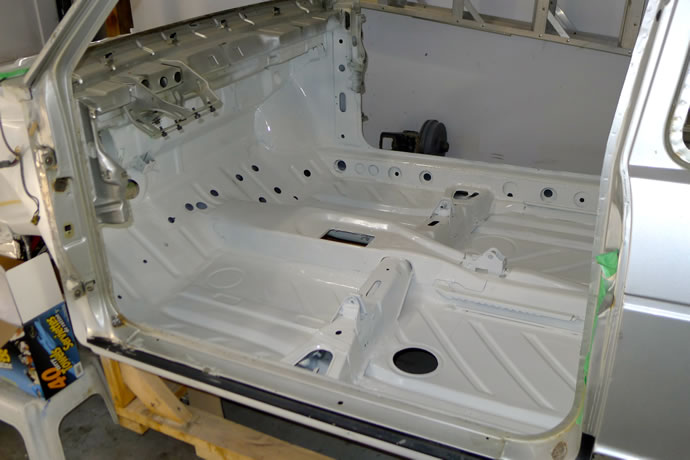
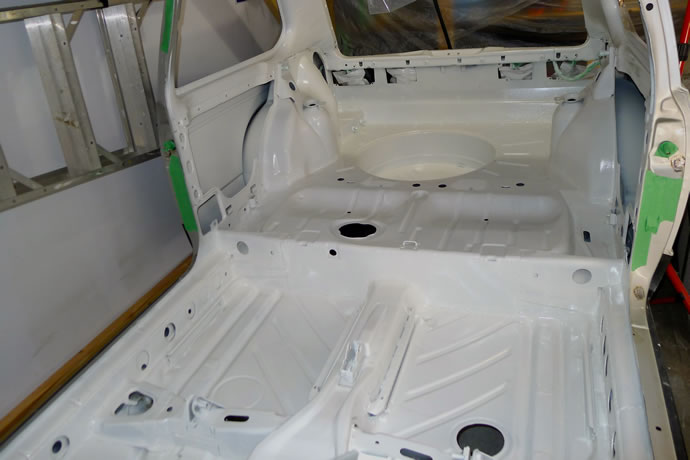
The interior sheet metal areas were treated to some body filler on the welded seems and then it was shot with some reduced grey color epoxy primer acting as a sealer and then some base and clear coats to complete the interior - September 14, 2013 ...
Since the weekend I have done some touch-up painting in the interior (a bit of experimenting for the more critical exterior panels later on, trying to get everything perfect) and then got the front inner fenders protected with the rubberized undercoating today. I have already re-epoxied and base color painted the rear wheel wells after they were undercoated and I am happy to say that the rubberized undercoating from Eastwood covered nicely by the epoxy which made me happy - September 17, 2013 ...
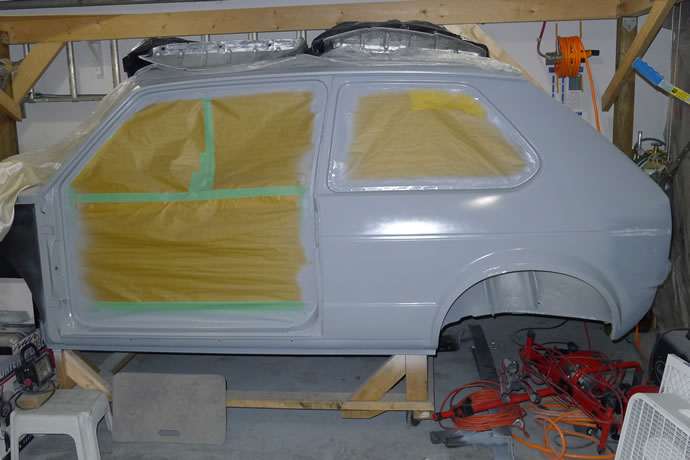
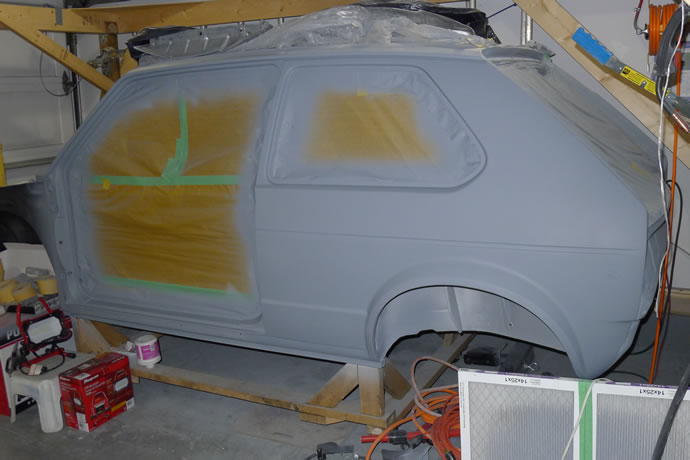
With the interior done I carefully masked off the whole car, including all interior to exterior holes and got ready to start the bodywork on the exterior panels, starting with the lower sills which were pretty badly abused by the prior owners, so I had to start by using a block of wood and a hammer to straighten out the underside area running beside my 1.5x1" subframe, and then block sanding and filling until everything was straight (still a work in progress) - September 22, 2013 ...
After the first pass of filler and some block sanding to find the high and low spots ...
Then some hammering of the underside metalwork to reduce the difference between the high and low areas, and some more filler (not yet sanded) ...
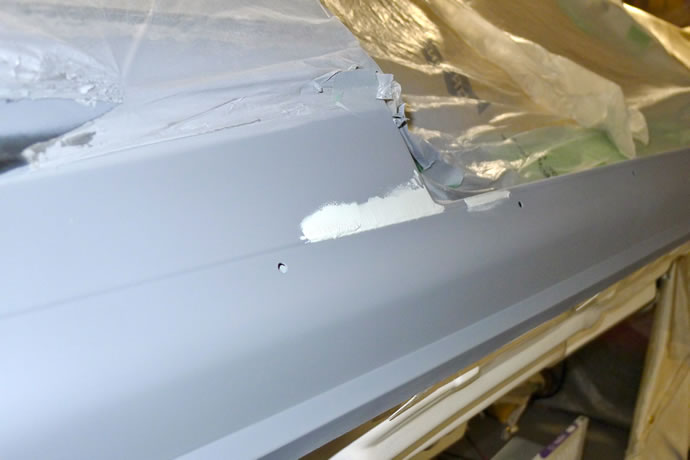
After a couple more passes with finishing putty and then a sealer coat of epoxy I tried my first application of 2K high build urethane primer on the driver side lower sill using a 1.4 spray tip (I did 3 coats with the 1.4 tip rather than the recommended 2 coats with a 1.7-2.0 tip as I didn't want to risk putting on too much paint in a single pass and getting a run). The paint went on dead smooth and dried quickly. I can see a few tiny areas where a bit of finishing putty will be required to fill voids and low spots but otherwise it will block sand to an ultra-smooth finish with little effort. This has been a 'test panel' for the rest of the outside bodywork and now I am confident that I will be able to get the whole car painted looking A1.
I haven't spoken much about the painting process so I'll describe my researched approach here: get to bare metal, then DA sand with 80 grit, clean with a water borne degreaser (containing methanol and toluene), then 2 coats of epoxy, then apply body filler and finishing putty as may be required, sanding progressively with 120-220-320 grit, then if there is a lot of bare metal showing thru again apply another coat of epoxy, then sand lightly with 320 grit, then high build primer with a guide coat, then block sand 320-600 grit (applying more finishing putty if there are any low spots that show through the sanded guided coat), then another coat of epoxy sealer (thinned 10-20%), then lightly sand 400-600 grit, then 2-4 base coats (wet sand 600 grit lightly if any junk gets into the base coats), then multiple clear coats, with 600-1000 grit wet sanding between the 2nd to 4th coats, then 1000, 1500, 2000 grit wet sanding of the final clear coat, then buffing out with a series of polishing compounds - October 1, 2013 ...
Well, I finished the drivers side lower sills and flipped the car around and started working on the passenger side sills. After 4-6 hours of work they are almost straight now and getting close to the finishing putty stage. I have a full week of travel in front of me starting Wednesday so won't get this finished for another 2 weeks though - October 14, 2013 ...

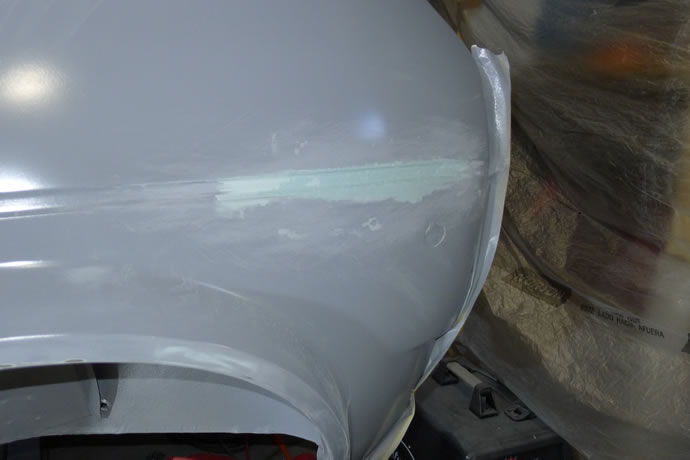
After a few more passes of putty I sprayed on some high build primer and found that pretty much everything was straight and clean except for a small area at the back of the door edge that I had over sanded along the crease, hence the additional putty in that spot. I have also managed to get 4 passes of filler and putty on the rear passenger lower corner where I had braised in a new panel - October 29, 2013 ...
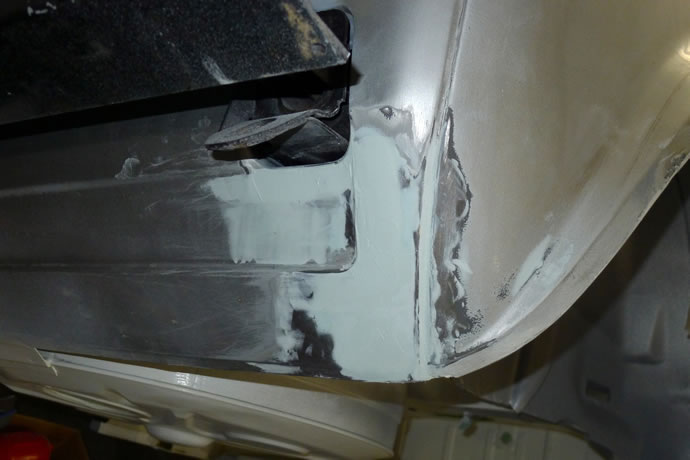
I have made good progress on the welded area in and around the fuel filler cap, the rear passenger fender lip, smoothing out and correcting a curvature issue around the side signal light, finshing the lower rear passenger corner where I had previously braised in a new panel, and cleaning up the area around the rear license plate lights (not shown) - November 5, 2013 ...
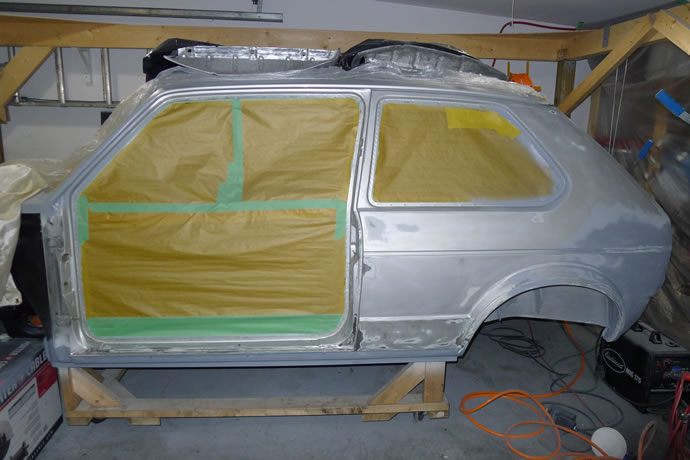
I have now completed the bodywork on the passenger side and have block sanded a number of times, sprayed epoxy twice with touch-up putty applications in-between and now it is ready for 2K high build primer - November 20, 2013 ...
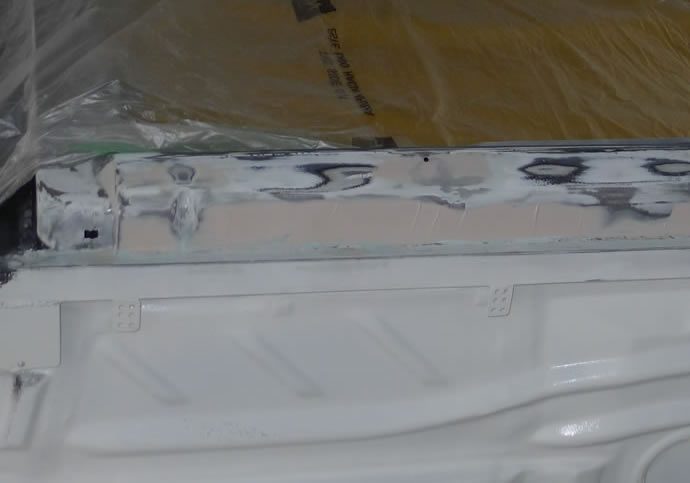
I put in about 15 hours this weekend doing a final epoxy primer sanding to the passenger side, then applying 2 coats of 2K high build primer (but I got some nasty runs in the paint because I put on too much - but it sanded out easily later ...), then I waited overnight to block and detail sand out the high build primer (which turned out great - really smooth and flat), and then I dropped the car down onto the roller frame, unbolted the rear bumper, sanded down the old paint on the rear, and then got the first coat of filler and block sanding done on the rear before dinner time - November 24, 2013 ...
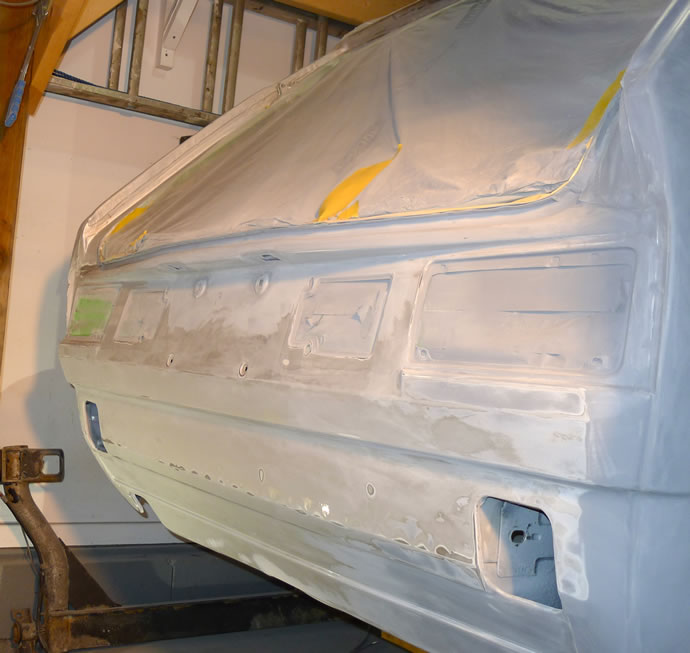
I spent quite a bit of time on the rear drivers side getting the panel absolutely correct. There was a soft dent in the area and after a lot of careful layer by layer buildup of filler I found that I had to go wider and wider to acheive the perfect curvature that was required. It is 90% now and so I decided to epoxy prime it at the same time as I did the initial priming of the rear this weekend so that I can see the reflections on the surface when I complete this task. i am very happy with the way the rear turned out as there is only minor touchup that will be required. I hope to get those minor things addressed tomorrow so that I can finish the weekend with a 2K high build primer application - November 30, 2013 ...
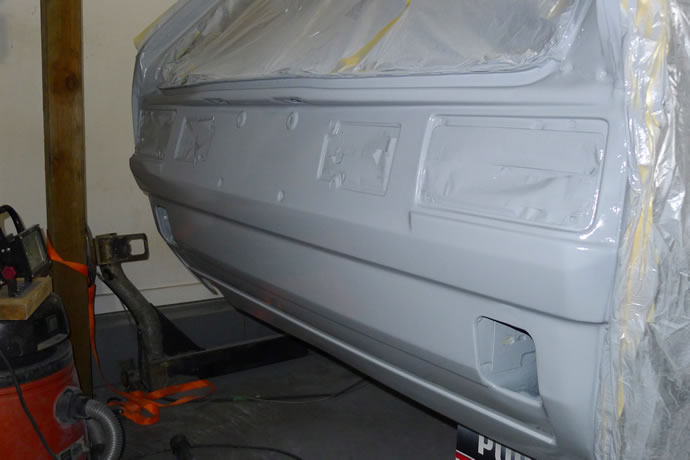
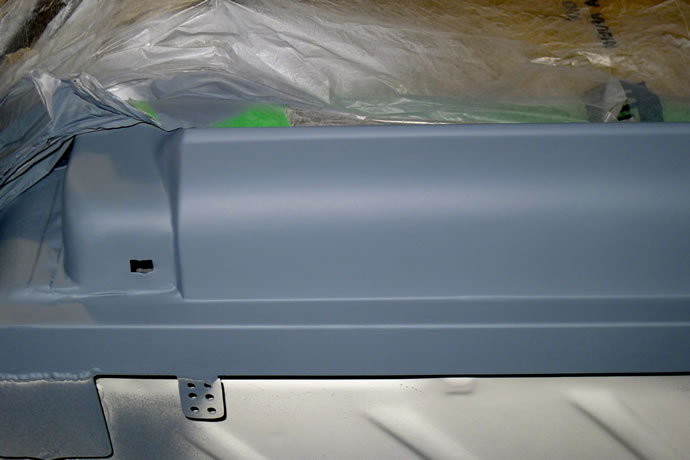
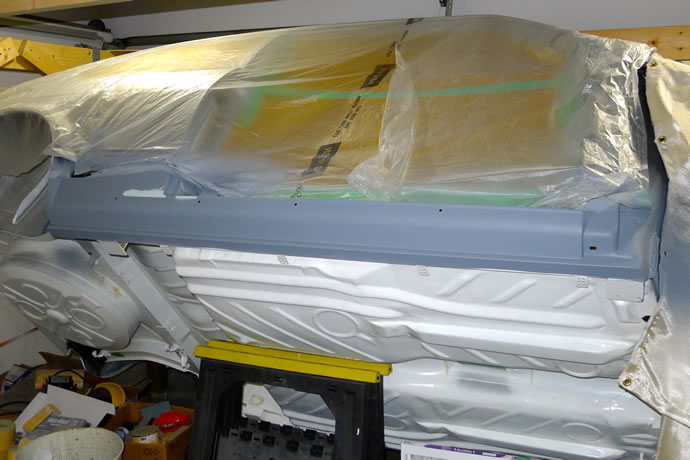
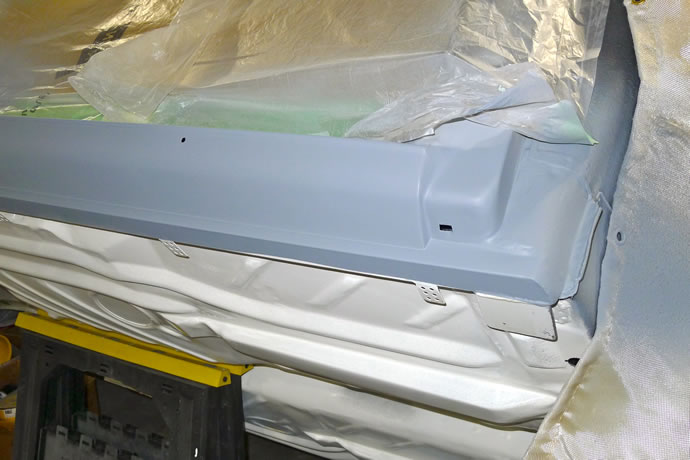
I got the 2K high build primer applied to the rear at the end of the weekend, sanded it down yesterday, did some minor putty touch-up today, shot those areas with a bit more epoxy, and then moved on to the drivers side. I sanded it down today and shot it with an initial coat of epoxy so I can lay on some filler and putty starting tomorrow - December 3, 2013 ...
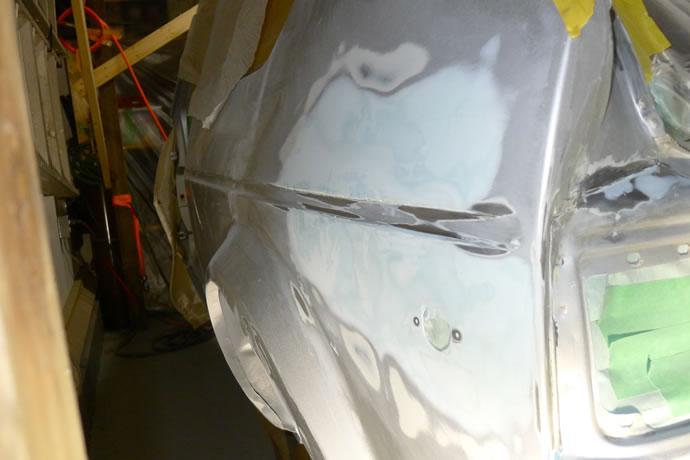
Over the past week I managed to get several passes of filler on the drivers side and another coat of epoxy, then more filler and sanding, then some touch-up epoxy on the areas that I cut thru to the base metal, and a lot of work getting the depth and profile on the edges of the molding crease at the back of the car (using a near little metal tool I shaped to create the correct depth and shape), then today managed to get the high build primer on (and after some block sanding once it dries I will move on the engine bay for the final touch up filler, etc and then the roof) - December 8, 2013 ...
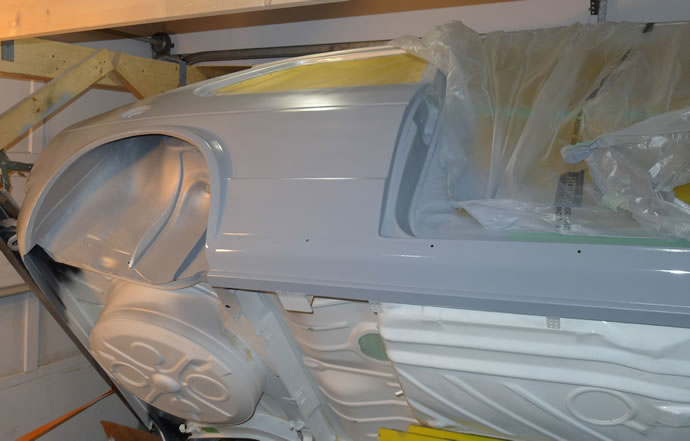
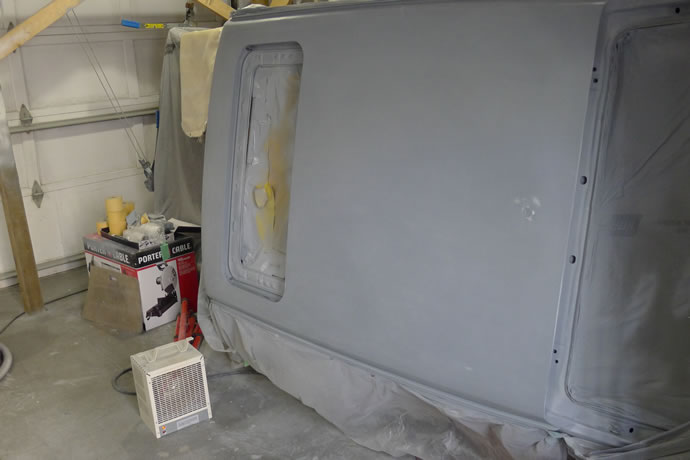
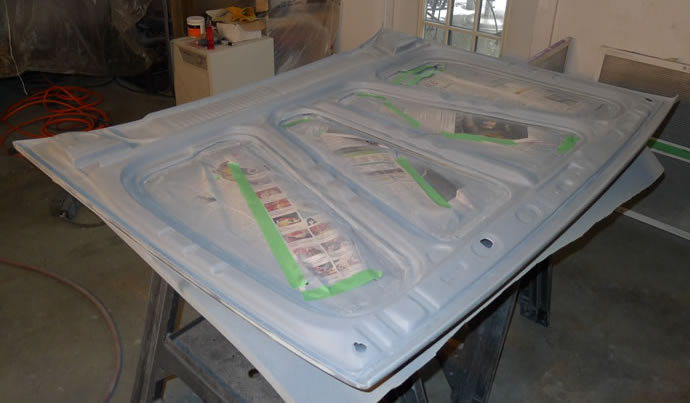
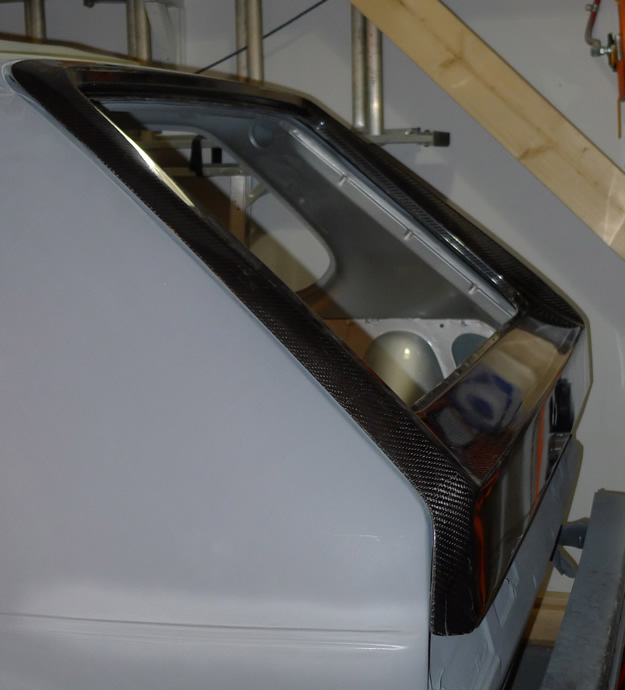
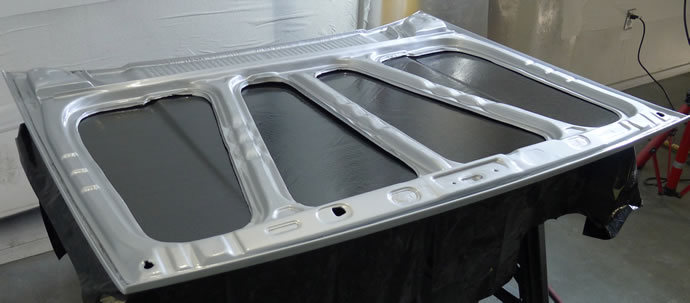
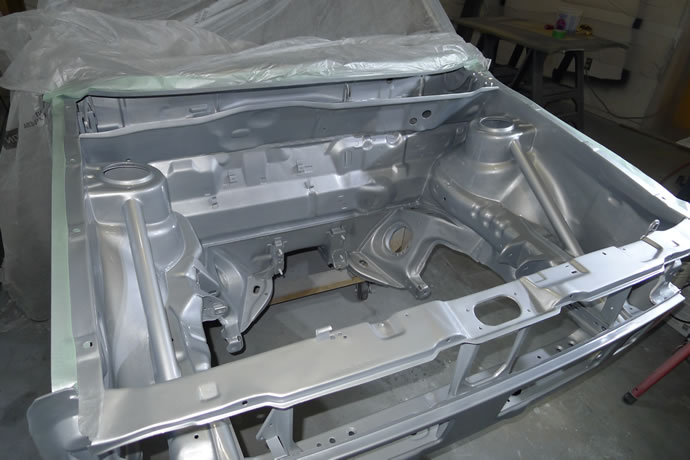
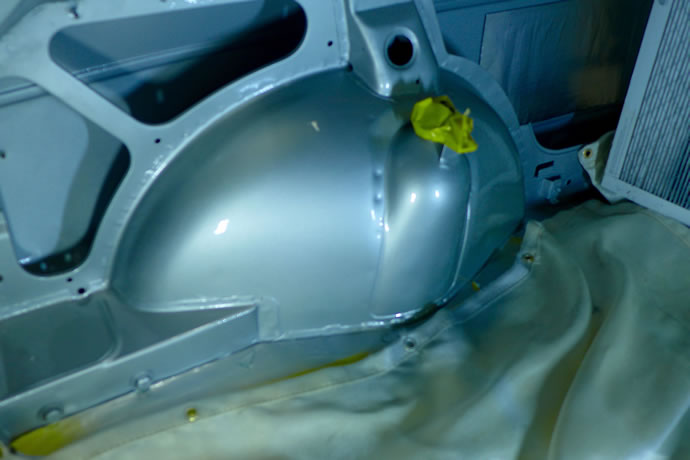
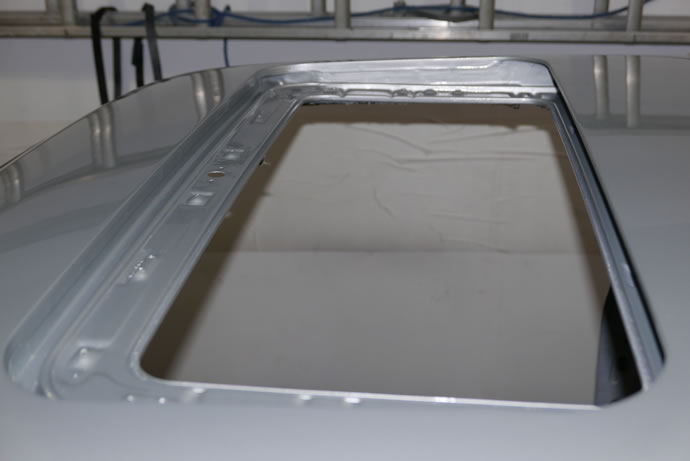
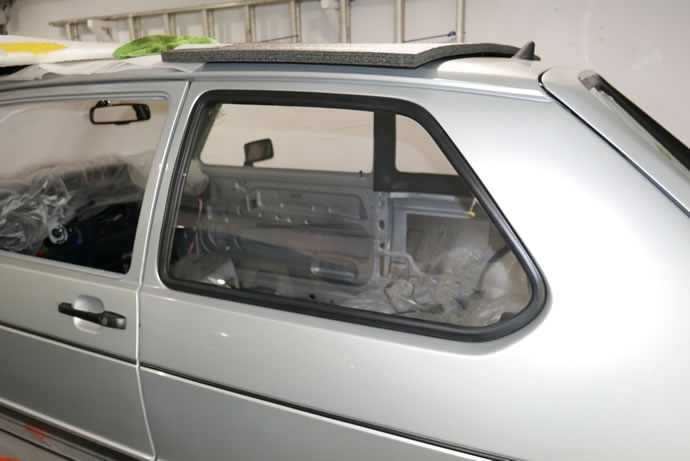
I spent the past week working on the engine bay, completing the final smoothing filling and sanding process, spraying epoxy when I needed to see how close I was getting, and eventually I got to the point of completing the high build primer application and started on the final block sanding of all of the surfaces prior to the base/clear painting process which I will tackle in January. I also got the critical front window frame areas all completed which is very satisfying - December 18, 2013 ...
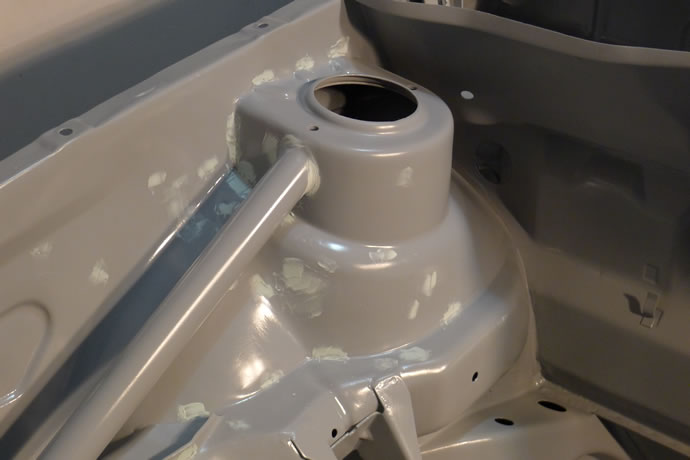
... sanding the 2K high build primer on the visually critical window frame surfaces ...
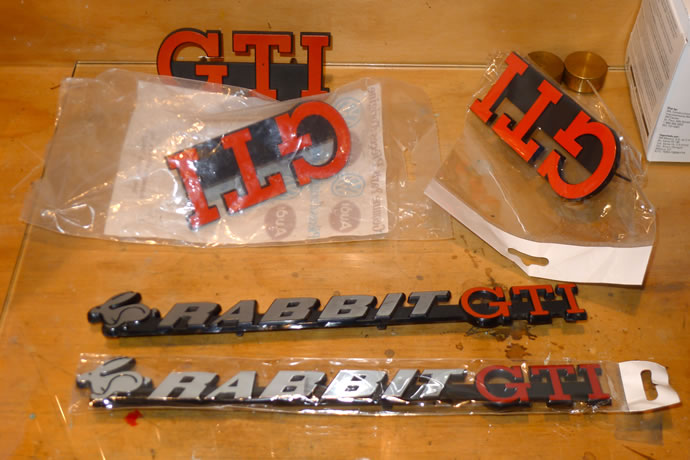
... and thanks to Kevin Young, a fellow VW Vortex member, I had access to one of his mint NOS GTI badges to get a correct colour reference to compare both my original faded badges as well as the aftermarket Mk1autohaus replicas - it turns out that the repro rear badge wasn't even close but the front was ...
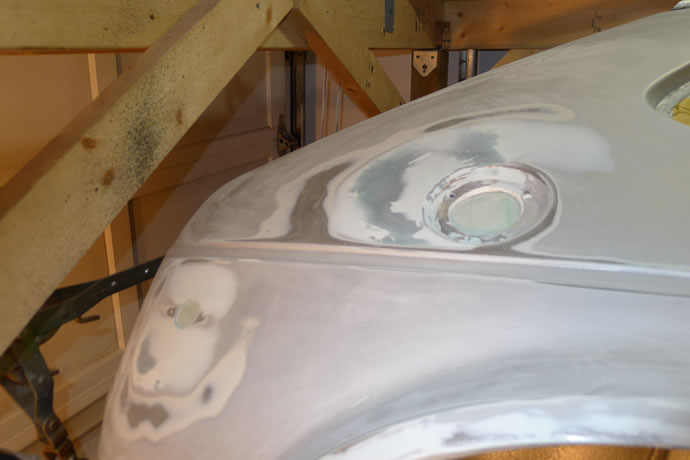
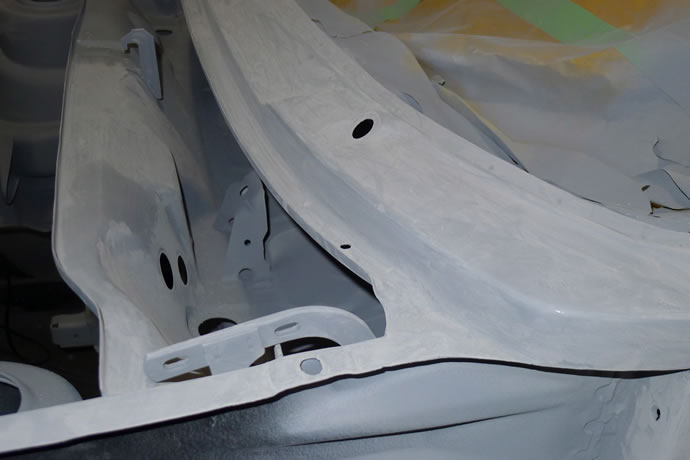
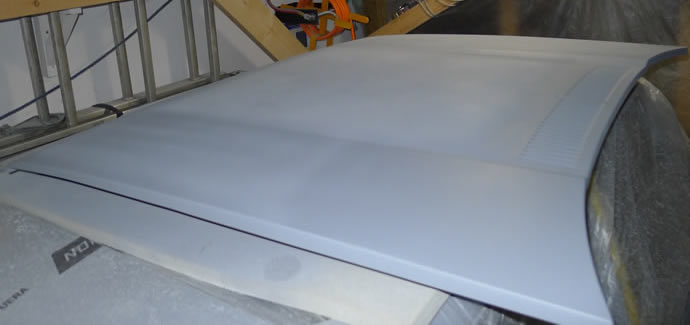
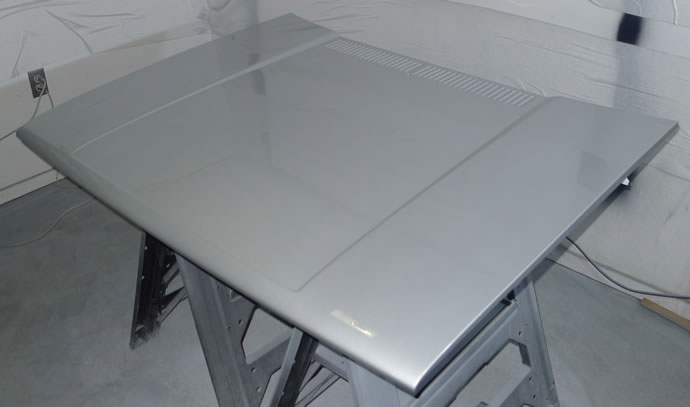
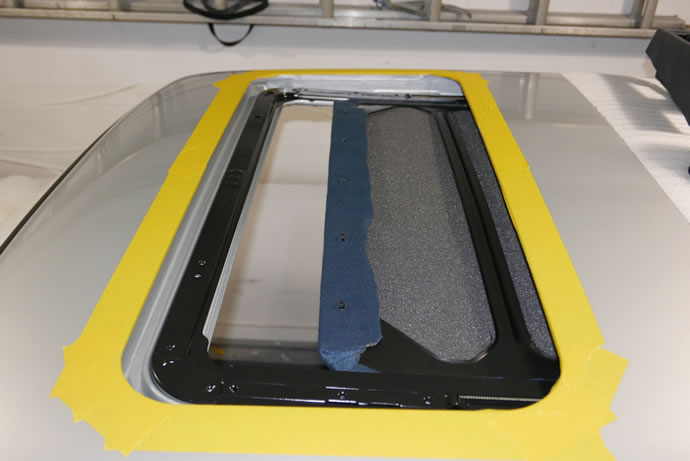
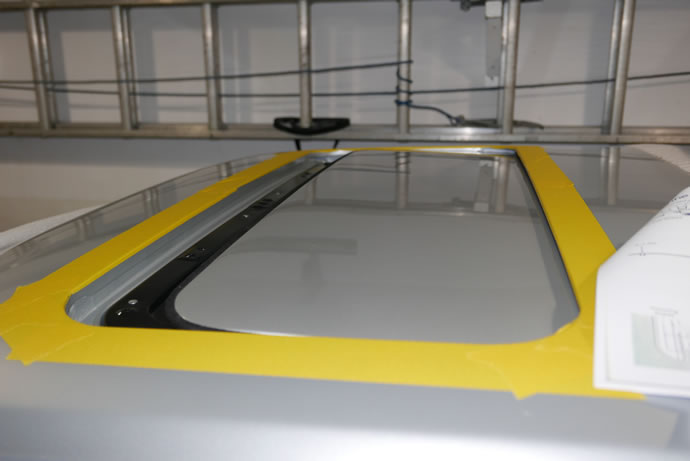
The Christmas holiday period was focused on family and nursing a bad cold. It was only in the last few days that I had the time and energy to get back into the GTI project in full force. I put time into dialing in the front, especially the uneven factory spot welding area below the bumper. With the high build primer sanded today it all looks great. I then moved on to the roof and sunroof area and got it DA sanded, etc. and then cleaned up the inside sunroof channel area and sprayed everything with 2 thick coats of epoxy (time for a new epoxy gun as it was not the smoothest application). High build primer will go on later this week after some more sanding of the epoxy - January 12, 2014 ...

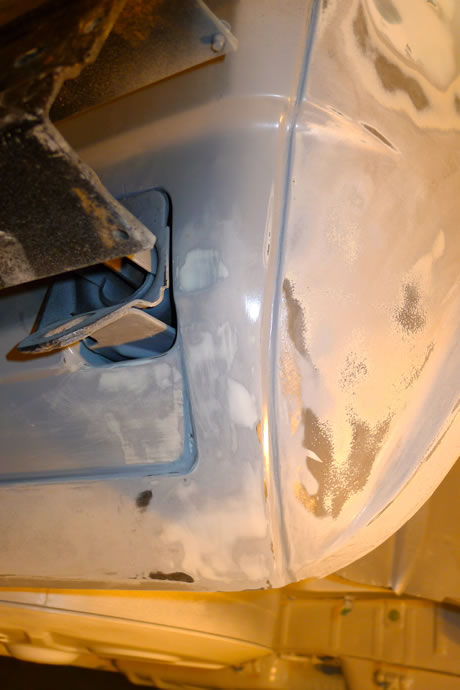
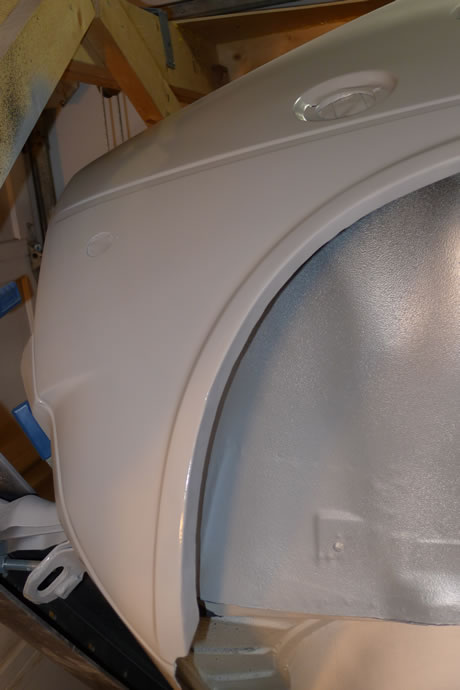
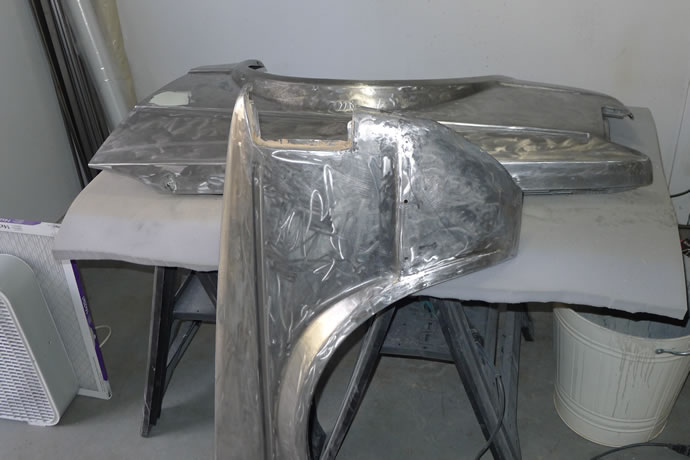
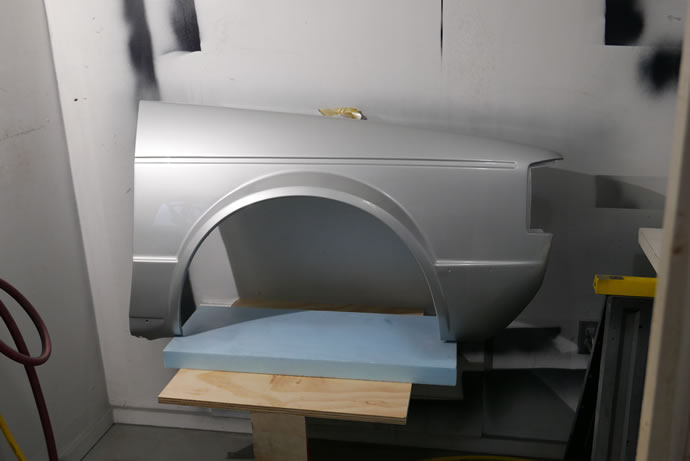
The roof/sun-roof area got a couple of coats of high build primer on it this week and then got block sanded and is now ready for final paint. I then pulled out the fenders and set to work finishing the process of stripping them down to bare metal as well as carefully banging them into the correct shape. It took several attempts with some nasty chemical stripper to get the critical areas looking perfect, then it was on to some final sanding and then water-born cleaner before 2 coats of epoxy primer were applied today. I will now start the process of filling and block sanding to get them straight/correct - January 17, 2014 ...
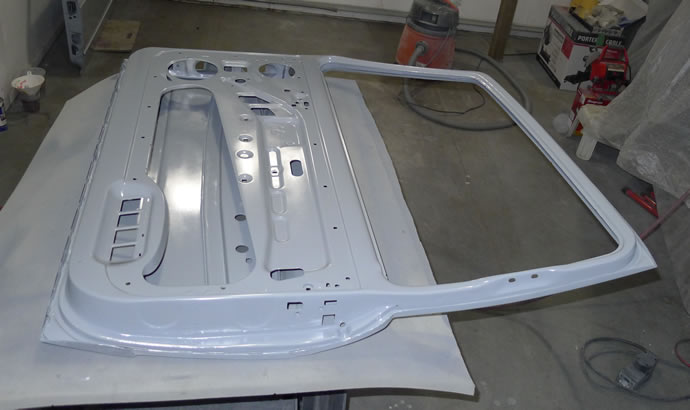
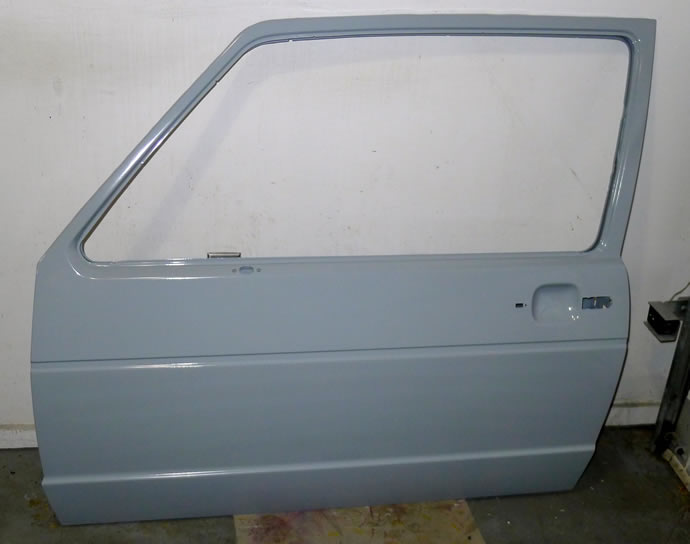
I finished the front fenders on Thursday with some more sanding/filling/epoxy and then 3 coats of high build primer and then sanding them out to 600 grit, and then rubberizing the insides - I am really pleased with the results. So Friday it was on to the doors, first stripping them down and then cleaning them out (boy they were filthy inside). Only today did I finally get to the point of prepping them for initial epoxy priming. The biggest challenge I ran into was a frozen passenger side mirror which would not rotate (cast aluminum oxidization) so I could not access the screw heads. In the end it was a long tiring job using a dremel tool to grind down the screws from inside the door and drilling them out. Now I need to weld up the holes and re-tap them. Oh well, no pain, no gain, right? - January 26, 2014 ...

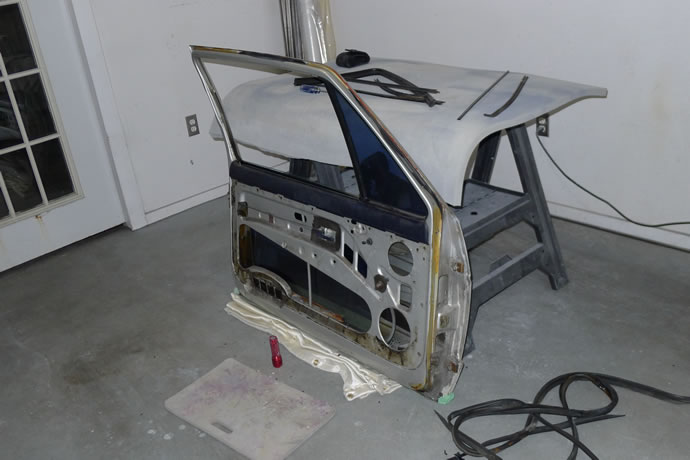
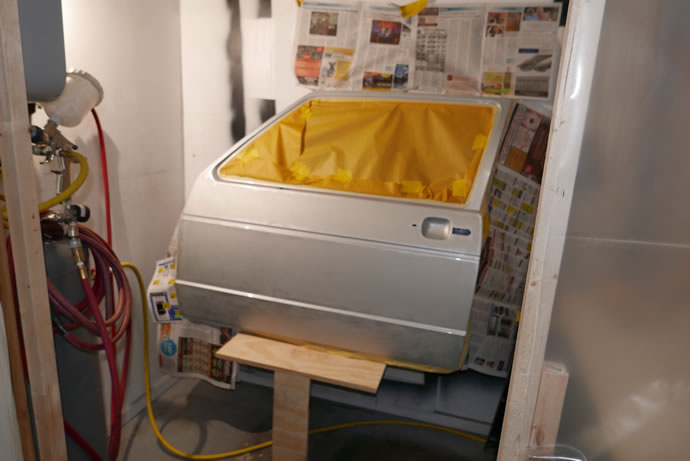
While I wait for the new door hinge pins from vwheritage, as well as the tools to replace them, I completed the cleaning/prep/sanding of the doors and managed to get them epoxy primed over the past few days. The doors are large and heavy and there is simply no way to paint them end-to-end in one go so the process of completing the painting will be x2 slower than for the fenders - side 1, then wait 24hrs and then side 2, etc. - January 30, 2014 ...
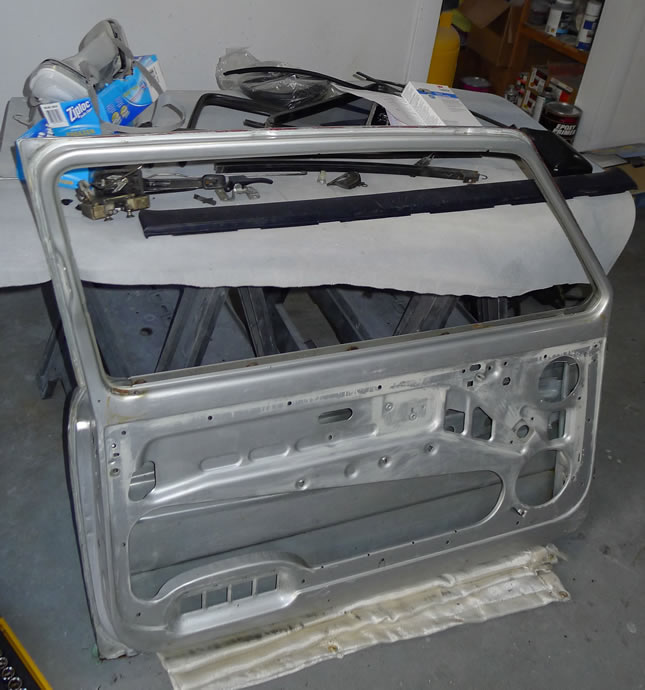
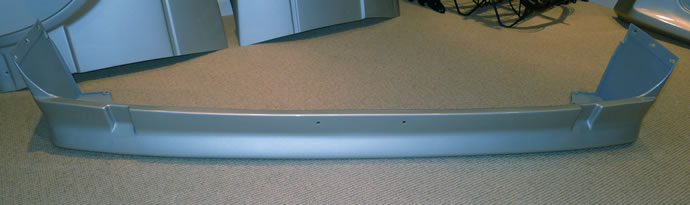
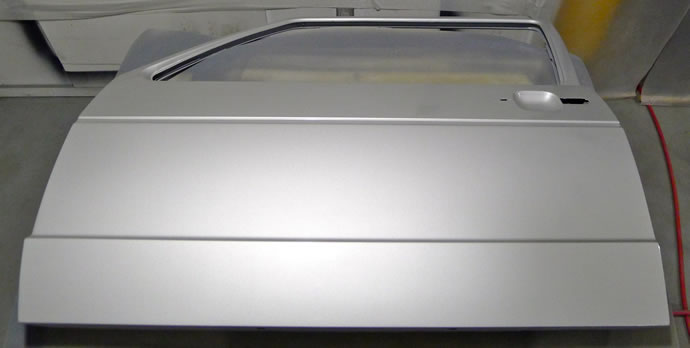
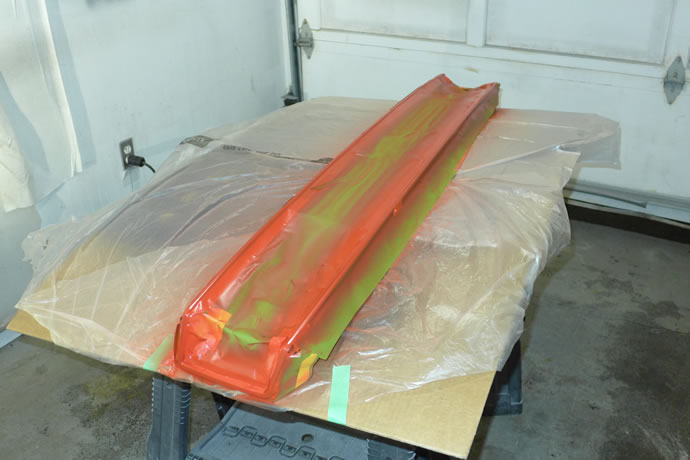
I got the doors finished a few days ago and I am really pleased about it all - they are straight and clean end to end after putting in a ton of work on them. So it is on to the final 2 body panels: the sunroof and the front spoiler. Other than the somewhat intricate sunroof dissassembly, the sunroof painting is very simple - I will have it completed tomorrow after the application of high build primer and some blocking out. The spoiler is a more complex process that involved removing the metal bracing, and sanding everything down to the original primer and/or bare urethane, and then filling in the dents and holes that were drilled by the former owner with flexible 3M filler, and then more sanding, the application of 'plastic kote', then epoxy, and then high build primer mixed with flex agent - which I will get done tomorrow. I did manage to fabricate an aluminum brace for the lower lip and also used a heat gun to straighten the spoiler to its original shape - February 9, 2014 ...

Today was the big day: time to mount the primed spoiler to the front of the chassis, align it such that the curve at the lip of the spoiler was perfectly balanced all the way across, and then remove the protective covering of the 3M double sided adhesive/tape that was attached to the aluminum brace I fabricated, and then clamp it into position. I was nervous that I wouldn't get it all aligned correctly but it worked out fine - especially the additional aluminum supports that help attach the lower lip to the body. I then got the high build primer on both the sunroof and the spoiler. This was my first time using Flex Agent and I was really impressed with the results: the normally thick paint which likes to clog up the fine holes in my spray guns flowed super smoothly and went on like melted butter. Wow. It looks so good I almost don't want to sand it - but I will tomorrow after I let everything cure for a full 24 hours - February 10, 2014 ...

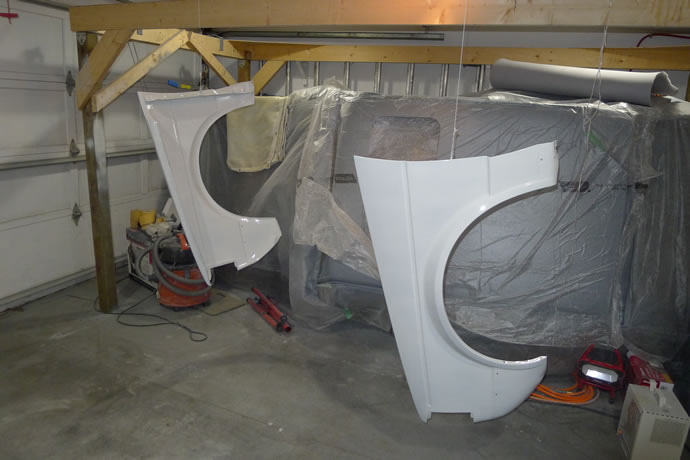
I got the sunroof and spoiler sanded out today. The spoiler was a thing of beauty when I was done as the flex agent seems to enhance the smoothness of the high build paint. The sunroof still had some low spots so I hit it with more high build primer and then blocked it again and finally it was mint.
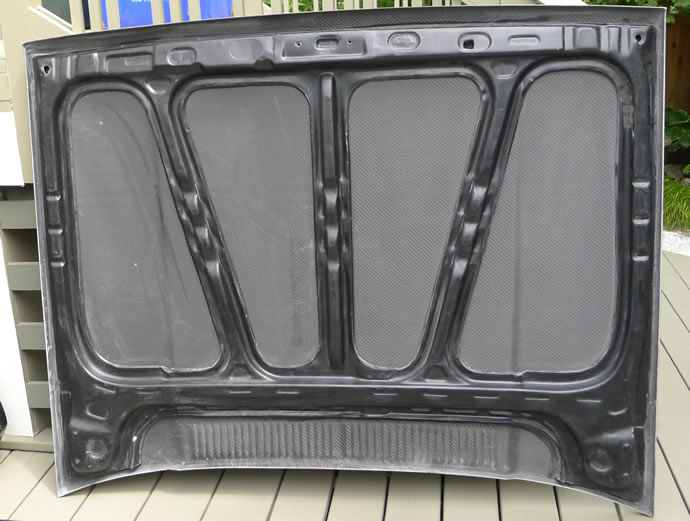
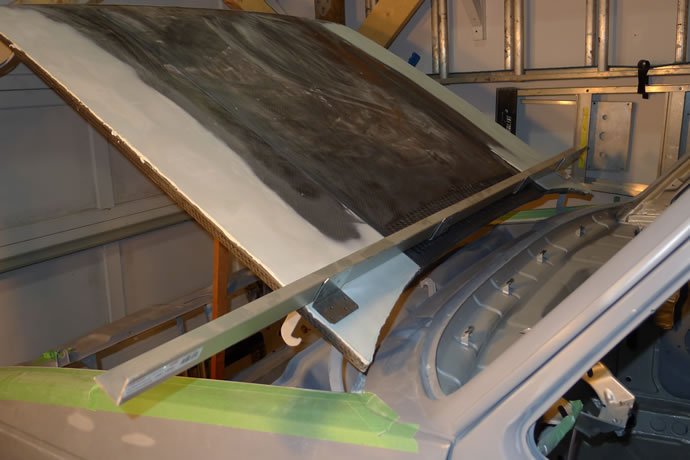
I then started on prepping the carbon fiber hood for primer and found only a few low spots so I started to get excited about how quick this phase of the project was going to be. Ha! I was badly wrong. I said to myself 'Gee, you haven't test fitted this thing to the body. What if the alignment of the front end is off, or this aftermarket hood is dimensionally different?' Well, good thing I went to all of the effort to re-mount the fenders, install the grill, tune everything until it was 'final' and then I bolted on the hood and found that it had an interference fit to the rain tray lip. Not a huge issue in and of itself - the brace which runs across the back of the hood needs to be cut down by around 3/8" in some areas and re-glassed. Then I said to myself, I never really liked the huge OEM hood gaps and now is the time to do something about that: so I will also extend the sides and back by around 1/8" so that the gaps are the same as for the rest of the body panels on the car. Lots of work but this way I get the alignment and gaps on the front of the car looking really 'high end' - February 11, 2014 ...
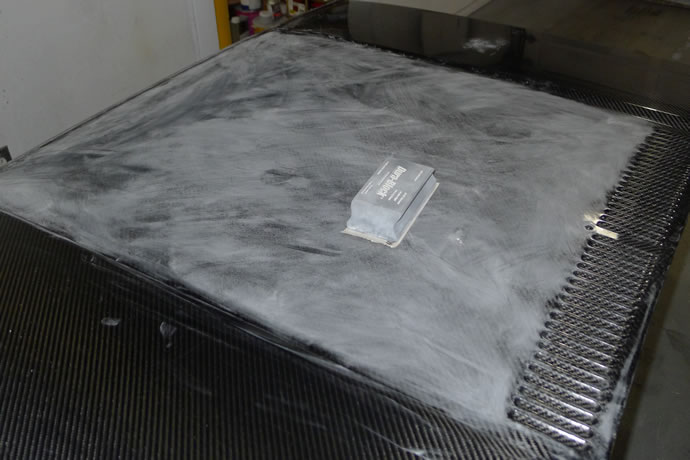
The last 2 nights have been carbon fiber hood clearancing (cutting up expensive stuff) and panel gap analysis and preliminary fitting. After filling the garage full of fine carbon dust and getting the hood to sit correctly I was better able to determine next steps with panel gap setting and/or hood width/length/height modifications. In the end I realized that I needed to get everything else to be in its final position before going any further with the hood and that meant hanging the doors and then getting the fenders true to the door gaps. I managed to hang the doors without help from anyone else which was a bit of gymnastics and once done I could see that I was already pretty close on the fitment - it looks like all I will need to do is adjust/blend in the height of the hood against the fenders and then I should be pretty much OK - I decided after hanging the doors that the OEM 1/4" gaps are std everywhere on the car and it wouldn't be smart to setup the hood for a narrower gap fitment (I am very close to 1/4" gaps on the hood on all sides already and only need to adjust the fenders in about 1/16" on each side) - February 13, 2014 ...
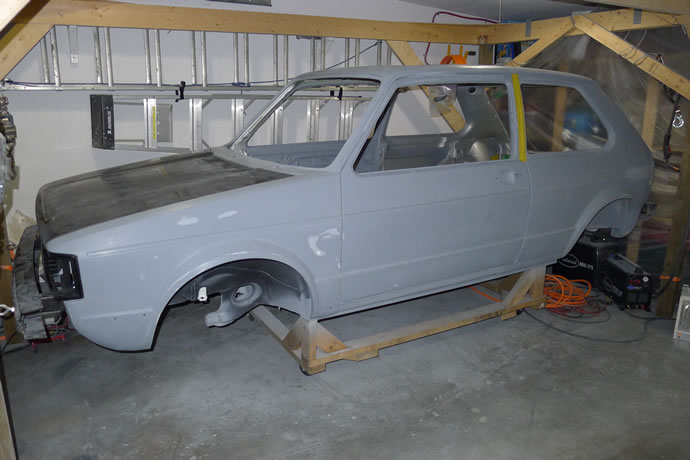
This weekend has been focused on getting the panel gaps perfect everywhere and then starting the process of leveling up the hood. Setting the gaps is an exercise in compromises: first you have to set the fender-to-door gaps such that the doors will just barely clear the fenders when opening/closing, plus the fender height needs to be such that the side moldings and creases all align, and finally, that the hood gaps are equal and approx 1/4" each: the front plastic grill also acts as an absolute reference, determining the left/right position of the fenders at the front (the grill edge and the fender edge should be the same).
My problem is that with everything set correctly the fenders stick out at the front/bottom about 1/16" so when I get 0.020" shim washers I will attempt to reduce the door-to-fender gaps a slight amount, hoping to get the fenders to align a bit closer at the front (even though this misalignment is pretty much hidden/covered by the spoiler, the bumper and the grill which sticks out and blocks the view of it).
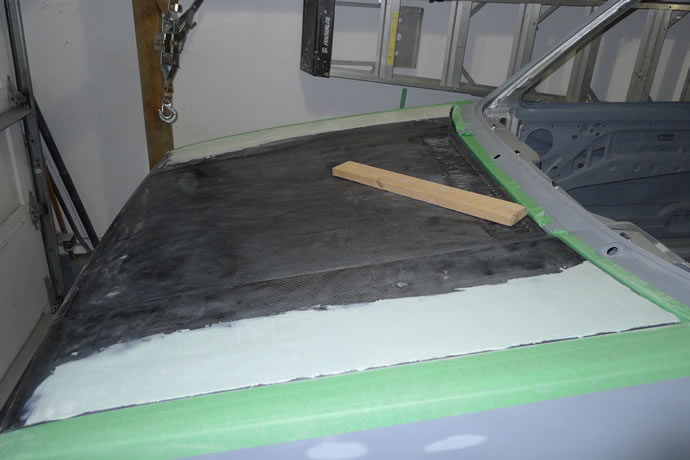
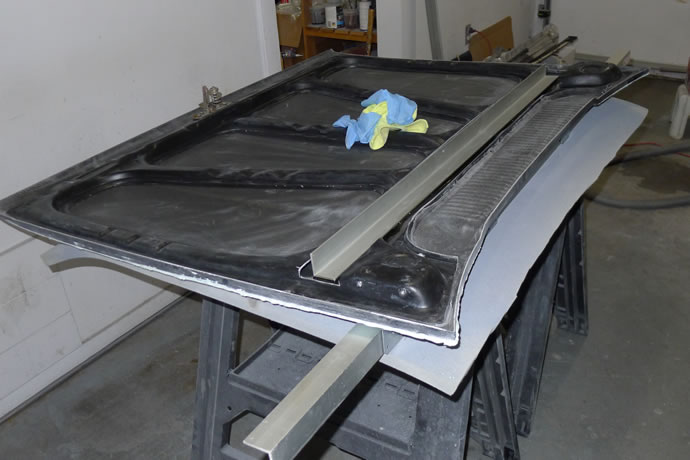
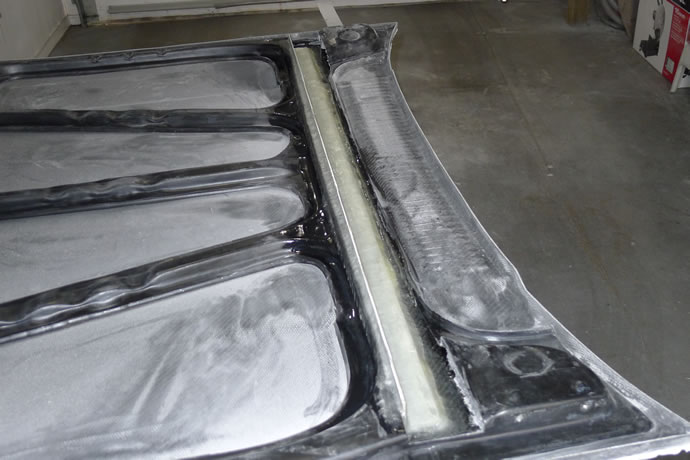
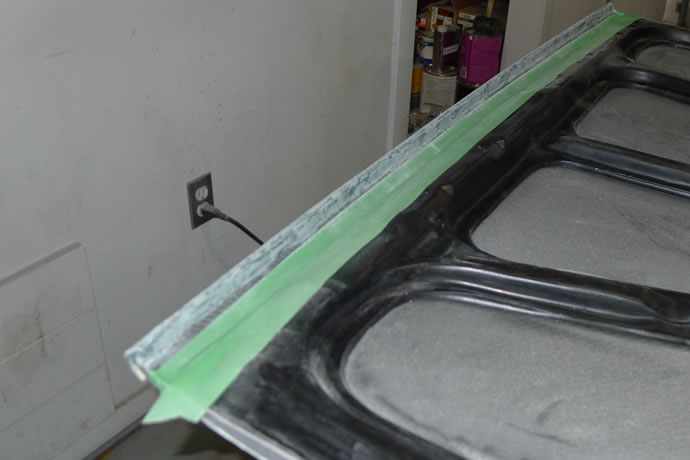
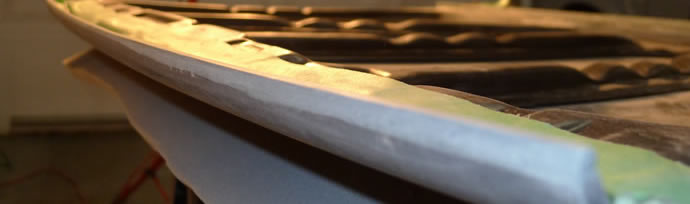
I put lots of passes of Evercoat Rage Extreme filler on the hood edges, and then got the first few passes of finishing putty on and all blocked to align the edges precisely with the top of the fenders, and finally, I fabricated an aluminum channel to better support the center-rear area of the hood where I had to cut away the supports to clear the edge of the rain tray - I will fiberglass that channel into place once I finish the edge profiling and absolutely true up the center-rear hood to the body - February 16, 2014 ...
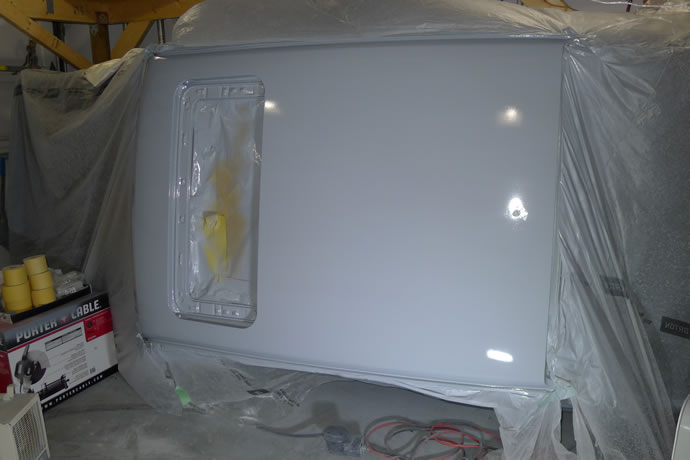
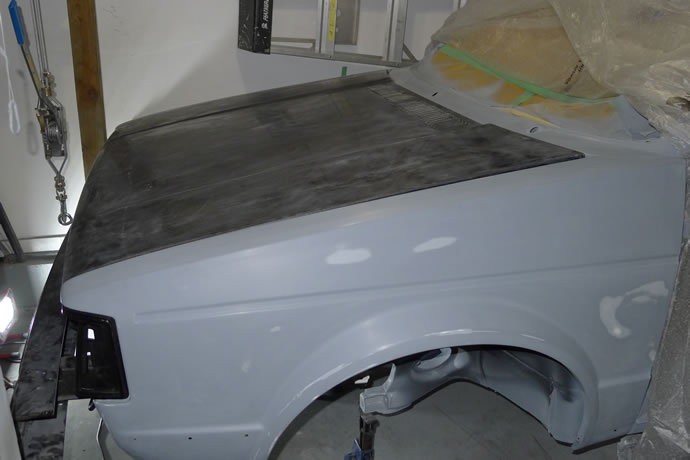
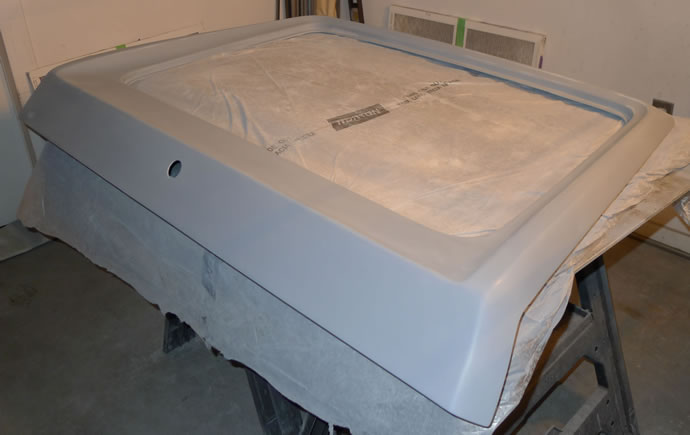
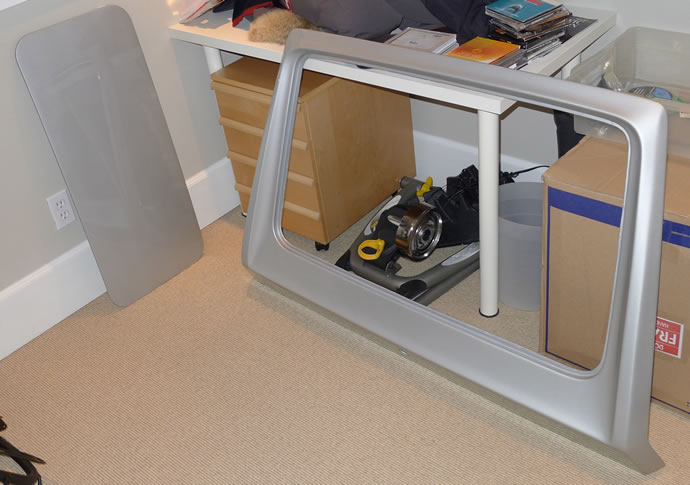
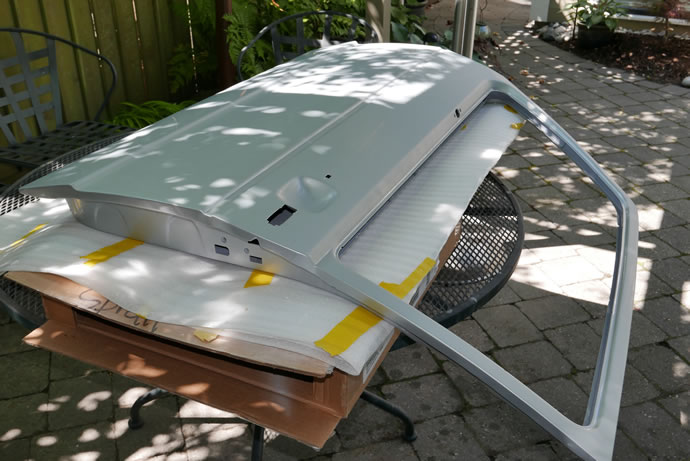
After getting the hood perfectly level relative to the fenders and cowl I temporarily glued a supporting truss across the back of the hood in order to 'hold' the shape until I could fiberglass in a support next to the rain tray on the underside. I also extended the front lip of the hood down 3/16" with short strand fiberglass and then rounded it nicely to match the OEM hood profile more closely. Finally I finished off the hood with epoxy primer and high build primer/block sanding, etc. I am now ready for the rear hatch which I also test fit to the car this week (and yes, it needs lots of work to fit perfectly - at least I am now an 'expert' with the hood work last week under my belt) - February 23, 2014 ...
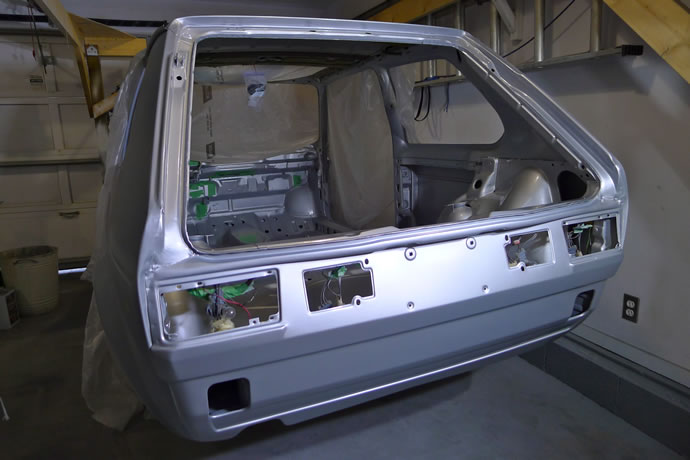
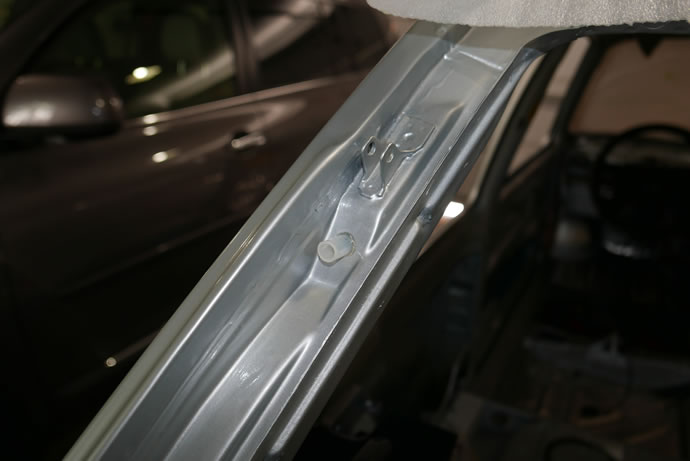
I am now deep into the rear hatch fitting process and it is turning out to be another exercise in almost completely assembling the rear of the car to get everything in alignment - the tail lights themselves have proven to be a challenge on several fronts: first of all it became clear that the driver side rear corner metalwork (all OEM from the factory) isn't the right shape and lacks the dual V taper into the lower edge of the hatch which the passenger side correctly has. It isn't a disaster as we are only talking about 3/16" but it impacts the interface with the hatch and the tail light such that both the hatch and light will have to be re-shaped to follow the metalwork 'as is' (it is simply not a reasonable alternative to try and reshape the body metalwork).
I mounted the hatch first, then realized that I needed to mount the lights, then I further found that I needed to install the hatch seal which pushes the bottom of the hatch lip out a bit, etc. After some grunting and groaning and some careful slotting of holes and a bit of grinding, everything started to come into their final resting positions. I then started to cut, sand and fill the hatch areas as required. This process will take several more days as there is a fair amount of tuning to do - I also need to get the hatch latch installed before I go any further in the tuning process but from this point onwards I think it is a well understood path that is similar to the hood work last week - February 26, 2014 ...
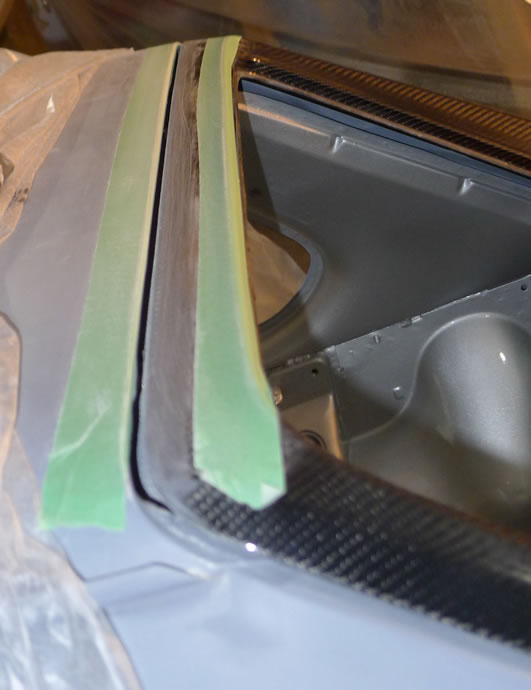
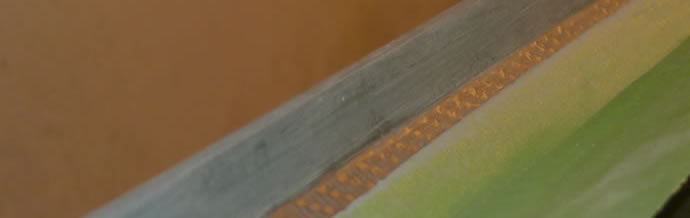
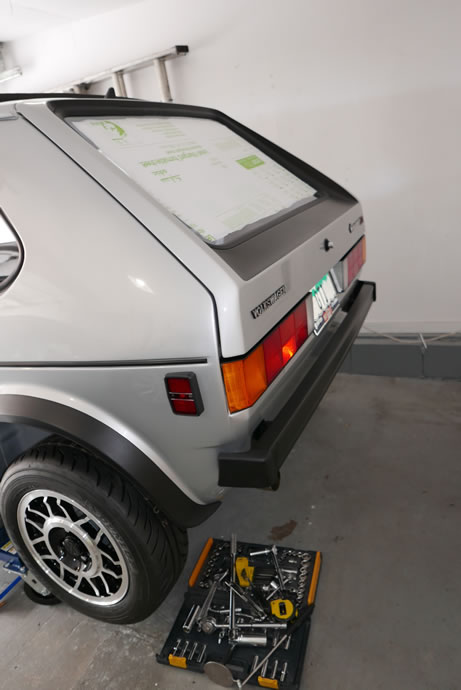
The rear hatch is now finished and ready for final paint. It took more time than expected to get everything dial in. First there was the tricky and exacting process of taping up and extending the edges to maintain the target 3/16" gaps on the top and sides and 1/4" on the bottom, and then there was incremental work to make both the inside surfaces and edges look OEM (fiberglass and carbon panels are never finished nicely on delivery - there is always fitting and finishing work - the surfaces aren't totally flat and the edges are rough cut, etc). Anyway, I decided to do a nice job as this was the last panel and it is something that I will be staring at inside and out over and over again once the project is complete - March 5, 2014
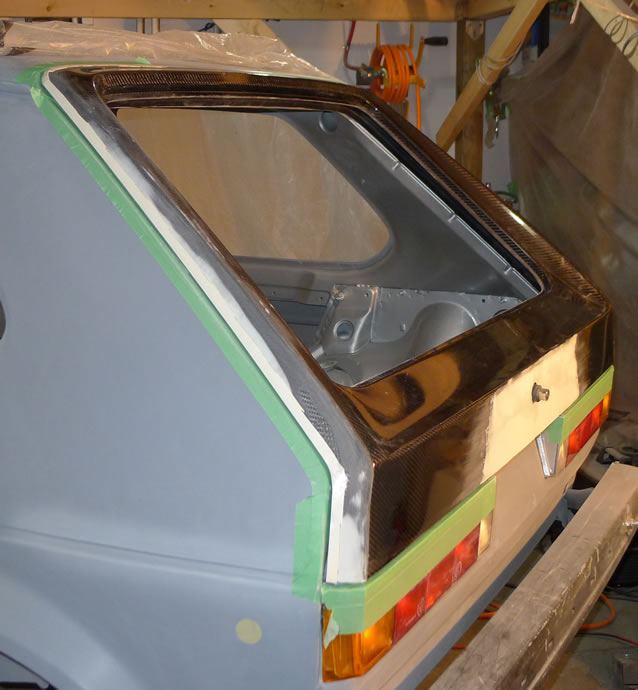
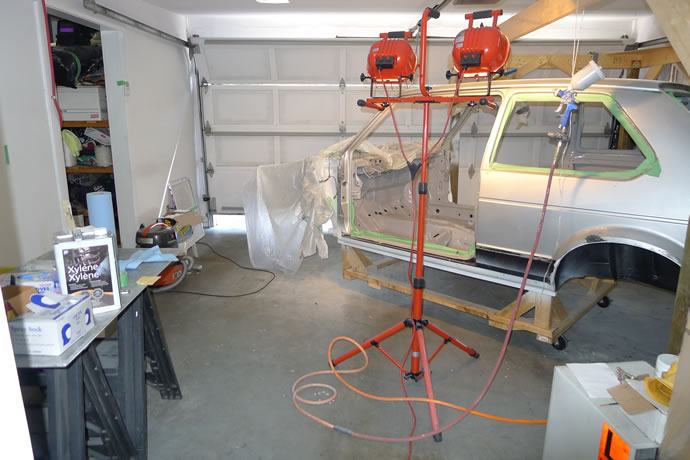
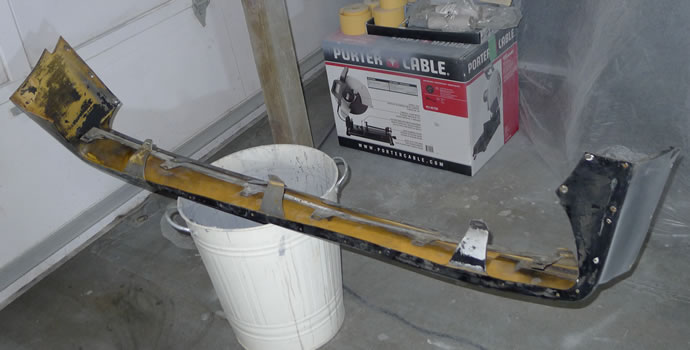
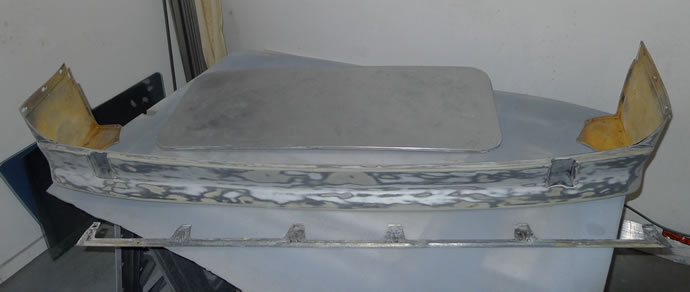
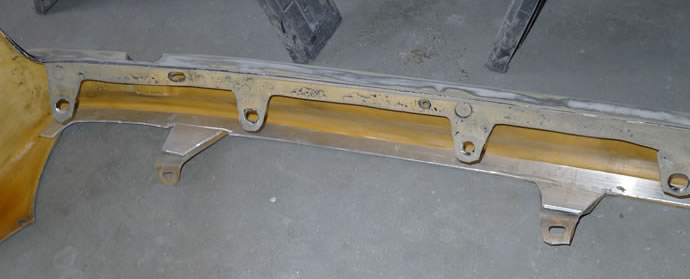
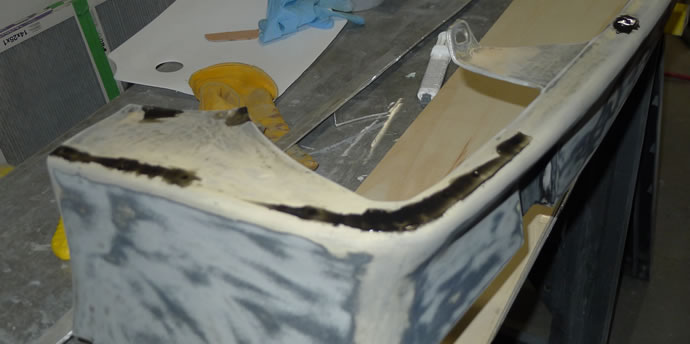
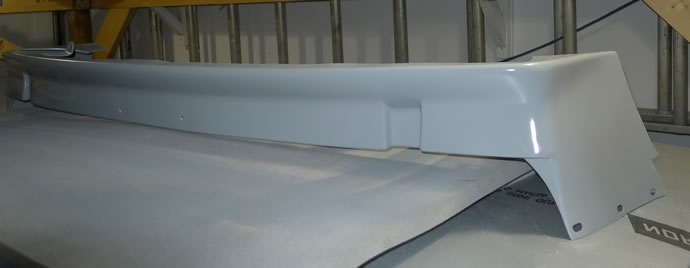
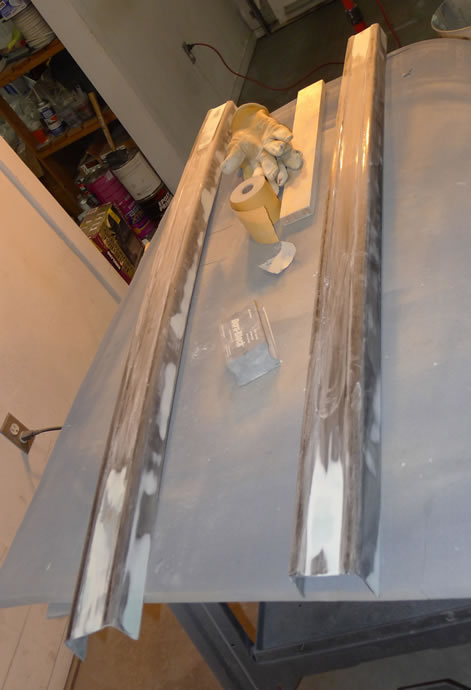
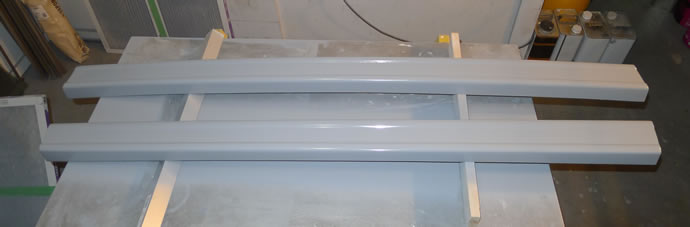
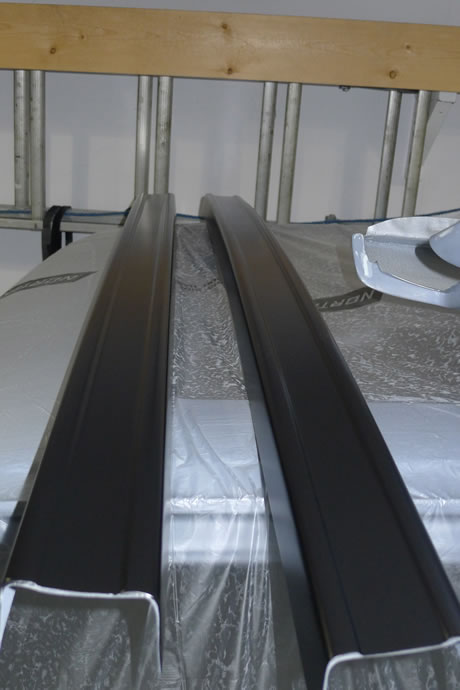
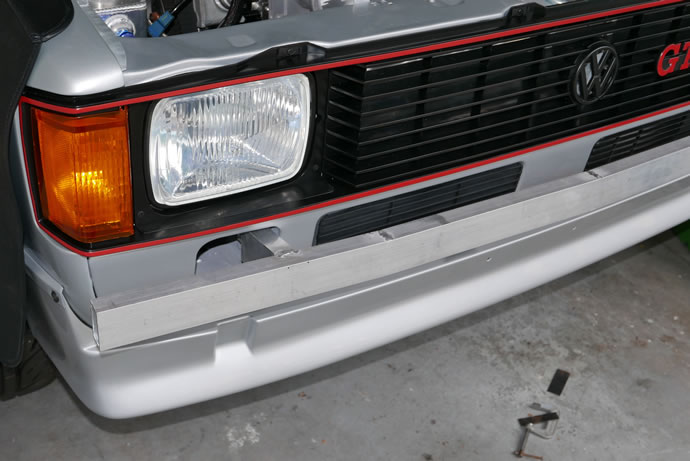
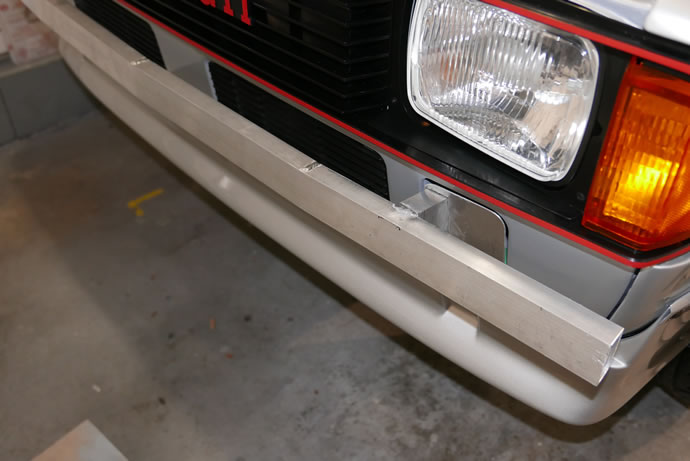
The early mk1 style carbon fiber bumpers are the last items to prepare for final paint. It took a week to get them dialed in due to the requirement to fiberglass in the front turn signal openings as I wanted to have the more delicate look of the thinner early mk1 bumpers but with the 1983/84 model look (black, no turn signals). After the fiberglassing there was a lot of fussing to get the surfaces perfectly flat and contoured. And since the bumper material was so thin/flimsy they required a fair amount of filling and block sanding to get nice and flat on the tops and bottoms. Mission complete/ major milestone, after I pick up my engine, trans and SS exhaust from Techtonics Tuning/Josh tomorrow I will start to clean out the garage and get it dust free and setup for the critical final panel painting process. - March 11, 2014
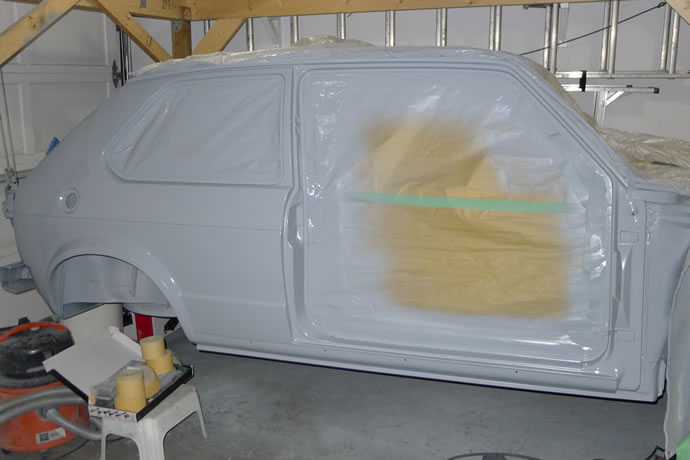
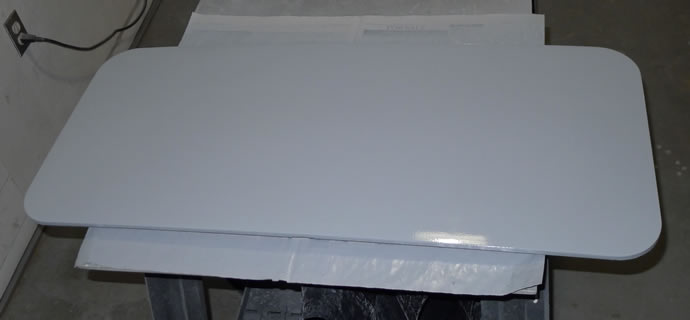
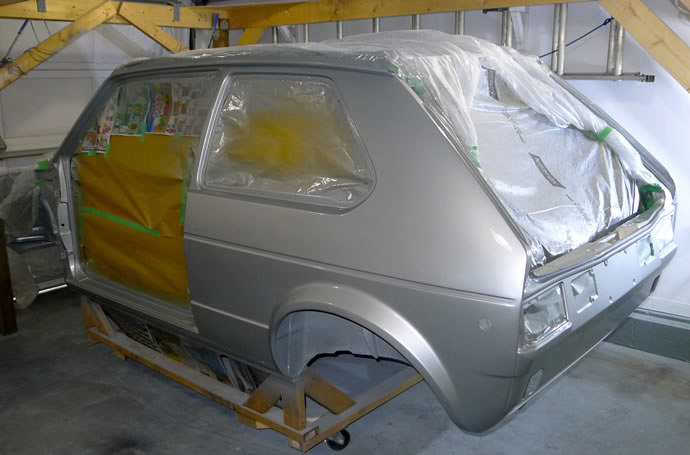
I got the 'paint booth' properly setup for final paint with 3M Dust control fabric on the walls of my garage, 3M static dust spray on the concrete floor, and 2 double-filtered fans pulling clean air into the garage (providing a positive pressure environment). I then set about spraying base/clear on the sunroof and the insides of the fenders, and also shot final black epoxy on the bumpers and rear beam axle - May 4, 2014
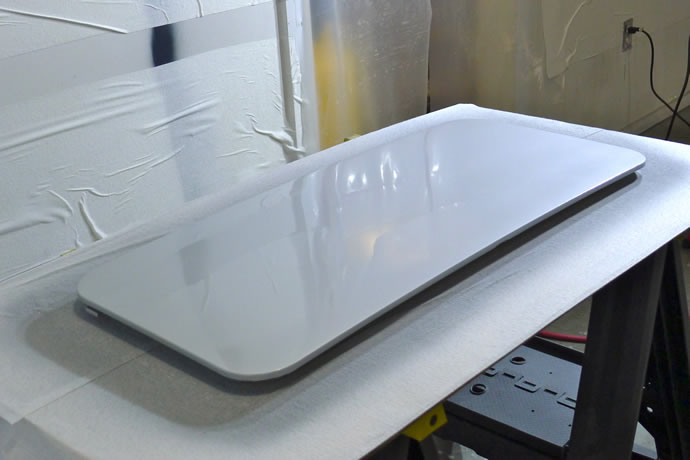
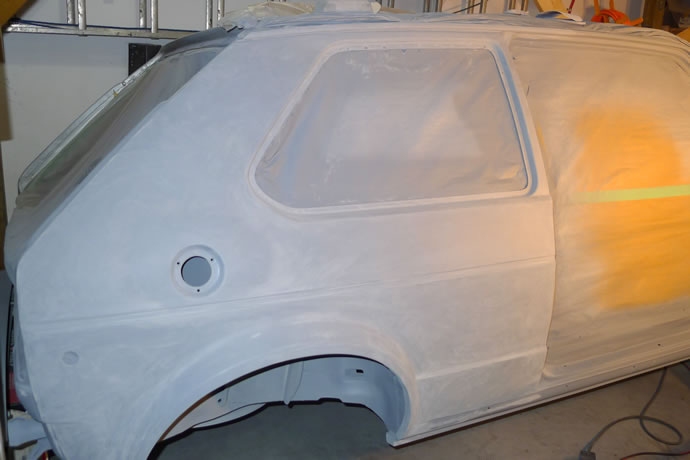
After successfully completing the final painting of the fenders and rear hatch, the hood turned out to my greatest painting challenge to date: a few spots of dark colored dust contaminated the first clear coat and in the end I had to sand back down and redo the base coats and re-clear but as of tonight it is all looking good. I am especially fond of the carbon fiber underside treatment (with the idea being that the exterior of the car and the interior are totally stock looking but under the hood it is all 'business') - May 14, 2014
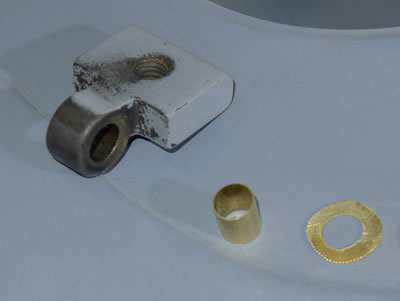
After getting final paint on the front spoiler earlier this week, it was finally time to remove the doors from the chassis and then dive into the process of fabricating brass bushings and shims for the lower door hinges and then hammering the pins into place, test mounting to make sure the hinges are 'good to go' and then getting the final paint on the 1st door. Mission success, now it is on to door #2 tomorrow - May 19, 2014
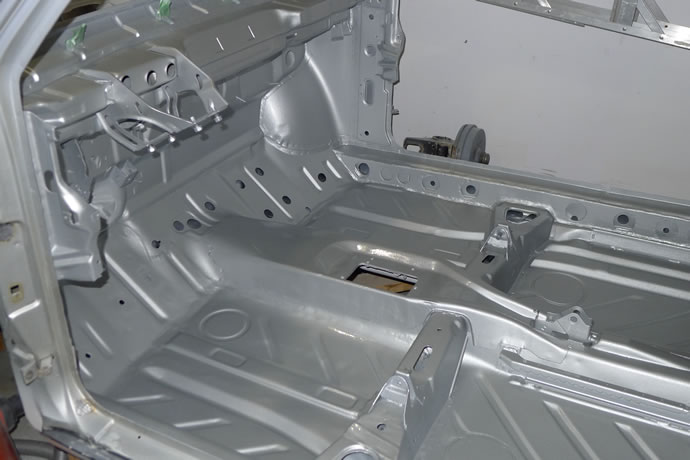
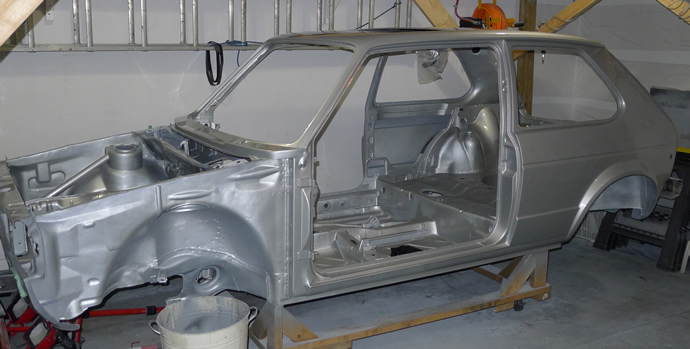
I got the hinges done on door #2 with an even better press-fit than door #1 and then got the door based and cleared properly so I was able to flip the chassis on its side and get epoxy sealer, base and clear done on the underside, wheel wells and most of the engine bay area. I will turn the chassis upright tomorrow and finish the engine bay area off and then will move to the rear, top and sides over the next week - May 25, 2014
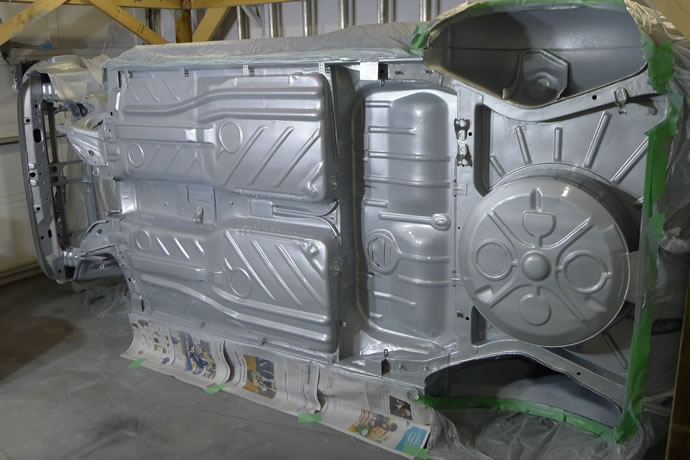
Now the engine bay and front end clip is done - May 26, 2014
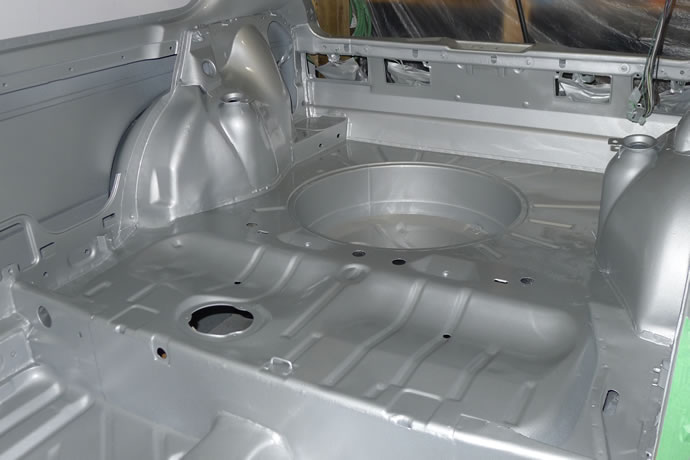
And the rear is done - May 27, 2014
I decided to sand down the rear and re-shoot both sides and the rear all together today. I also noticed that some of the 400-600 grit sanding marks showed through the base in a few areas (bright silver base requires a perfect surface or it will show any imperfections) so I lightly wet sanded after 3 coats of base and then re-based the critical areas 2 more times before shooting the clear. I will wet sand the clear tomorrow and apply one more coat of clear afterwards. My mom was right - shooting vertical surfaces attracts about 1/10th the amount of dust that a horizontal surface does. Mothers always know best. Therefore I will shoot the roof when the chassis is flipped on its side - May 28, 2014
Final paint complete. What more can I say? Major project milestone in the can. Yes! When I get back from a trip next weekend I will start wet sanding and polishing the clear (once it is good and firm). And I am already planning out the braking system and fuel system routing under the chassis so that I can use the chassis flipping system one last time before dismantling it and mounting the suspension/wheels - May 30, 2014
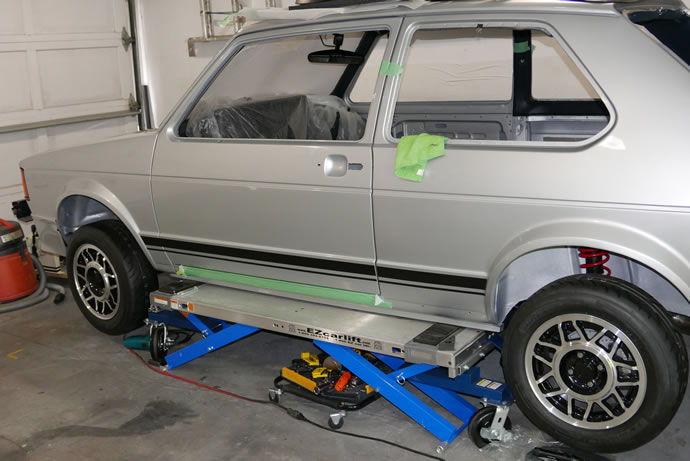
Final paint has now been wet sanded/polished. It took a full month part time to go thru the process of 1500/2000/3000 grit wet sanding of all surfaces and panels, then 3M PerfectIt rubbing compound and then polishing compound using a variable speed Makita orbital polisher. But it is done and the results are A1. I have a some 'craters' in the clear on some of the surfaces that I have filled with additional clear with a tiny paint brush and will finish sanding them out later this week and then I will start to assemble the car - July 6, 2014
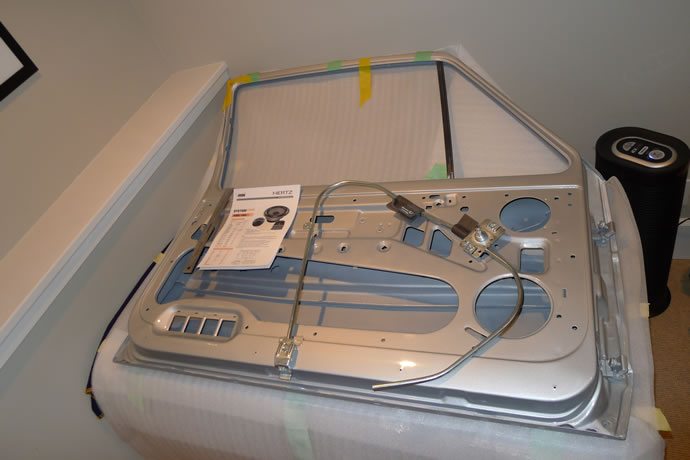
I wire brushed, acid etched and plated the metal h/w for the heater/blower box, and dove into the door assembly/finishing tasks, starting with the reconditioning of the window channel guides which were rotted out on the bottoms and required TIG braising in new metal, filling, sanding and painting, and also got the design for the 2 way component speaker system that will be installed in the doors sorted out (a high end Hertz HSK 165 system with a 6.5" woofer and 1" tweeter - I will also use hertz coax speakers in the stock front/rear locations, plus a Hertz Sub box in the rear that I can remove along with the sub amp when I want less weight for racing, etc). I also got the metal side plates for the front spoiler stripped, acid etched and primed, plus got the mirror bases acid etched and the whole assemblies partially cleaned up prior to painting - January 12, 2015
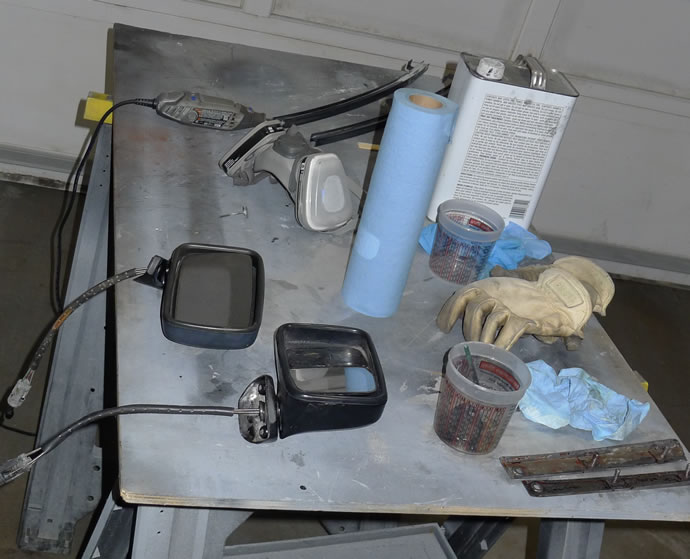
I got the prep and painting of the front window channels, front spoiler side plates, and mirrors completed this weekend. It all turned out very well but I think I will wet sand and polish the black epoxy paint parts as those parts ended up being a bit too shiny for me - I want a semi-gloss look and when you wet sand and polish black epoxy it comes out pretty much exactly semi-gloss (soft gloss) - January 18, 2015
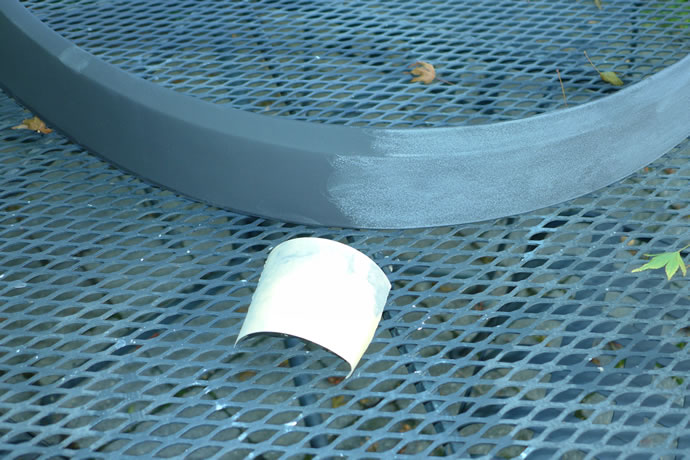
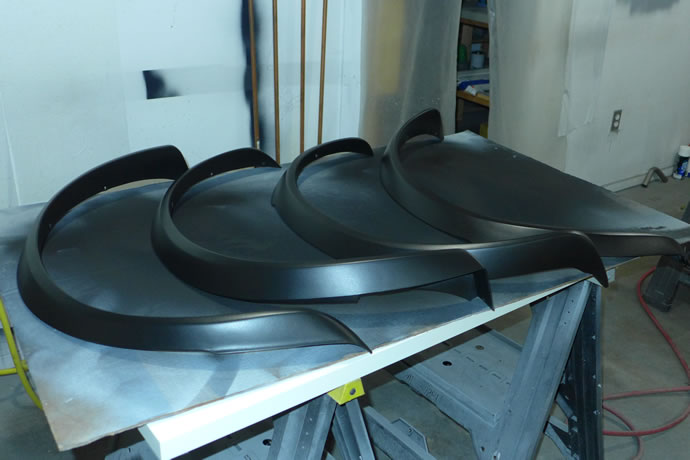
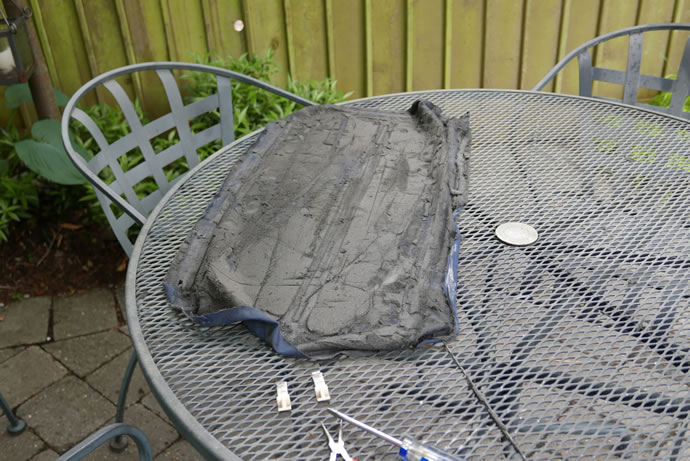
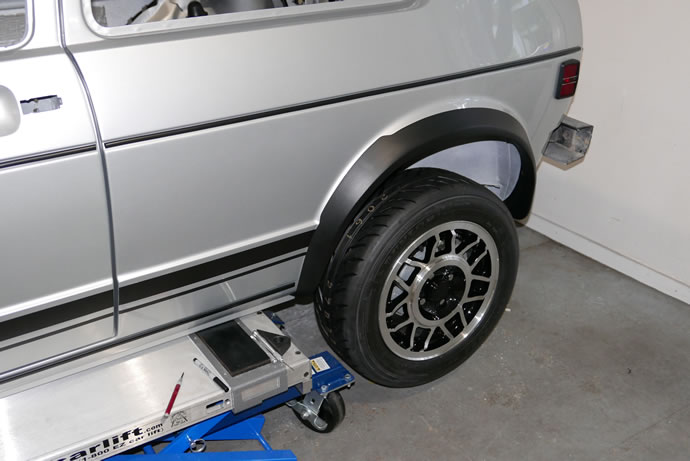
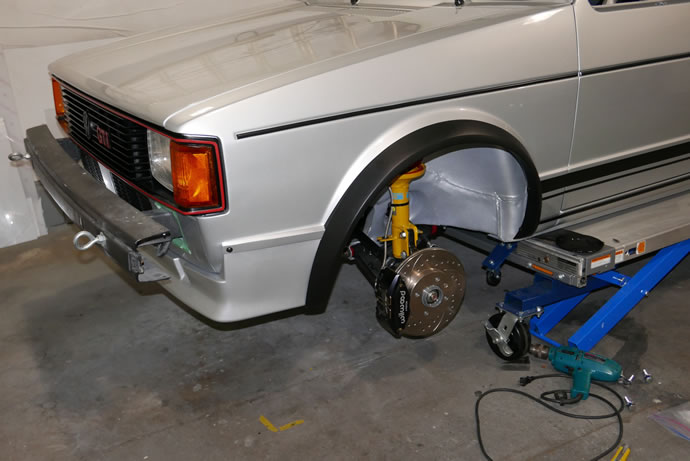
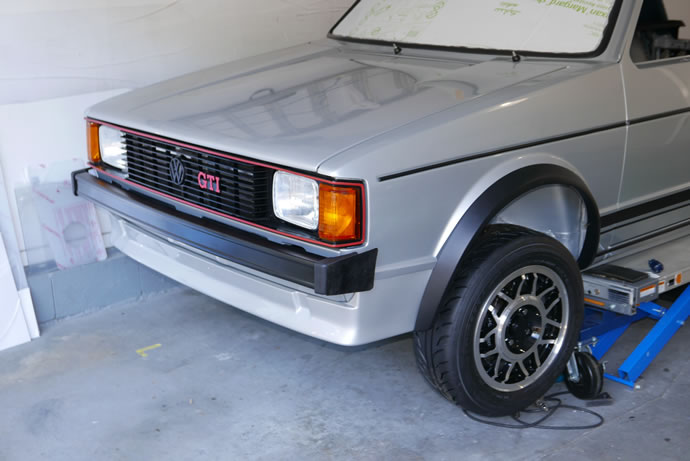
After gluing in the missing chunks plastic, then using SEM plastic filler to fill the extra holes and deep nicks and scratches, and then SEM plastic fine finishing putty, I sprayed the original GTI fender flares/liners with SEM high build flexible primer and sanded them, repeating this process until the surfaces of all of the fenders were smooth and defect free. Then I applied SEM flexible texture coating and then used 400 grit sandpaper to flatten the texture until the VW OEM texture appearance was achieved. I then shot the fenders in Parasol semi-gloss black plastic paint 3 times - they finally look mint again! - September 30, 2015
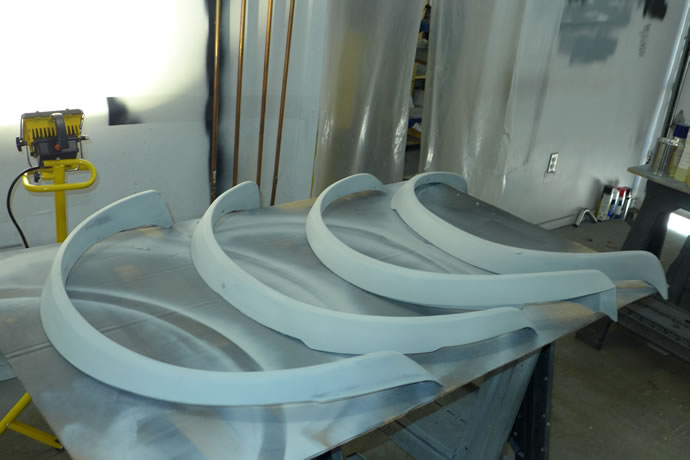
Flattening the SEM texture coating with 400 grit sandpaper ...
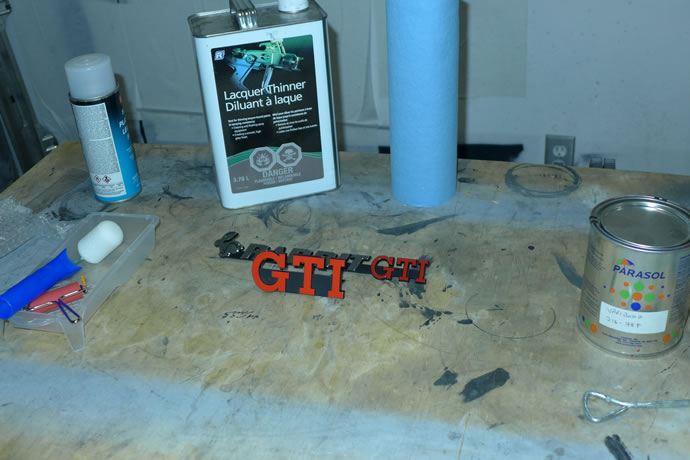
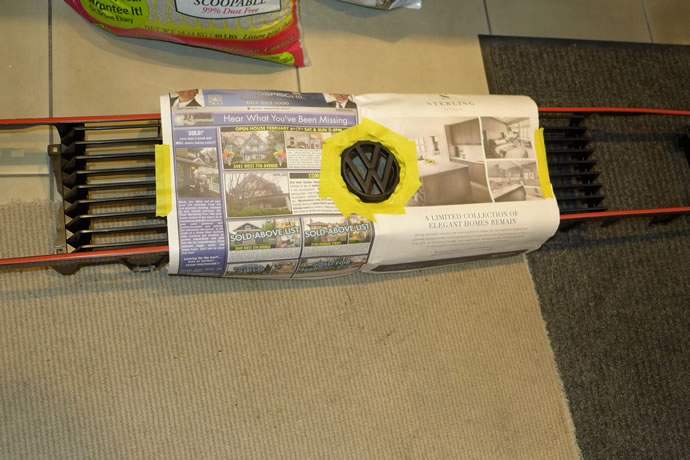
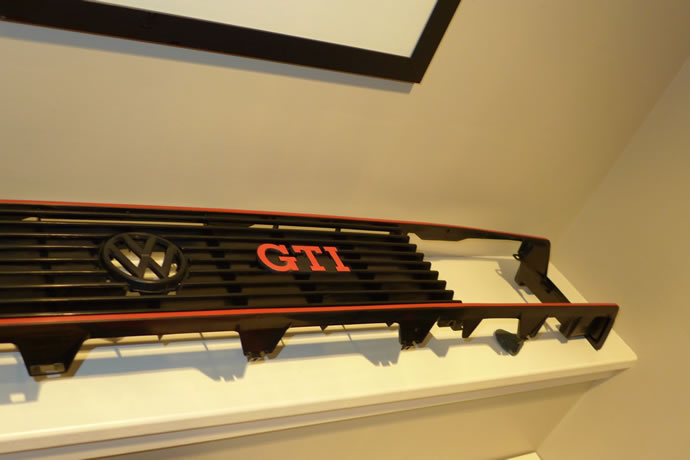
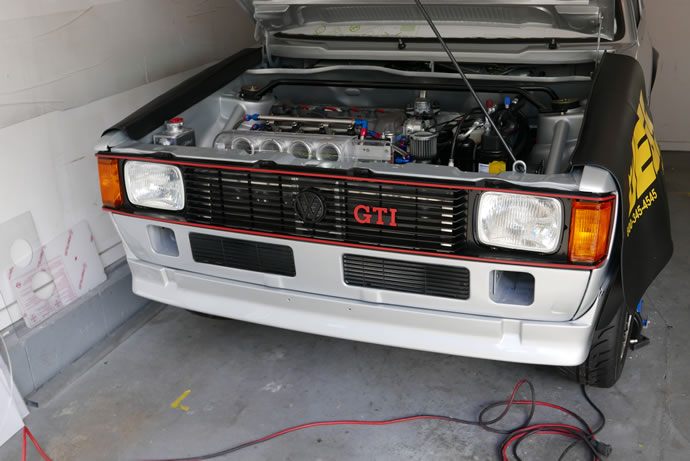
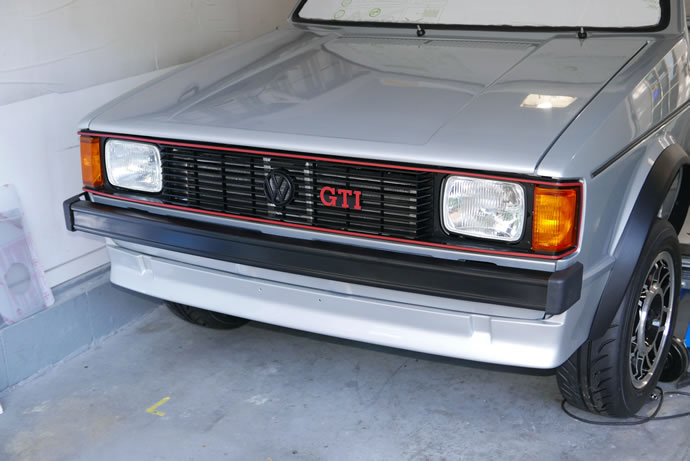
My 33 year old plastic front grill was beaten up and needed to be sanded down with 600/1000/2000/3000 grit wet sandpaper, and then masked off and painted with the red GTI edge stripes, plus the GTI badges needed to be color matched. The grill cleaning and sanding went really well, but my initial attempts at using a hard rubber roller to paint on the Parasol red plastic paint were a near complete failure as the paint dried on the roller very quickly (there is a lot of powerful solvent in the paint that evaporates super fast) plus the solvent in the paint which helps bite into the plastic also tends to dissolve the prior layers of paint when disturbed by a roller or brush - but isn't a problem when spray painting. I ended up destroying 2 rear GTI badges before giving up and finding NOS GTI badges on ebay and then masked off and spray painted the red stripe on the grill. That worked out, but the masking was very tricky/time consuming, plus some of the paint found its way under and around the masking so it took another 4-5 hours of wet sanding and touching up the stripe with a fine model spray gun ... in the end it was all worth it as the grill looks awesome now. Plus I successfully hand painted the front GTI badge with the same red paint and then carefully block sanded it down smooth to match the grill stripe (it was a bit off and now everything matches 100%). I am really happy with the look now - February 8, 2016


I finished cleaning up the trunk area where I had ground off the wiring metal tabs (that I won't be needing), filling, sanding, priming, base coating and clear coating it all - February 17, 2016
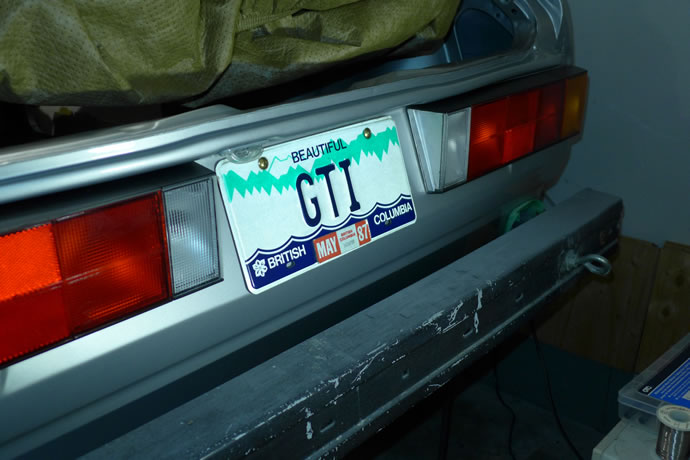
I ordered and installed some OEM rear license plate mounting h/w and finally mounted my original GTI license plate on the back of the GTI. A milestone! - March 2, 2016
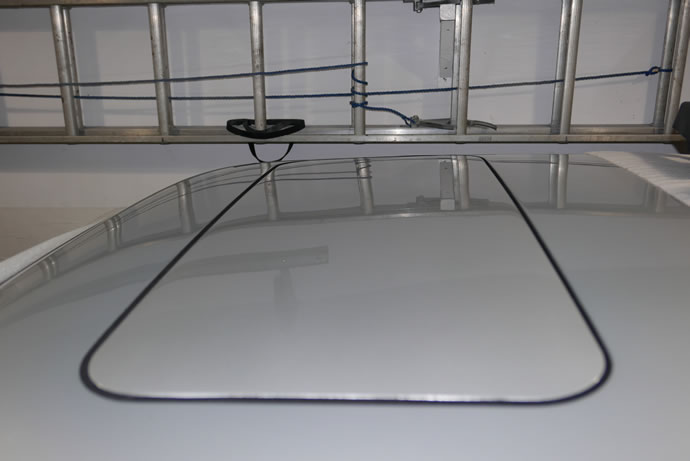
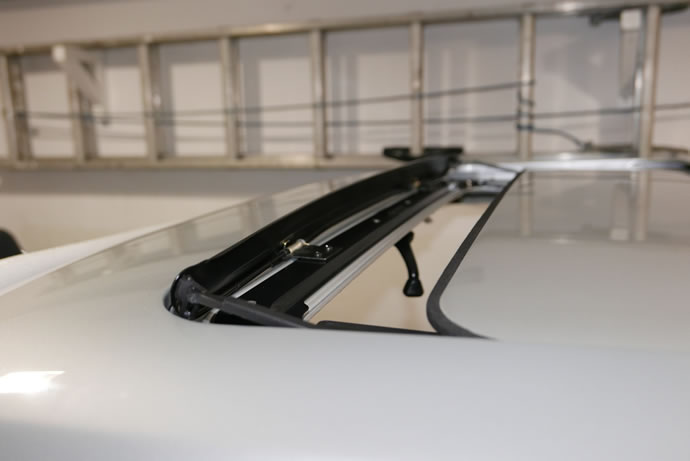
I got the sunroof sorted out by refinishing the parts and ordering several new items (the wind deflector and levers, new cable assemblies) - March 20, 2016
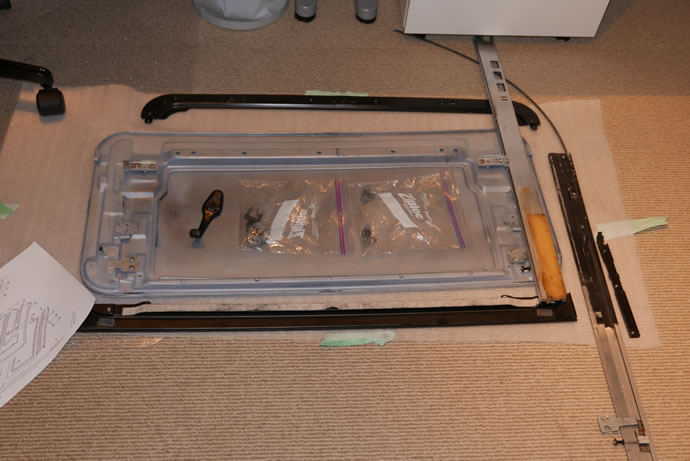
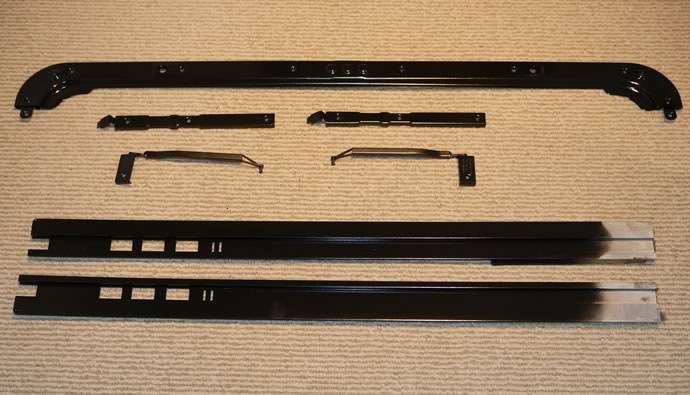
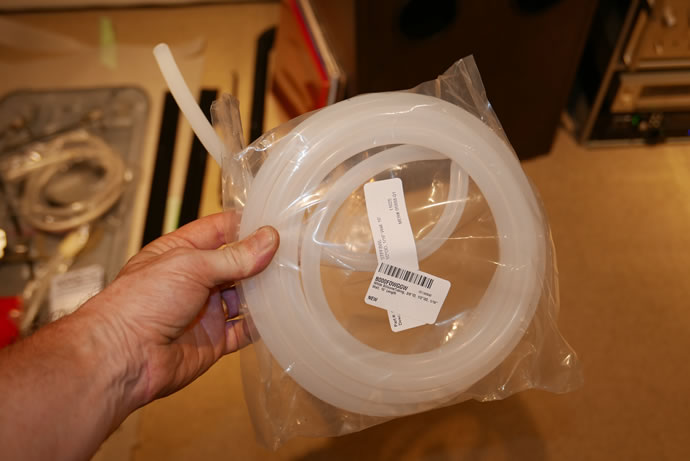
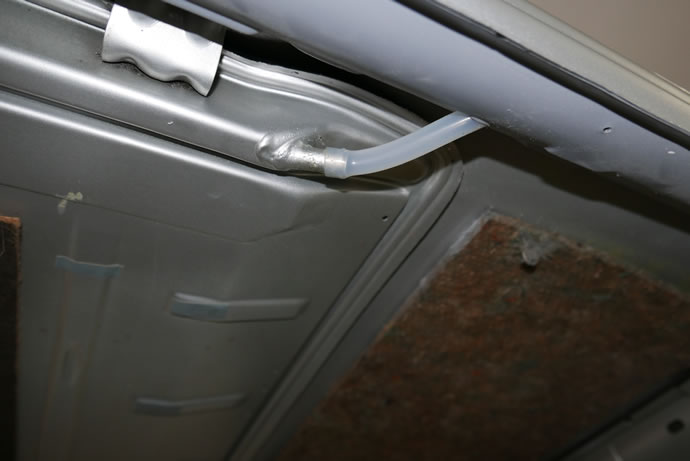
The sunroof system is now installed, complete with new silicon rubber rear drain tubes, new spring retainers, cable/lifters, headliner, and a new wind deflector - June 7, 2016
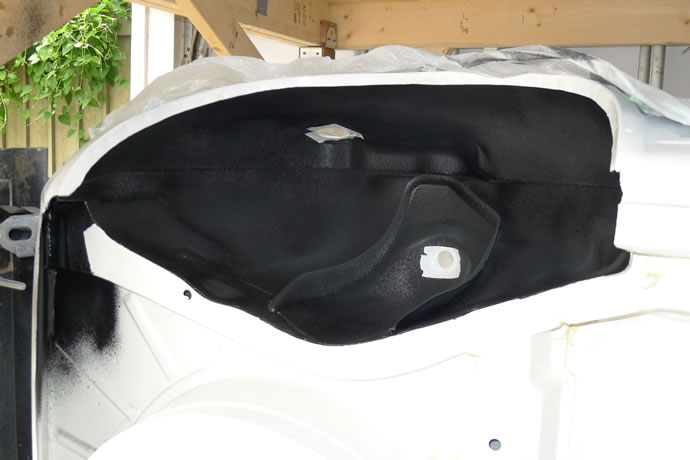
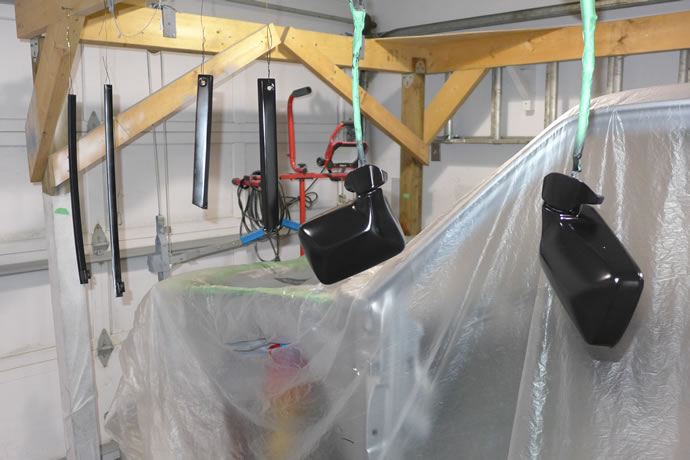
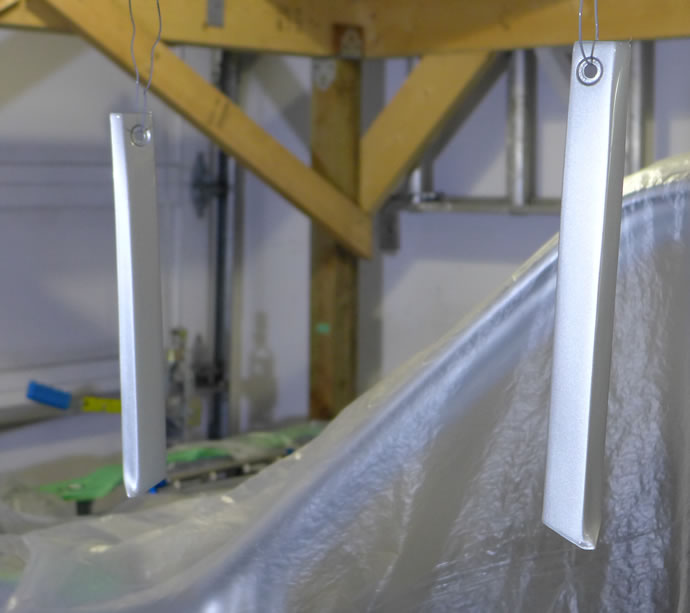
I built a temporary paint booth in my garage to re-paint my doors and front fenders as they needed to be 'improved' somewhat - and I am very happy with the results (almost no dust in the air so the painting was clean). I also did some touch-up bodywork/painting on the chassis where there were a few solvent bubbles (thankfully only on the drip rail) plus I repaired the damage to the lower rear valence and fixed one rust blister on the inner lip of one of the rear fenders. While I had the temporary paint booth setup in the garage for the doors and fenders I took advantage of the setup and used it to apply Parasol Varikote vinyl dye to the door cards after masking off the chrome and red striping. Once the doors are polished I can then assemble them ... - July 4, 2016

Wet-sanding the doors to see if the clearcoat is flat enough ...
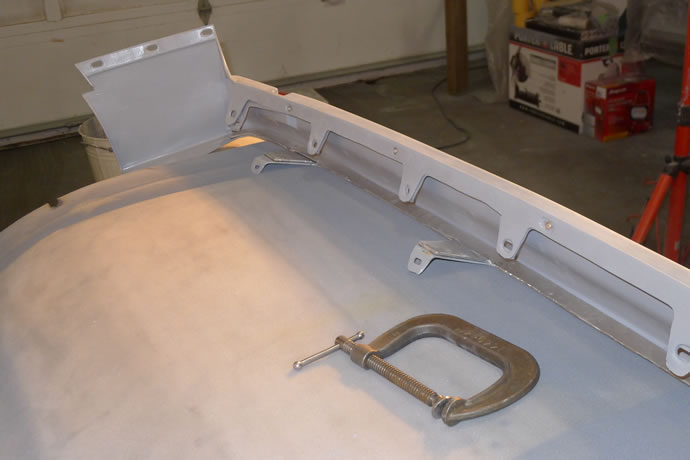
The door cards were completed after some bloopers, all the body panels were installed and gapped, fender flairs and spoiler attached, the decal stripes were applied, and the carbon/aluminum custom bumpers were partially completed - July 17, 2016
The old 35lbs bumpers - being replaced by 10lbs of carbon/aluminum ...


Cardboard mockup of potential new end-cap design ...
After holidays and such I have managed to get the project somewhat back on the fast track. This last week I finished the carbon/foam/aluminum bumpers, installed all of the lexan panels, mounted and adjusted the gap on the rear hatch/tailgate, mounted the door handles, re-keyed the lock cylinders, rebuilt, painted and mounted the mirrors, and started on the rest of the door assembly work. T minus 40-50 hours max now before licensing it ... - August 10, 2016

The last 2 weeks were an intense period of battling to put the doors together with the lexan windows and non-OEM windows lifter mechanism, seals, locks, speakers, etc. In the end there was a conflict between the speakers and the lifter mechanism that has caused me to reconsider the design and move towards a mk2 electric lifter mechanism using the hand crank arm as a momentary up/down switch - the video explains why. I am also going to get a local plastics firm to heat bend some Margard lexan to the correct curved shape as the flat lexan sheets don't take the proper shape and are hard to move in the channels. For now the driver window works but the passenger window is fixed - I have the option of simply putting in the OEM glass and the OEM lifter mechanism but I'll try the above approach. The doors look great overall and the sub-woofer ended up working out really well. The latch for the carbon fiber hood had to be re-worked a bit and is now functioning properly. I am T minus 1 week to project completion now ... - August 22, 2016

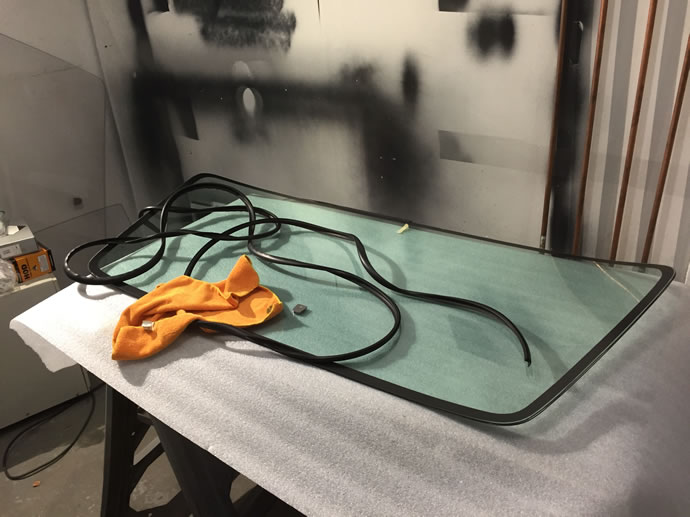
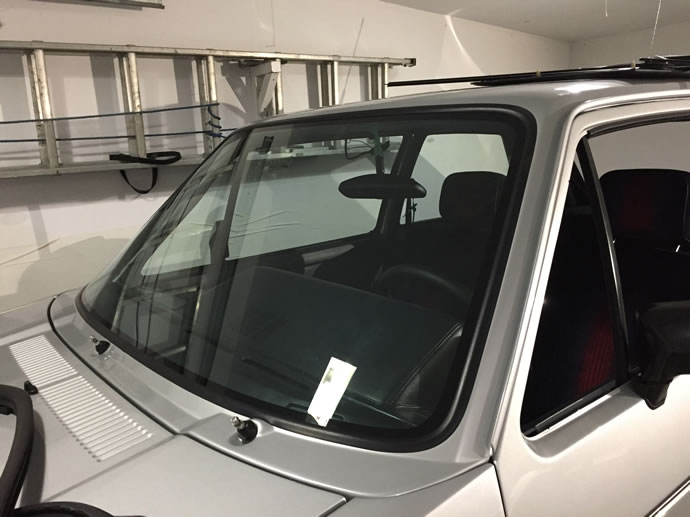
Well, I ended up in the hospital last week with pneumonia after fighting a losing battle with a chest injection/cough for the past 2 months. I am on 'the good drugs' now and they are really helping me get back on my feet. I did low key things on the GTI during this period: I used Cerium Oxide to polish the old set of glass side windows to bring them back to life, and I got my youngest son, Evan, who is 18, to help me glue-in the new front windshield ... - October 10, 2016
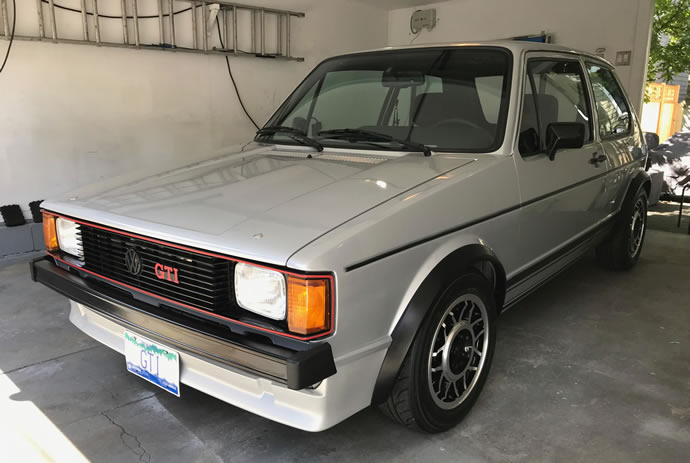
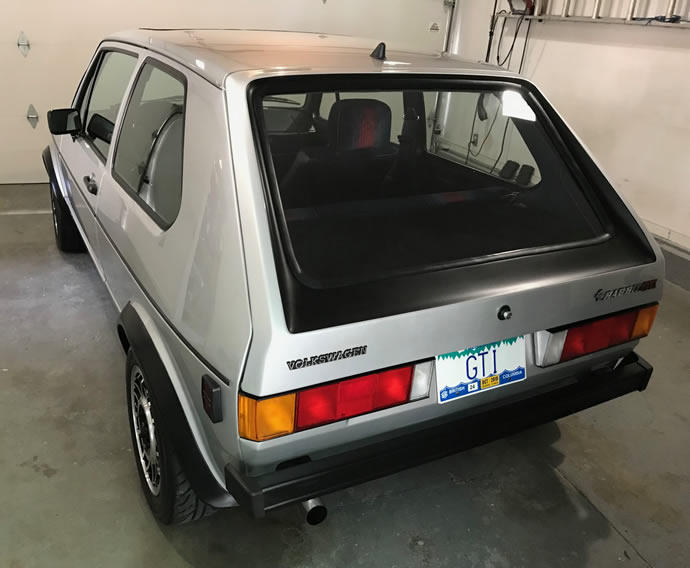
The results of a 3 step paint finishing process: starting with machine application of 3M rubbing compound, then 3M machine polishing compound and then a final hand carnuba wax job - looks very glossy - finishing the GTI project at last!
Index of Project web pages:
Project Overview, Goals & Specs
Project Car Initial Condition
Chassis Development
Bodywork & Paint
Suspension, Steering & Braking Systems
Engine, Oiling, Cooling, Transmission & Exhaust Systems
Electrical, A/C & Fuel Systems
Interior
Performance Validation
Final Street Trim Conversion
VW Vortex thread on this project
Videos # 001 - 049 (Feb 2013 - May 2014)
Videos # 050 - 099 (Jul 2014 - Sept 2015)
Videos # 100 - 149 (Sept 2015 - May 2017)
Videos # 150 - 181 (May 2017 - Dec 2019)
My original 1983 Rabbit GTI (owned 1983-1987)